56

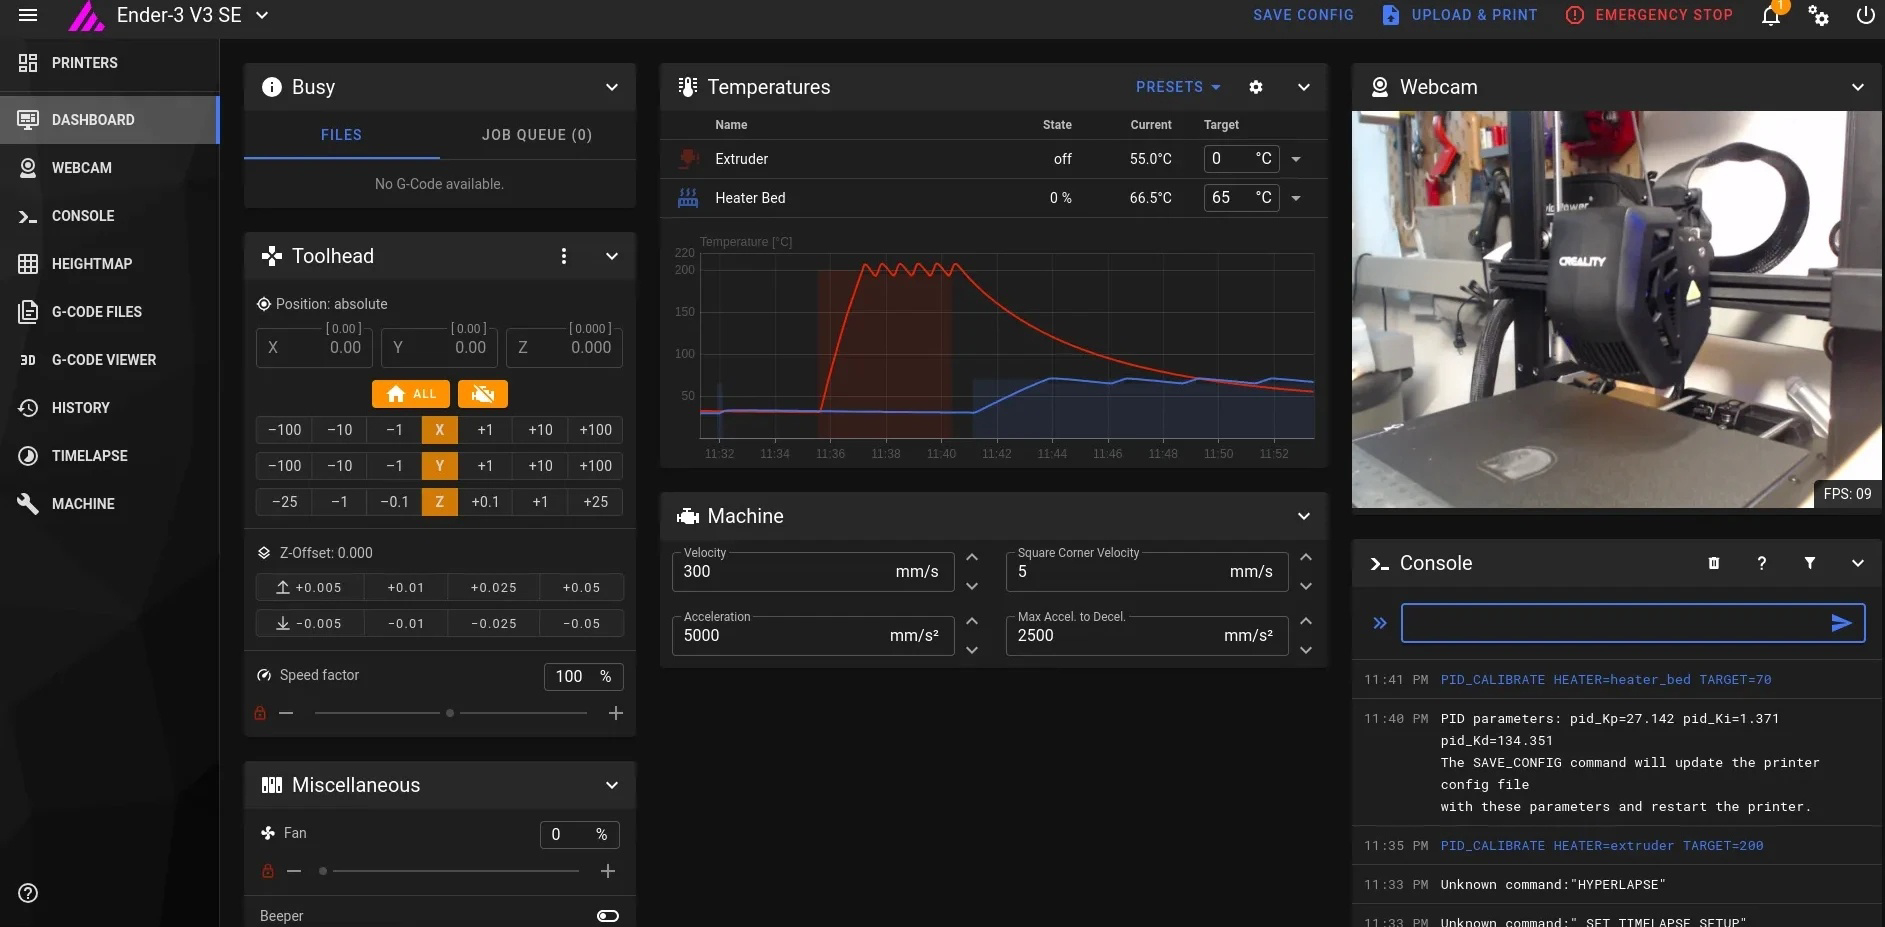
Made sure the stock firmware printed the example gcode that came on the SD card and then immediately embarked on my journey to get klipper running on this guy.

I didn't finish until the wee hours this morning so I've yet to really give it a go but all the essentials are operational.

Here's the GitHub link to the config I created: https://github.com/0xD34D/ender3-v3-se-klipper-config

top 15 comments
sorted by: hot top controversial new old
[-] im_mr_clean@lemmy.world 4 points 1 year ago* (last edited 1 year ago)

To your printer.cfg I’d add:

[exclude_object]

Allows you to cancel individual items. If you have multiple items printing and one fails in one way or another you can cancel just that object and continue the rest of the print. Literally the only thing is add the bracketed thing to the cfg and it’ll add a icon next to the pause button that gives you the options.

Meh on the next part. I see that version doesn’t have bed level knobs. I’ll leave it if there is someone else who doesn’t know about it.

I’ve also found that one of the bed screw leveling options is very helpful for getting the bed close enough for the bltouch to really be dialed in. I use

[bed_screws] Screw1: 32.5, 202.5 Screw2: 32.5, 32.5 Screw3: 202.5, 32.5 Screw4: 202.5, 202.5

Then in the console run: bed_screws_adjust

Just moves the nozzle to each of the four corners right above the leveling knobs. Makes it pretty simple. I will add that the coordinates I use are fore a ender3pro but should be the same ish for you. But don’t quote me on that.
[-] 0xd34d@sh.itjust.works 2 points 1 year ago

So I add that as an include from another config. It's saved me from a few complete failures 😁. For this I was trying to keep it as a basic config for others to use as a good base and I would like to submit a PR, eventually, to include it in klipper's example configs.

[-] hibbfd@kbin.social 2 points 1 year ago* (last edited 1 year ago)

even better, add [screws_tilt_adjust] to take advantage of the crtouch and a little fancy computer math to make leveling super easy.

after configuring the screw locations and thread pitch, execute the command screws_tilt_calculate

https://www.klipper3d.org/Manual_Level.html

ender beds use M4 screws

[-] 0xd34d@sh.itjust.works 1 points 1 year ago

I'm going to look into adding this in, thanks for the tip!

[-] MicrosoftSam@lemmy.world 3 points 1 year ago

Can you give a little more info about this? I don't know what it is. I have to Ender 3s at work and would love some kind of dashboard.

[-] Calania@feddit.nu 5 points 1 year ago

You should try to install octoprint on a raspberry pi. It's the easiest way to get a web gui if you don't want to mess with the firmware or mainboard

[-] LazaroFilm@lemmy.world 4 points 1 year ago

Klipper is sooo much better than Octoprint. It replaced the whole software not just the web interface part. Klipper is absolutely amazing. Now for work, it’s an open source software with community support. So done corporate don’t like not having a company to blame if something goes wrong.

[-] mee@programming.dev 4 points 1 year ago

Klipper isn't a web interface. Octoprint works with Klipper as a web interface. They're different software for different things.

[-] rambos@lemm.ee 3 points 1 year ago

Yeah, get mainsailOS with klipper

[-] hibbfd@kbin.social 3 points 1 year ago

klipper is the firmware flashed to the printer

gui is achieved and accessed through mainsail or octoprint. I haven't tried octoprint.

mainsail runs on a raspberry pi and can manage multiple klipper printers with one device. you can also add klipperscreen, it's an addon that can be used with a touchscreen for an interface at the printer (or anywhere really)...

but I just access mine running mainsail through my phone browser or the laptop I use to model and slice. I like orcaslicer because it integrates mainsail right into a tab in the slicer and provides a seamless user experience.

[-] MicrosoftSam@lemmy.world 2 points 1 year ago

Awesome thanks for the info!

[-] hibbfd@kbin.social 1 points 1 year ago

another thing to note... klipper firmware takes the heavy processing typically handled by the printer control board, and offloads the burden onto the computer or device you have hooked up to the printer, processing and feeding the gcode one line at a time. so whatever device you are using needs to be up to the specs. I'm using an rpi 3b+ and have no issues.

[-] troydowling@lemmy.world 2 points 1 year ago

Is that about 20 degrees of swing on the hotend? Might need to recalibrate that loop!

[-] evidences@lemmy.world 3 points 1 year ago

I'm like 100% sure that's a PID tune.

[-] troydowling@lemmy.world 2 points 1 year ago

Oh, of course. That explains the coefficient output in the terminal. Thanks.

this post was submitted on 04 Sep 2023
56 points (100.0% liked)

3DPrinting

15577 readers
68 users here now

3DPrinting is a place where makers of all skill levels and walks of life can learn about and discuss 3D printing and development of 3D printed parts and devices.

The r/functionalprint community is now located at: !functionalprint@kbin.social or !functionalprint@fedia.io

There are CAD communities available at: !cad@lemmy.world or !freecad@lemmy.ml

Rules

If you need an easy way to host pictures, https://catbox.moe may be an option. Be ethical about what you post and donate if you are able or use this a lot. It is just an individual hosting content, not a company. The image embedding syntax for Lemmy is ![](URL)

Moderation policy: Light, mostly invisible

founded 1 year ago
MODERATORS