I am happy about this fact and there's no problem at all. I just want this lemmy to grow fast and be a reliable comparator to r/prague - so not just locals, but friends and visitors have another source to find information.
Just go for it! It's not easy, but you learn from it!
After running my own website (wordpress) on a Synology NAS, I found I could do better. So I bought a N100 pc which I would use as a server, equipped it with a 1TB SSD and some 32GB RAM.
After installing SSD and RAM, I connected the server with a network cable into ETH0 port to my router, connected a monitor via the display port (the HDMI ports wouldn't work). I also downloaded Proxmox and 'burned' that onto a USB flash drive, using Balena Etcher. This is all free software!* I also connected a keyboard via USB and after inserting the flash drive into the server, I booted it up. Here you can follow the setup-guide from Digital Mirror on YouTube or just search for "Proxmox Setup" and watch the one according to the version you have downloaded.
I then logged into the graphical user interface, using the browser on my laptop, disconnected the monitor, the keyboard and the flash drive and continued from there. Here I finished the setup and optimized it using this Proxmox (PX) helper script which I inserted in the terminal of the host: bash -c "$(wget -qLO - https://github.com/tteck/Proxmox/raw/main/misc/post-pbs-install.sh)" You can find a lot of more useful scripts here. If you don't understand what they do or if you need them, ask any LLM of your preference!
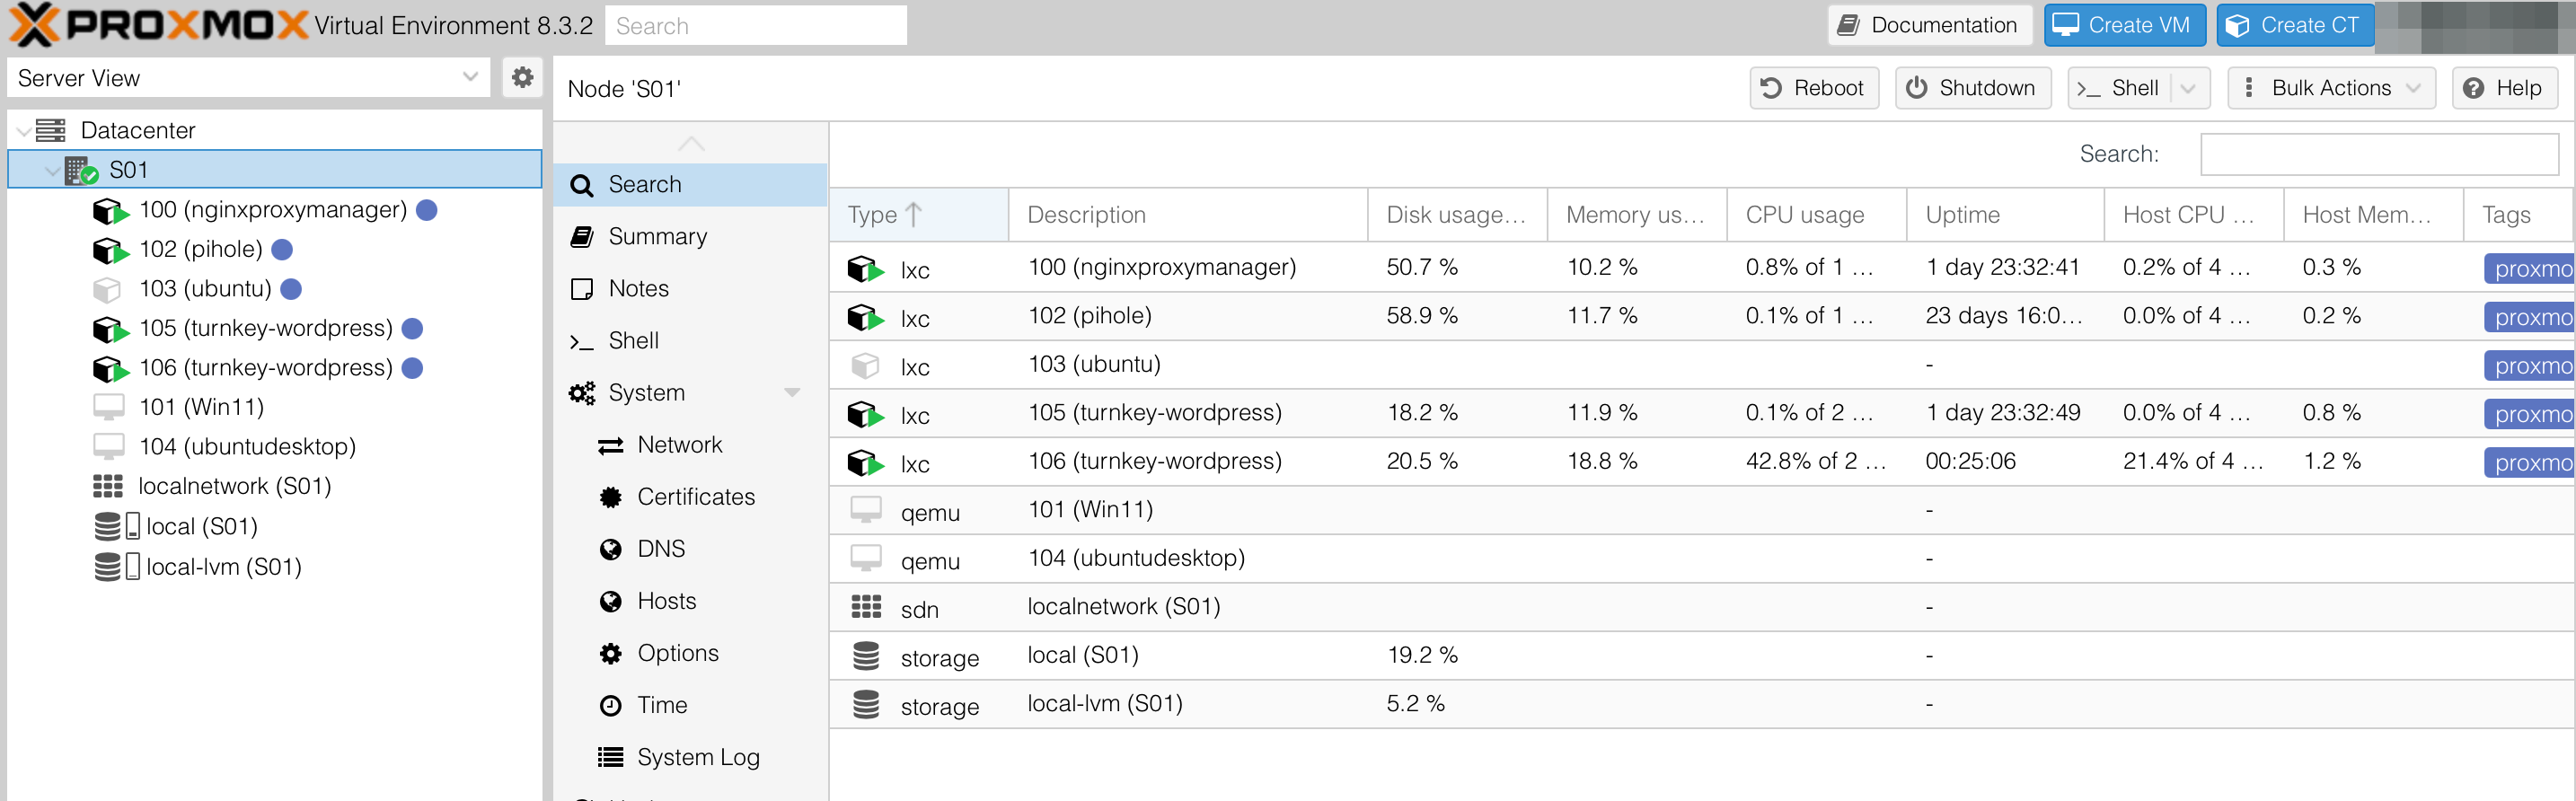
Next, I went to my domain hoster and set the DNS record to the public IP of my router. Once that was done, I used the helper script to install a NGINX reverse proxy manger and noted down it's IP address.
On the ISP modem/router backend I ensured that this IP was kept fixed and wouldn't change after disconnection of power loss (this procedure differs from router to router - in my router it's under DHCP settings). I also opened 'port forwarding' from the 'outside' (the internet) into my network and opened port 80 and 443 (http and https) and forwarded this to the NGINX server, that's running on my Proxmox virtualization on my hardware server at home. Got it? The internet can now connect, using my domain name, to my home network. I can now host my own blog in my home!
That's what I've been doing: I used the helper script to install "Turnkey Linux" onto Proxmox, once running I opened the terminal from within that instance, logged in with the credentials that were provided during the installation process, and continued installing Wordpress from the menu. Here I entered the domain name of the blog, made sure that router had a fixed IP for that instance (you can use the MAC address of that instance for this). Now I forwarded all traffic from my domain to my blog in NGINX, installed a Let's Encrypt certificate and BOOM - you can read my blog by entering the URL into your browser! Awesome! My blog, hosted in my home, accessible for everyone! My mind was blown off! That easy!
Well, then I went, installed another wordpress instance for another URL and repeated exactly the same.
I also installed a Pi-Hole onto my proxmox server and since then, I'm pretty much free of any ads in my household.
And you can do that, too!
All software is for free and/or open-source.
Feel free to contact me, if you have any questions!
Few months ago, together with an election, there was a poll whether the parking prices should be raised. Unfortunately the outcome wasn't too exciting.
I love that idea, especially the bot thingy. Let me know if you need any support.
Lots of different plants and succulents. Bring time! Open today and tomorrow.

Trump hat doch selber so dicke Eier.
Last time I had to buy one was actually in December. Thanks for the info. Guess I should change the title of the post then.
I guess they are called 'kolky', right.
Following your advice - set myself a goal of at least one post / day. Feel free to kick in if you have anything to share.
If I'd know you from playing in the sandbox together, I'd now call you a smartass ;) Thanks for your helpful insights, but I'm not willing to create the content, rather than provide the platform.
we don't have enough stickers, yet? :D
I totally fancy this idea!
Thank you!
view more: next ›
Die schlimmsten Befürchtungen sind mit Trump wahr geworden.