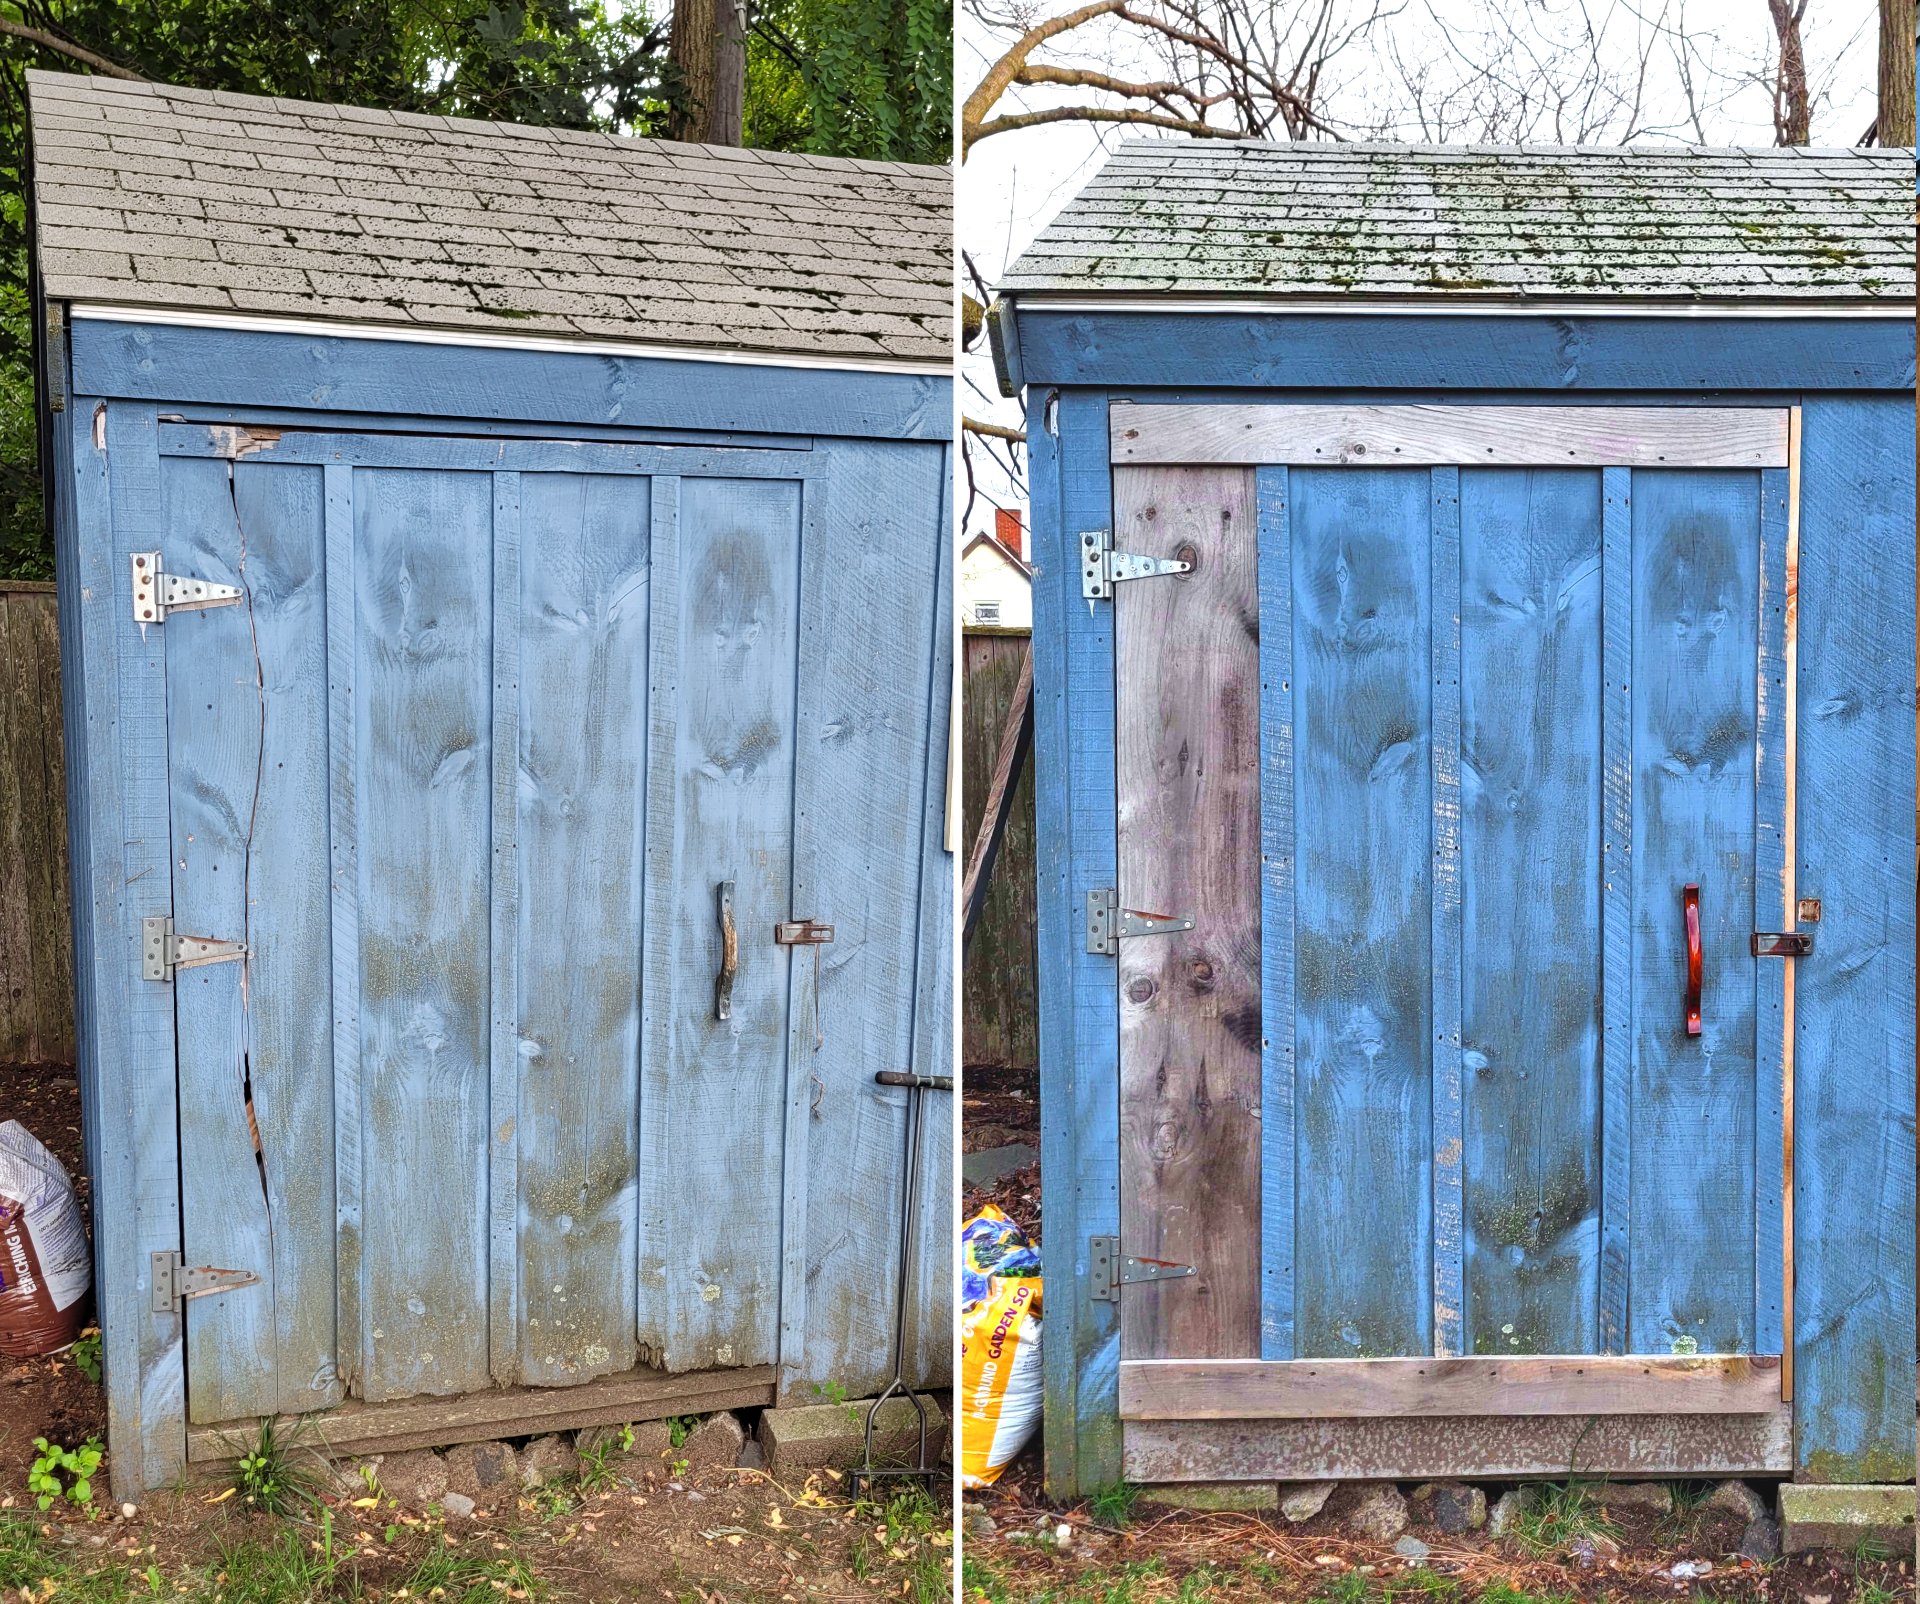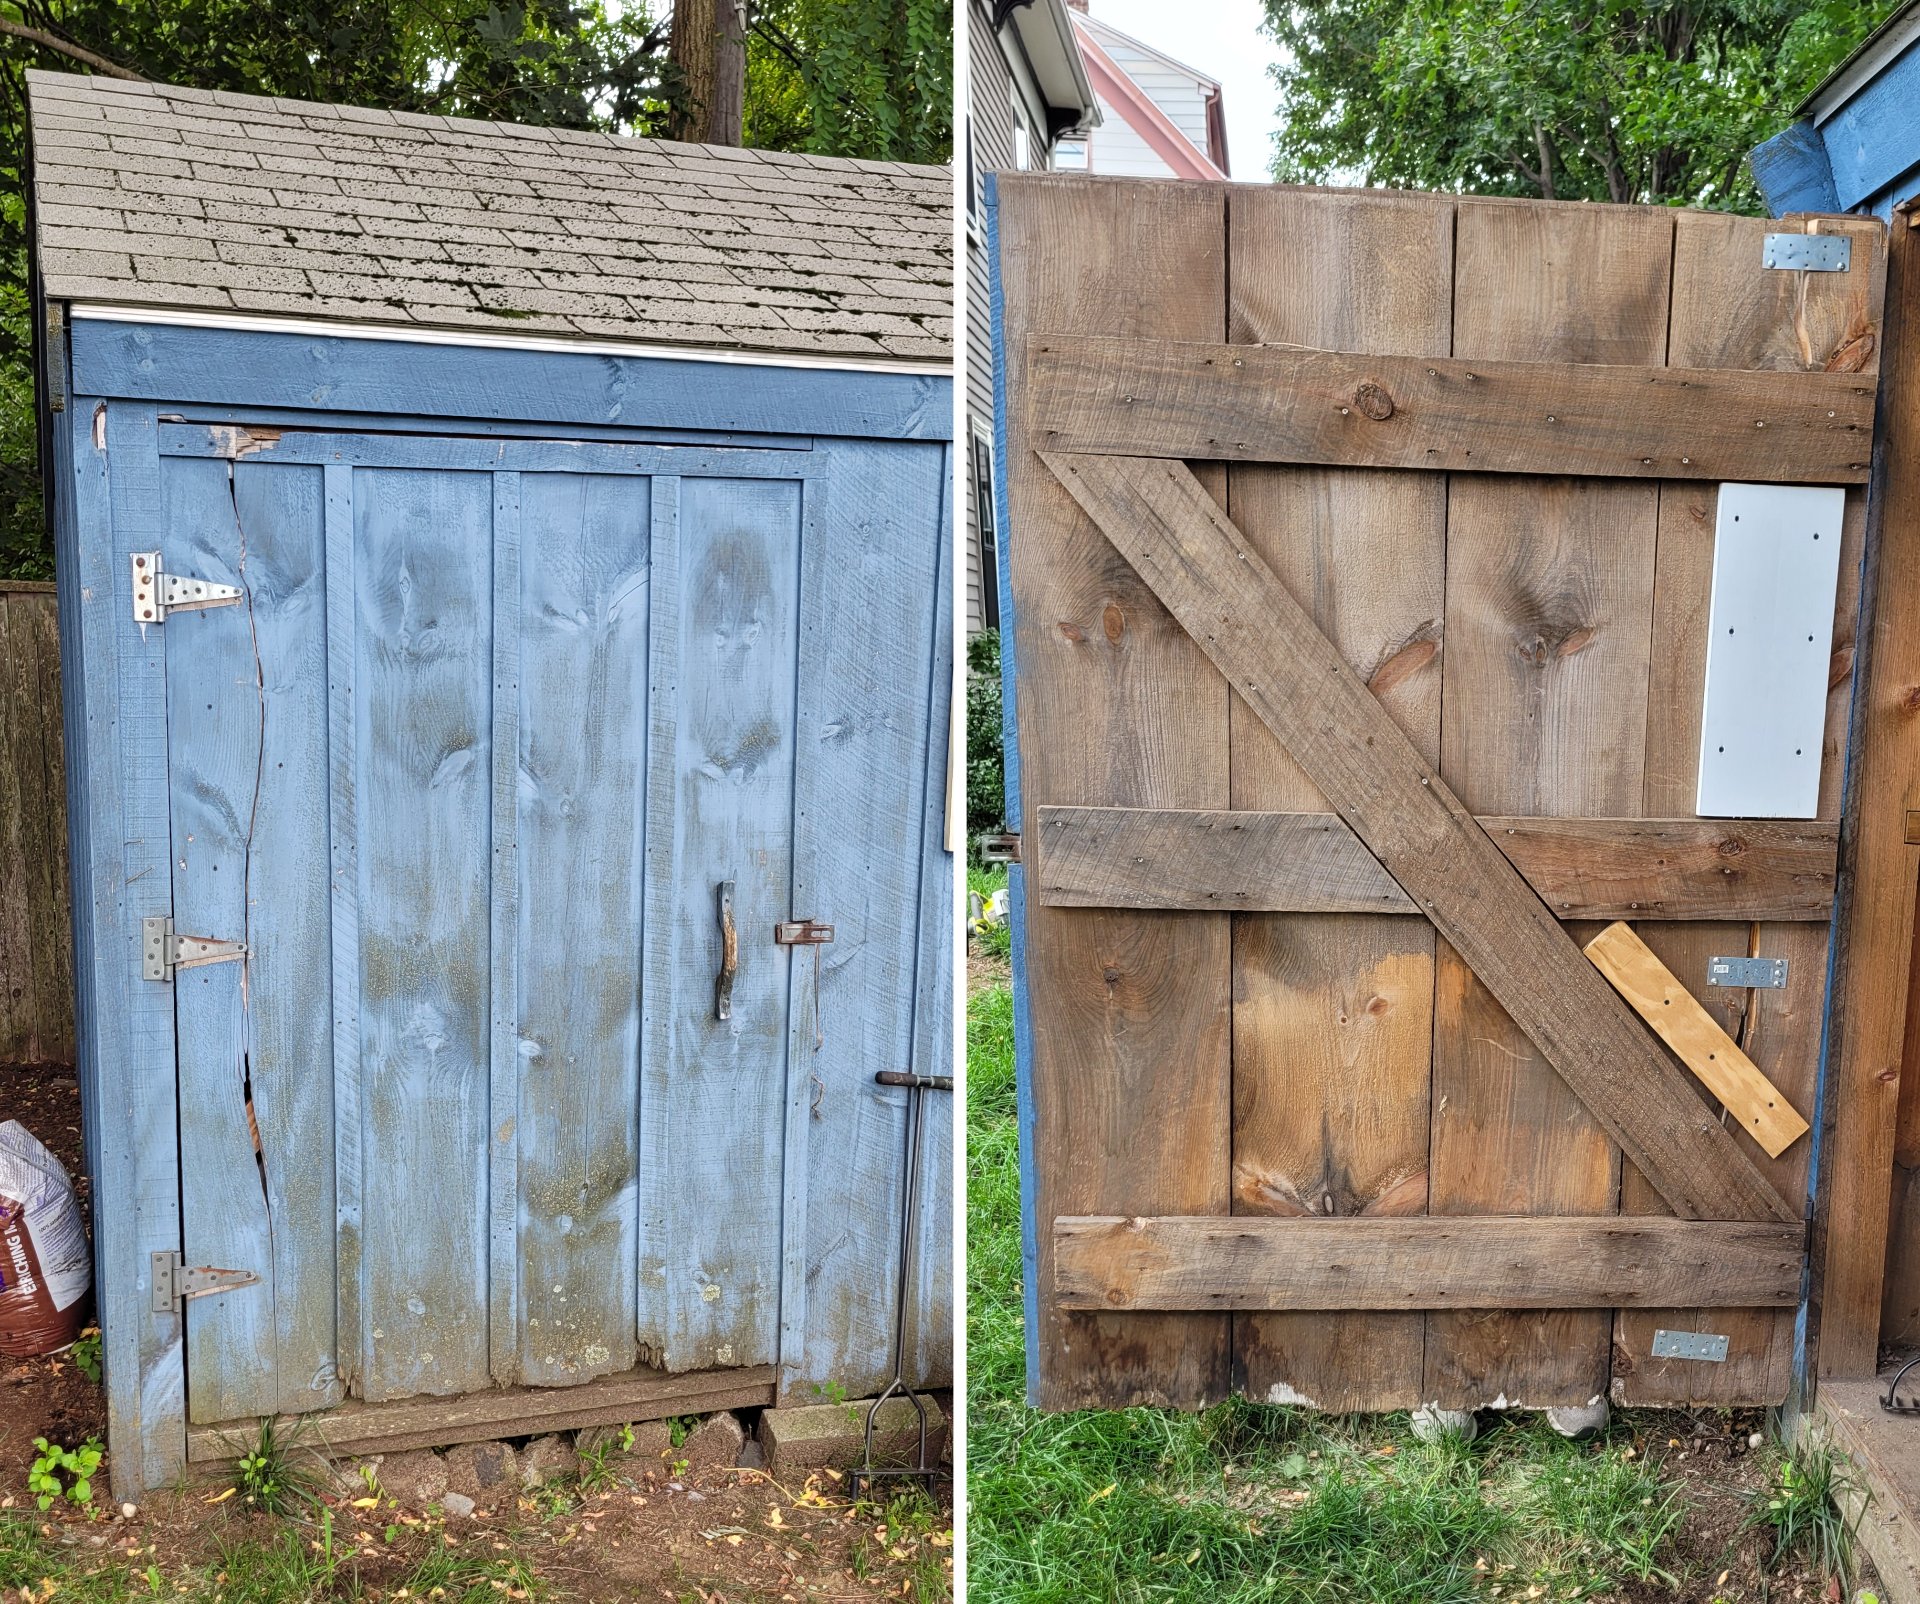
This was a pretty quick little project - some of my friends recently bought a house, it came with a shed, and the door of that shed was broken. The design of the door allowed it to swing open about 180 degrees, at which point it'd hit its own frame.The wind must have caught it one day and swung it open hard. When that big wide door hit the frame so close to its fulcrum, it just snapped right down the line. It also bent all the hinges.

The previous owners tried to fix it, it looks like by lifting the door back in place and driving some mismatched screws through some wood scraps and metal plates. That left the door drooping, hanging crooked in the frame, and flexing kind of alarmingly when it opened.
We'd talked about taking it down and fixing it properly, I even took some measurements.
Then one morning I got lucky, I saw a post on our local Buy Nothing -type page where someone was offering up some 1"x12" boards they'd been using as shelves in a shed. They were a bit weathered but otherwise in good shape (no cracks, warp, or rot). It was trash day in that neighborhood so I hustled out there and claimed the whole pile. 1"x12"s ain't cheap.

On the way back I picked up a shovel with a cracked handle which I fixed with a hose clamp and have been using for a couple years now.
We set a day, I packed the lumber and tools, and we started in on the shed. I think we also planted a peach tree (using my new shovel) that day.
We started by taking the door off the shed and setting it on some sawhorses I brought.
 (Dog helping hold down the door)
This was where we made our first unfortunate discovery. The shed was older than we'd realized. The 1"x12"s the door had been made from were rough cut, not dimensional, so the boards I'd brought were about half an inch narrower, and a quarter inch thinner than the originals.
So we had a couple options here - all the boards were rotten for a few inches of the bottom. We could replace all of them with the new ones, which would be a close fit of all our materials, and would lose us a couple inches of width unless we added another board, or we could save lumber all around and change the design to keep most of the existing door but make it a little janky. They were good with that, so we did a kind of strange design.
First we removed the split board and it's support scraps and set them aside. Then we cut one of the new boards to the original/final height of the door.
Next we measured far enough up to catch all the rot, and we cut the door that much shorter.

We attached the new vertical board so it extended a couple inches at the top and bottom (it's on the right in the picture above). Then we added two braces across the face of the door, so they went across at the final height of the door/the long new board, leaving a bit of space above and below the old boards. These would add some extra ridigidity, by having pieces going across on the front and the back, and they'd hide the difference in length. Then we cut some pieces to go behind them, fitting flush above and below the old boards. These weren't structural, they just took up space so critters and weather wouldn't get in.

Once the door was made, we started looking at hanging it again.
Unfortunate discovery two: the doorway was crooked. Part of that was the fault of the badly rotted board which crossed the doorway under the door. It didn't seem to be doing anything but catching rain and soaking it up, so we pried it off and replaced it. Luckily it only crossed the doorway, it wasn't actually part of the building frame, which seemed to be in okay shape. The top of the doorway was also out of square, but not enough to be a major problem. As they reminded me a few times, it's a shed, not a house.
We straightened out the hinges by putting them on a brick and pounding on the high points with a small sledge (not ideal but it worked). Then we hung them back up and attached the door. From what I remember, it sat just above the new lower plate when it was closed, might have rested on it but I don't remember.

The last step was to cut a thin piece to attach to the inside of the door frame to make up for the width lost by replacing a roughcut board with dimensional.

From there, I think we called it good. It had rained on and off during the project, and we didn't want to re-attach the trim while it was wet for fear of trapping water between the boards.
We cleaned up the tools and had some pizza.
As a side project, I took the original, very rotted wooden door handle, and the scraps of the split board. From the dimensions of the original and the look of the wood, I figured they cut the original from scraps of the same roughcut 1x12s they built the rest of the shed out of, so I wanted to make the replacement the same way.

I traced the original onto the wood, flipped it end for end, and traced it again, and sort of averaged the two. The original wasn't actually symmetrical but my replacement would be much closer. Then I started sanding it down until it was comfortable to hold. I pre-drilled the holes for the screws, including space for the heads, so they wouldn't split the handle when it was attached.

I stained it, I think my usual mix of Gunstock and Red Oak, then applied a few coats of urethane, sanding lightly between coats. I even got the back, where it'd touch the door, and the holes for the screws. I figured they could paint it whatever color they painted the door, like the original, or leave it as-is, either way it'd be very waterproof and last a long long time.

All it needs now is a new coat of paint.
Nice to see another project of you. I'll post my chicken coop project in near future as well
I look forward to seeing it!