150
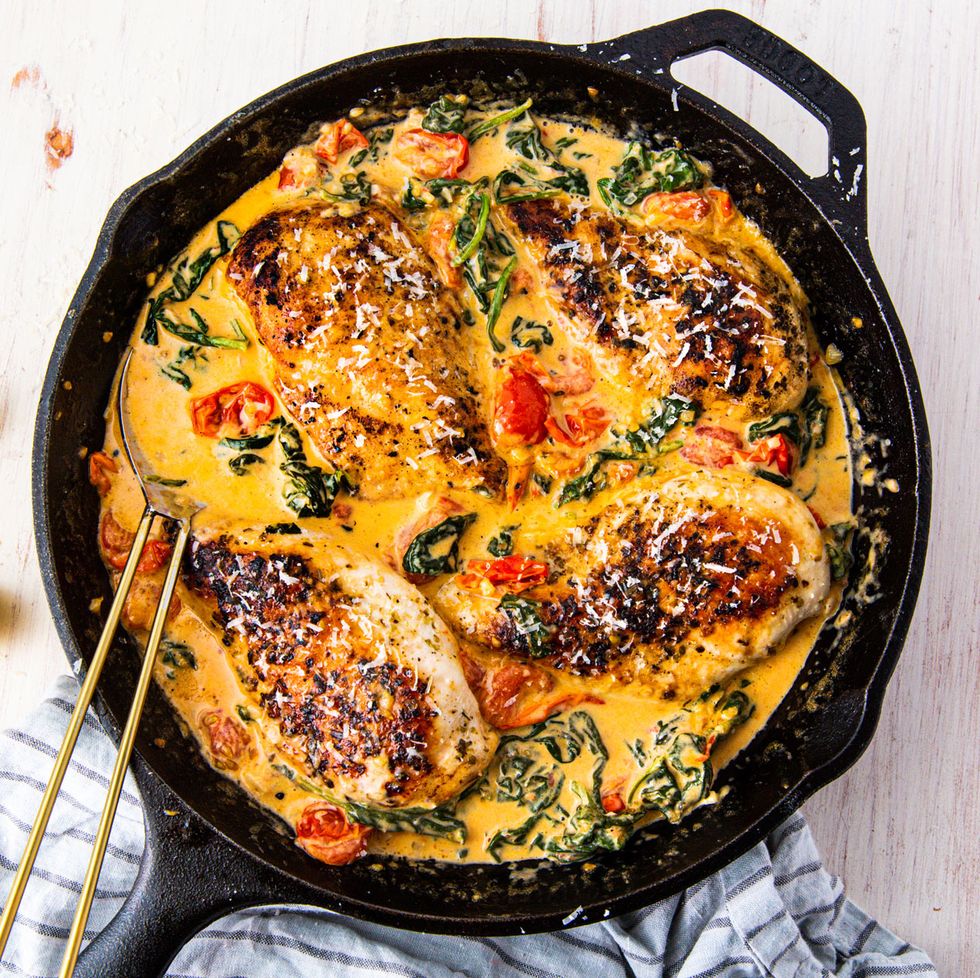
Creamy Tuscan Chicken
(lemmy.world)
Hey y'all! I modified this recipe from Delish's back when everyone on /r/castiron was making this and it's quite delicious. Hopefully you guys try it out!
Ingredients
Rice
- 1.5 cups rice
- 1.5 cups chicken broth
Chicken & Sauce
- 2 chicken breasts
- salt
- black pepper
- dried oregano
- cayenne pepper
- Kashmiri chili
- 1 tbsp neutral oil
- 2 tbsp butter
- 4 cloves garlic minced
- 1 lb campari tomatoes quartered
- 2 cups spinach
- 1⁄2 cup heavy cream
- 1⁄4 cup parmesan cheese grated
Directions
- Start the rice and chicken broth going in a rice cooker or on the stove.
- Cut chicken breasts so that they're generally the same thickness, then season with salt and generous amounts of black pepper, oregano, and just enough cayenne and kashmere chili for a bit of kick.
- In a skillet, heat oil over medium heat and sear the chicken nicely on both sides for long enough to cook it through.
- Once the chicken is cooked, set it aside and melt some butter in your pan and scrape up any fond that formed. Toss in the minced garlic and saute until fragrant.
- Throw in the tomatoes and season with a big pinch of salt and a bunch more black pepper. Keep them moving in the pan until the skin is falling off and the juices have mixed nicely with the sauce forming in the pan, about 3-5 minutes or so.
- Throw in the spinach. You will be worried that everything's gonna fall out of the pan, but just gently keep it moving in the pan. Over the next couple minutes it'll all wilt down and be much more manageable.
- Once the spinach has wilted down, pour in the heavy cream and mix everything together. Once everything's combined, throw in like the parmesan and stir til everything is melted together. Leave it for about 3 minutes or so, then stir again and scrape the bottom as nice crispy sheets of cheese may have formed.
- Add the chicken back in and let everything get to know each other at a low simmer for like 5-8 minutes or so.
- Serve over the rice you started earlier, it should be about ready by now.


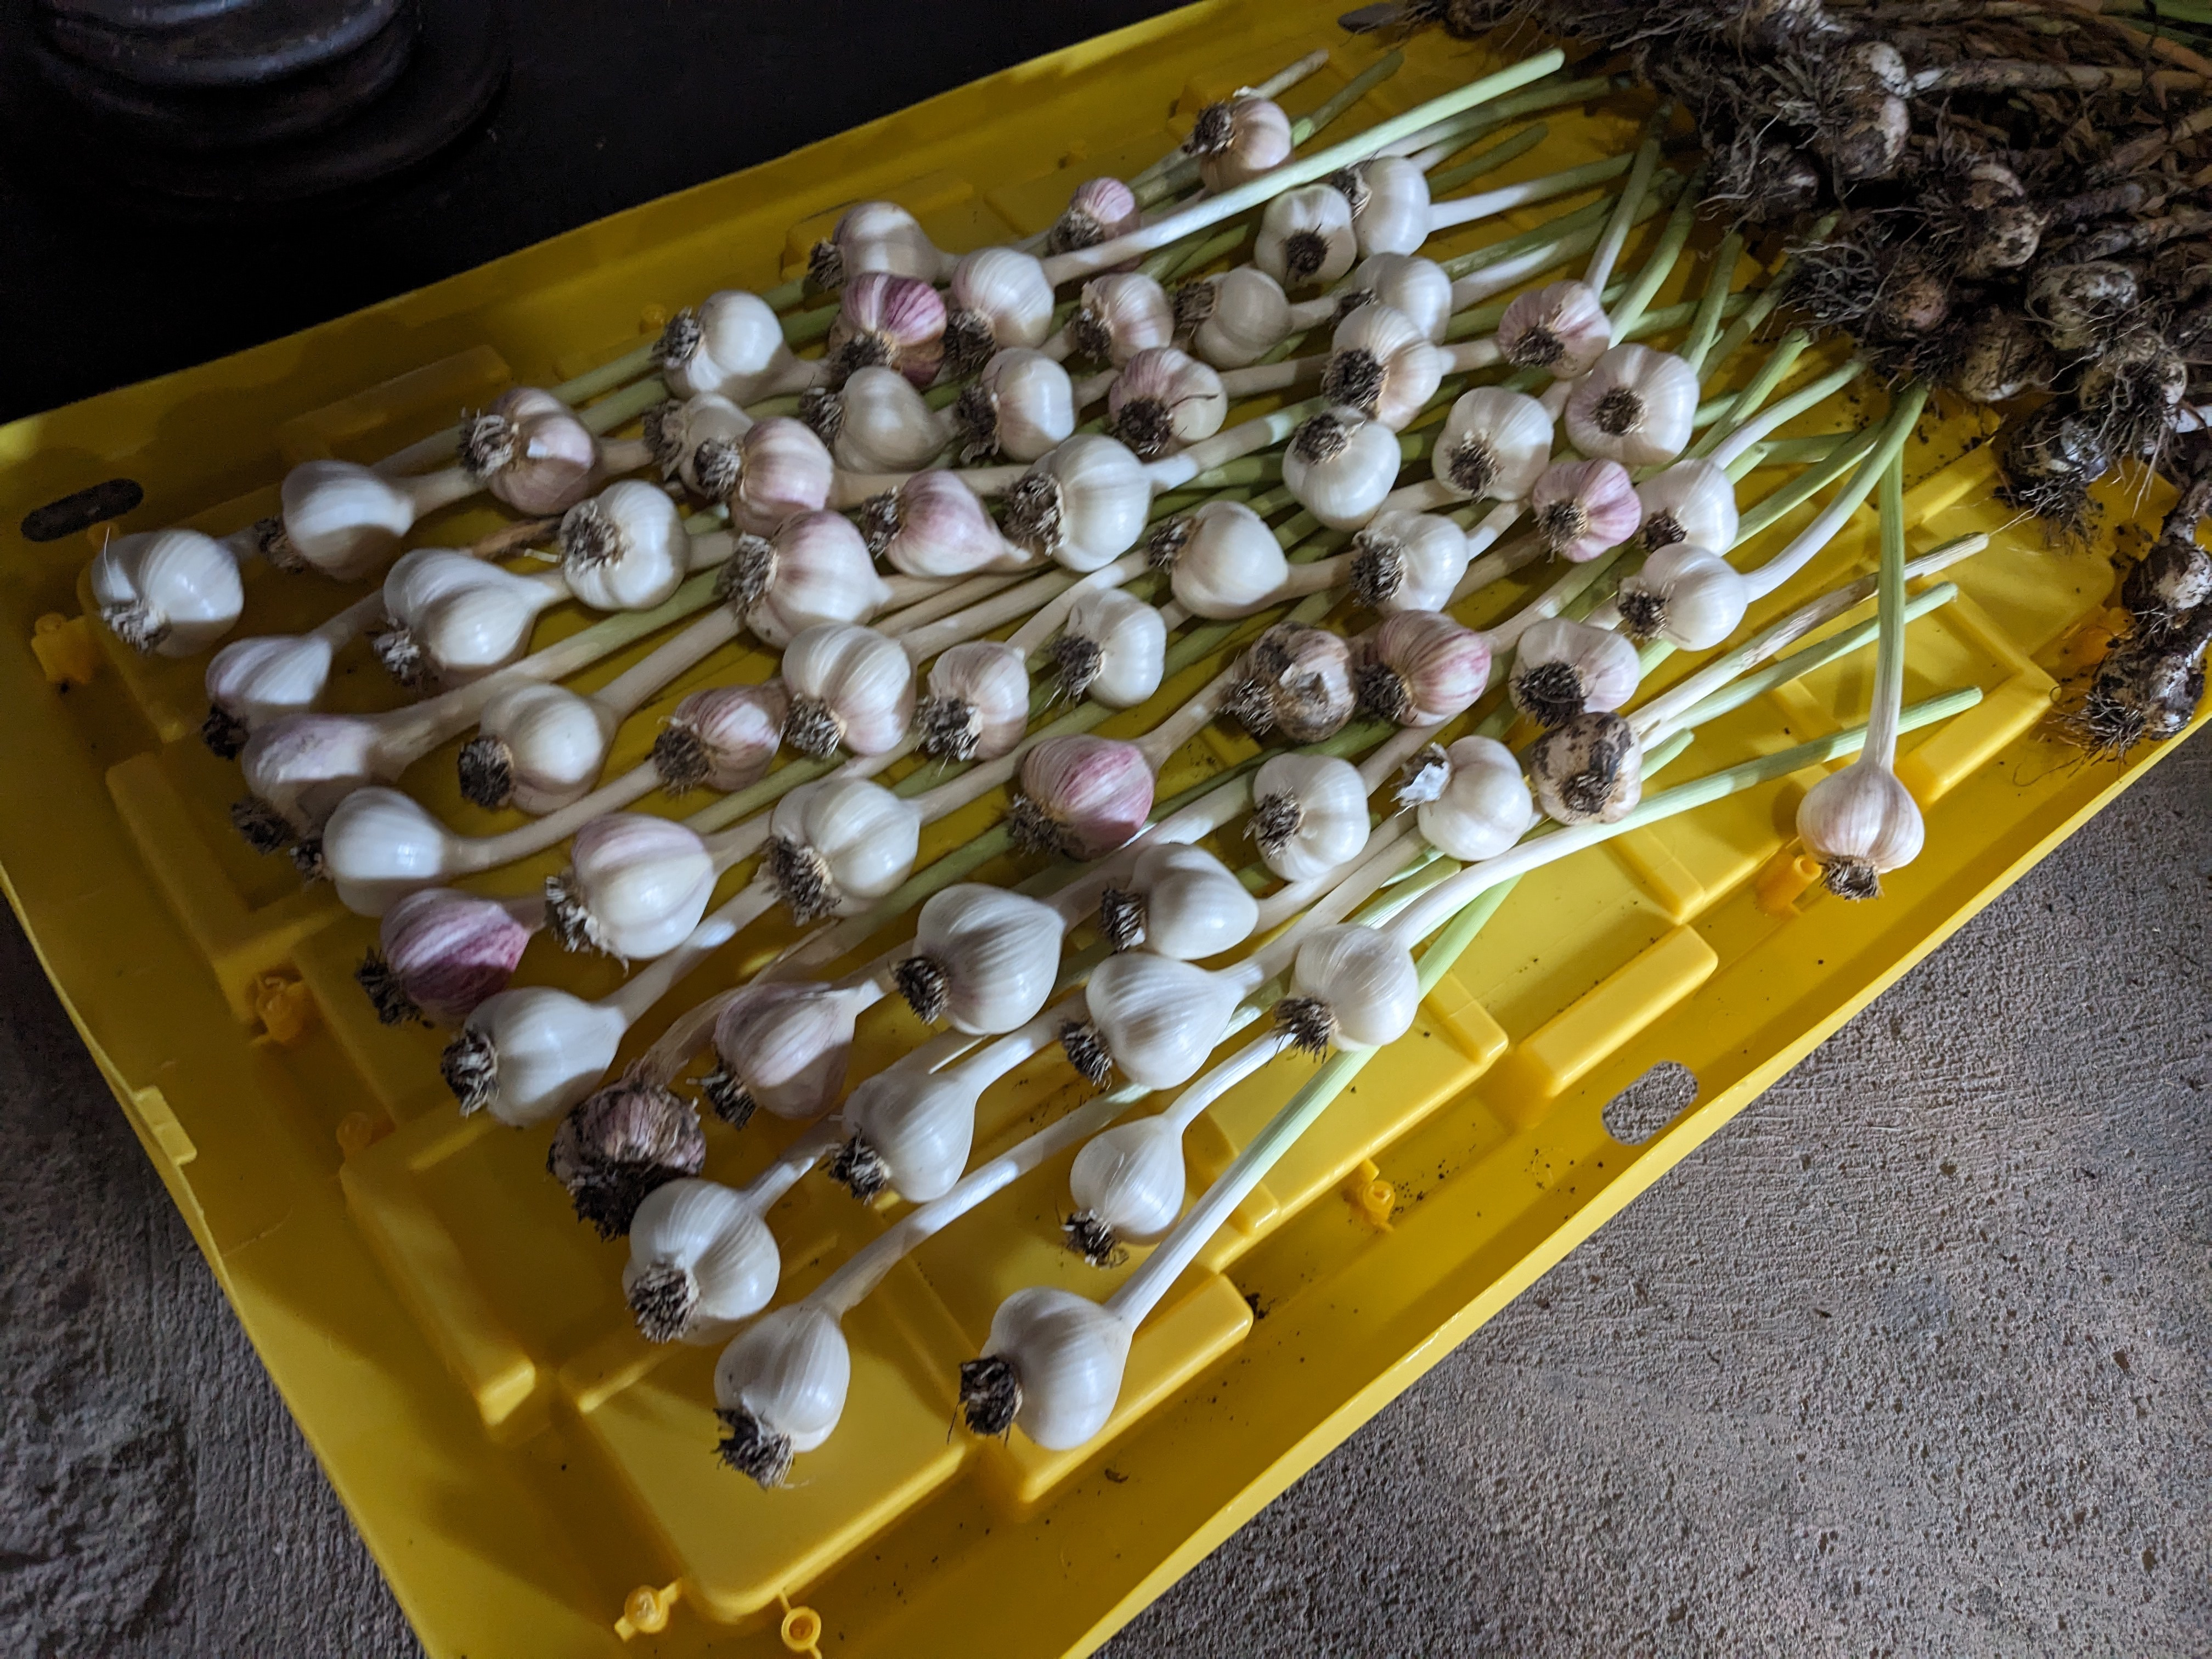
Hey! I've been growing garlic with my family for years now and recently compiled our findings. Sorry for the formatting, I'm on mobile and am copying this from my notes.
Date: 2023-07-24 Status: #idea Tags: [[Alliums]], [[Annual Plants]], [[Sun Loving Plants]], [[Cold Hardy Plants]]
Garlic
Garlic is an [[Annual Plants|annual]], [[Cold Hardy Plants|cold hardy]] [[Alliums|allium]] that requires [[Sun Loving Plants|full sun]]. Make sure to plant in well-draining, moisture retentive [[Loam|sandy loam]]. A mixture of [[Peat Moss|peat moss]] and [[Manure|cow manure]] does excellently, and a thick layer of mulch or other slow-decomposing matter under your soil layer will provide long-term nutrients to your crop.
When to Plant
[[Hardneck Garlic|Hardneck garlic]] does best when planted around 60 days before the [[Frost|first frost]] of the fall so that it can experience a "dormancy" period of colder weather. By planting in the fall, the garlic has time to develop healthy roots before the temps drop and the ground freezes, but not enough time to start sending top growth up.
[[Softneck Garlic|Softneck garlic]] can be overwintered in zones 7 and warmer, but for colder climates must be planted in the spring as it is not as cold hardy.
Planting
Immediately before planting, work a couple tablespoons of 5-10-10 complete [[Fertilizer|fertilizer]], bone meal, or fish meal into the soil, several inches below where the base of the garlic cloves will sit.
Select large, healthy cloves that are free of disease. The larger the clove, the healthier and bigger the resulting bulb will be the following summer. Break apart the cloves from their bulbs a few days before planting, but make sure to keep the papery husk on each individual clove.
To prevent weeds from growing, cover the entire bed with a layer of plastic landscaping fabric and anchor it at the edges. In spots where a bulb will be planted, use a blowtorch to melt a hole in the fabric about 3 inches in diameter.
Cloves should be planted in rows spaced 6 to 12 inches apart, with cloves about 4-8 inches apart. Plant cloves 2 inches deep in their upright position (with the wider root side facing down and the pointed end facing up).
After everything's been planted, [[Mulching Crops|mulch]] the garlic beds heavily with straw or leaves to ensure proper [[Overwintering|overwintering]]. In the spring, the mulch should be mostly removed around two weeks after the [[Frost|last frost]], leaving only a thin layer of about an inch to keep weeds under control.
Maintenance
Keep garlic beds heavily weeded. Garlic does not do well with competition, and nutrient availability will directly contribute to bulb size.
As garlic shoots grow, they will send up [[Garlic Scapes|scapes]] with a growing flower bulb at the end. Allow these to grow until they first begin to curl, then prune them just above the highest leaf on the shoot. This prevents the garlic from using too much energy trying to flower and allows the bulb to grow larger.
Fertilize the garlic using blood meal, pelleted chicken manure, or a synthetic source of nitrogen such as a pelleted fertilizer in early spring and again just before the bulbs begin to well in response to lengthening daylight (usually early May). Repeat if the leaves begin to yellow.
Water every 3 to 5 days during bulbing (mid-May through June). As mid-June approaches, taper off watering.
Harvest
The right time to harvest from fall plantings will range from late June to August. In general, the clue is to look for yellowing foliage, but this isn't the case for all garlic varieties. For hardneck varieties, harvest when the bottom two leaves have turned brown, but most of the plant is still green. For softneck varieties, harvest when the tops of the shoots flop over. Make sure that the soil is not too wet when harvesting.
Before digging up your whole crop, it's a good idea to sample one bulb. Lift a bulb to see if the crop is ready. It's recommended to dig up a bulb before the tops are completely yellow (in late June or early July) as some garlic types will be ready earlier.
If pulled too early, the papery skin surrounding the bulb will be thin and easily disintegrate. If left in the ground too long, the bulbs will sometimes split apart. The skin may also split, which exposes the bulbs to disease and will affect their longevity in storage.
To harvest, carefully dig up the bulbs using a garden fork (don't pull or yank the stems up by hand). Avoid damaging the roots or root-plate (where they attach to the bulb). Lift the plants and carefully brush off surplus soil, but do not remove any foliage or roots before putting them to dry thoroughly.
Curing and Storage
Let garlic cure in an airy, shady, dry spot for about 2 weeks. Hang them upside down on a string in bunches of 4 to 6 or leave them to dry on a homemade rack made from chicken wire stretched over posts. Make sure all sides get good air circulation.
After a few weeks, the garlic should be totally dry and ready to store. The bulbs are done curing and ready to store when the wrappers are dry and papery and the roots are dry. The root crown should be hard, and the cloves should be able to be cracked apart easily.
Once the bulbs are dry, brush off any dirt, remove only the dirtiest wrappers, trim the roots down to 1/4", and cut off the tops to 1 to 2 inches.
Bulbs should be stored in a cool, dark, dry place (around 55°) and can be kept in the same way for several months. Don't store bulbs in your basement if it's humid. Don't store them in your fridge either, as it will be too cold and too humid.
Make sure to set aside your biggest, best-formed bulbs for planting again in the fall. Remember, the better the bulbs you plant, the better the bulbs you harvest.
Troubleshooting
Red and white spots on leaves: this can be a sign of [[Garlic Rust|garlic rust]], which is a fungal disease that affects garlic and other alliums. It does not affect the taste of safety of the harvested bulb, but it does limit bulb growth (especially if the infection started early in the season). Try to catch this early and cut off any afflicted leaves before it spreads too far.
Notes
Garlic should be planted on a 4-year [[Crop Rotation|crop rotation]] if possible to prevent the likelihood of [[Fungal Infections|fungal infections]]. If this isn't possible, you can discourage some fungal infections from taking hold by spacing your garlic further apart. Additionally, make sure to minimize sources of fungal spores like dead leaves and spent plants.
[[Nematodes]] love eating alliums and [[Nightshades|nightshades]], so if you encounter them eating your crop make sure to avoid planting them in the same spot for a few years to starve them out.
Grower's Log
2023 Harvest
Bulbs were on the small side this year. I think this is due to a number of timing factors (late planting, next to no weeding, late to cutting scapes) as well as no effort to fertilize during the growing season. Next year I will try to be more attentive to both of these things. Processing for curing was also made difficult due to being late to harvest, so most of the leaves were too dry to get a single layer off the bulb.
I also found weird white dots in the soil under one corner of the bed - hoping this isn't anything I need to worry about for in the future.
References