1
3

So I had a taillight bulb go out on me this week, and changing that bulb was simple enough, but also not particularly obvious. Had to look it up and could only find a overly long winded youtube video on it. In the interest of saving some one else the headache of scrubbing through a 20 min video to get answer that could have been explained in 2 minute short, I figured I would write it out.

Tools and Parts list

  • Flat head screwdriver
  • 8mm deepwell socket or wrench (A standard socket might work, but a baby socket won't. Long bolts.)
  • Replacement bulb
    • The red brake and taillight bulb is a white 7443 bulb. )
    • The turn signal bulb is an amber 7440A
    • The reverse light is a 921

Instructions:

1.) Open the trunk. (Yes, I'm a smart ass :-D )
2.) On the rear (driver's perspective) corner of the trunk on the side with the blown bulb, look for a removable plastic rivet. Place under the center part of the rivet, a flathead screwdriver and lever the center part up, then pull the rivet out. If you try to remove the rivet before poping the center part up you will break the rivet.
3.) Pull the carpet to the side to reveal where the back of the tail light assembly should be. You will find 2 long bolts secured with 8mm nuts.
4.) Remove the 8mm nuts.
5.) Applying rearward pressure to the exposed bolts and the outside of the assembly, remove the assembly. It slides off to the rear, not the side. This will take a bit for force, but not much. Be careful not to damage the tail light assembly or damage the wiring harness. The wiring harness has roughly 8 inches of play.
6.) You now have access to the bulb holders for the tail/brake light, turn signal, and reverse light. The bulb holders twist loose and it shouldn't take much force. The bulbs themselves are a friction fit into the bulb holders.
7.) Reverse these steps to reassemble.

2
10
submitted 1 month ago by Duallight@lemmy.today to c/diy@lemmy.ml

My wife and I are quite shit at design but are pretty handy. We recently bought a house, and we want to make the backyard a great hang out spot, but have no idea how to make it look good. I contacted a local landscaper about just paying for a design/plan and we would just DIY it but they never called us back. Is this an okay thing to hire for? Or do landscapers usually want to do the work themselves?

3
36
Is this hot plate damaged? (lemmy.blahaj.zone)
submitted 2 months ago* (last edited 2 months ago) by FemboyNB@lemmy.blahaj.zone to c/diy@lemmy.ml

I was cooking some food when I noticed a burning plastic smell and some smoke coming out of the knob, I let it cool down, and when I turned it back on, there wasn't any smoke but the burning smell returned, is the plate damaged, or is it some stuck food being burned?

The burning plastic smell seems to be coming from the plate, even when it is dissassembled like this, i can smell it from the centre.

4
11
submitted 4 months ago by Waveform@lemmy.world to c/diy@lemmy.ml

Hi,

I tried contacting PowerA about which parts I'd need to fix joystick drift and a sticky directional button, but they would not help.

It's a long shot, but does anyone know if the parts needed are available for purchase? I don't like making e-waste.

Alternatively, does anyone know of a good Android controller that can be repaired easily? (e.g. Something I won't have to make custom silicone pads for or otherwise get too technical.) Or should I just get a wireless XBox controller?

Thanks

5
7
submitted 6 months ago* (last edited 6 months ago) by casey@mander.xyz to c/diy@lemmy.ml

cross-posted from: https://mander.xyz/post/12406051

I'm not sure where the right place to post this would be, but here goes.

I bought this DW745 Type 2 saw off of Facebook Marketplace. I think it was abused. I replaced both of the elevating shafts (5140100-04 & 5140100-05). I also had to replace both of the bevel gears (5140061-65).

The aluminum housing seems to be okay and the lifting shafts move in and out without much resistance. I'm still getting this chunky movement when I raise and lower the blade.

I'm looking for advice before I go though the whole process of replacing the entire aluminum housing on the motor.

6
21
submitted 6 months ago* (last edited 6 months ago) by SharkEatingBreakfast@sopuli.xyz to c/diy@lemmy.ml

Refrigerator is a Frigidaire LTFR1832TF0.

Leak came from the front-right side.

I did not notice any temperature fluctuations, but I also don't notice much of anything. It still seemed cold when I unplugged it, though!

Checked the drain pan & it seems dry? Not overflowing or anything.

No water on inside of refrigerator.

Anyone have any idea what might be going on? I'd really appreciate it, as no one can take a look for another 3 days.

I don't want my food to spoil, as I don't have a lot of money. I just want to know if it'd be safe to plug it back in!

Thank you.

7
19
submitted 7 months ago by Joeyfingis@lemmy.ml to c/diy@lemmy.ml
8
11
submitted 7 months ago by Zicoxy3@lemmy.ml to c/diy@lemmy.ml

I have some headphones with a broken 3.5" jack. The headphones are perfectly fine, but my son and his ps4 shatter them when conecting it to the controller. Any tuto to solder the jacks?? they have a microphone.

9
9
submitted 8 months ago by mortrek@lemmy.ml to c/diy@lemmy.ml

I have a friend who lives in a Section 8 housing apartment and the dryer vent (that normally sticks out enough to connect a dryer to) is broken off flush with the wall by previous tenants. I believe it's also glued/foam filled into place, so it can't be easily pulled further out or anything. They'd probably get in trouble if they modified anything excessively anyway. No pictures, sorry.

They have a stacked washer/dryer that works, but cannot use them due to no venting. There is no way that the landlord will fix it, as they refused to fix many bigger, more dangerous things until the state forced them to. They are just stuck with the apartment that they have. Also, they currently have a negative income, so I'd have to fix it out of my pocket. Currently they just walk to a laundry place and pay a bunch of money (that they don't have) to wash their things.

Is there some sort of trick that's still safe, like a metal insert that you can put into the vent to extend it? Some way to make it usable without modifying the building?

This is Washington State, USA, so it'd need to pretty much follow laws/code if at all possible.

Thank you.

10
8
submitted 8 months ago by the_beber@lemm.ee to c/diy@lemmy.ml

Hey, I just repaired one of my earbuds, which required me to open up the casing. Now the casing opens up way to easily at the seam, therefore I want to reseal it.

Can someone give me tips on what glue to use? I want the glue to be able to re-liquefy under a bit of heat treatment, as I may need to open it up again in the future, and it should be water-proof. The material is some kind of hard plastic.

Also some application tips and tricks would be nice, as the area is very very narrow and I don't have the steadiest of hands.

11
68
submitted 9 months ago by CrimeDad@lemmy.crimedad.work to c/diy@lemmy.ml

cross-posted from: https://lemmy.crimedad.work/post/55668

cross-posted from: https://pixelfed.crimedad.work/p/crimedad/664462779759271734

If you use enough electrical tape, that counts as a junction box, right?

I'm a hack myself, so I get it, but jeez. A wet application like a dishwasher installation really isn't the place for this sort of carelessness.

The second picture shows how I remotely open a circuit breaker.

This post is a follow to my previous dishwasher install post (https://pixelfed.crimedad.work/p/crimedad/664264701761318465).

#diy #dishwasher #linoleum #electrical

@crosspost@lemmy.crimedad.work

12
97
submitted 9 months ago by CrimeDad@lemmy.crimedad.work to c/diy@lemmy.ml
13
9
submitted 9 months ago by StopSpazzing@lemmy.world to c/diy@lemmy.ml

Looking to combine:

ESP8266 1/2/4/8/16 Channel Way Wireless WIFI Relay Module AC/DC 5V/7-28V/5-80V + Usbc trigger 12v modules + 12v 10A (possibly more or 2 split between half of relays) power supply connected in parallel across all relays + Buck converter to drop 12v to 5v to power relays

Purpose? Want to migrate all my power for my devices for my network equipment that support 12v to usbc. I will probably get the 16 relay and split up 4 sections to the usbc specs (5v,9v,12v,20v) for all my device power needs.

Thoughts? Suggestions? Has anyone tried this?

14
3
submitted 9 months ago by Aussiemandeus@aussie.zone to c/diy@lemmy.ml

So i have a LG 65sj850t-ta TV. Its been a great TV for a few years but recently its started having issues streaming with pauses etc and can not pass an upload test on any of the speed test apps or websites.

I'm not entirely sure if its the Main card or not but at 100 odd dollars its sure cheaper then a 3000 dollar TV.

Has anyone changed out a main card before? Im a Crane Technician so i am not unfamiliar with this sort of work, just i have never worked on a television before.

(Picture is samsung tv infront of LG tv for trouble shooting)

15
10
submitted 10 months ago* (last edited 10 months ago) by pcgaldo@lemmy.ml to c/diy@lemmy.ml

This setup allows Arduino to read temperature, control relay based on setpoints, display info on OLED screen, and manage date/time settings with user input through buttons. Adjust based on specific hardware/project requirements.

Designed to replace the faulty electronic control of a blue heat radiator.

Code and simulation at Wokwi

Licensed under GNU GPLv3.

16
126
Finally fixed my refrigerator. (pixelfed.crimedad.work)
submitted 11 months ago by CrimeDad@lemmy.crimedad.work to c/diy@lemmy.ml

cross-posted from: https://pixelfed.crimedad.work/p/crimedad/641007525326911401

Finally fixed my refrigerator.

The previous owners of the house inexplicably cut the water line to the fridge, so I reconnected it only to find out that the ice maker would keep leaking water. That was happening because the solenoid valve that allows flow to the ice maker wasn't closing properly. Fortunately, it was an easy replacement, just a couple of screws and push connections.

#diy #RightToRepair

@crosspost@lemmy.crimedad.work

17
3
submitted 11 months ago by JustADumbass@lemmy.ca to c/diy@lemmy.ml

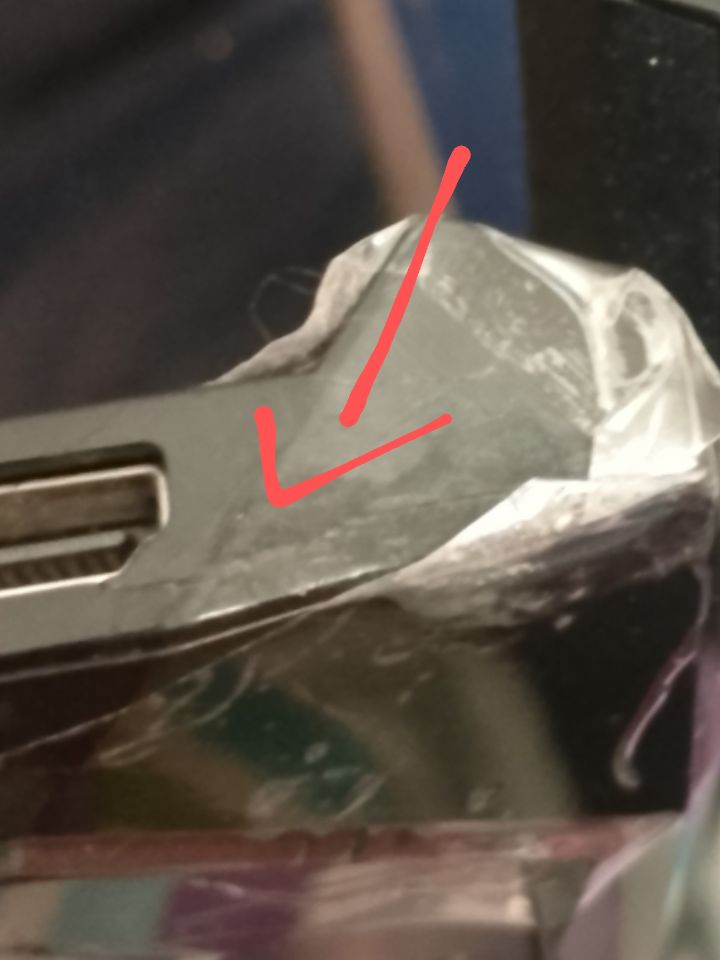
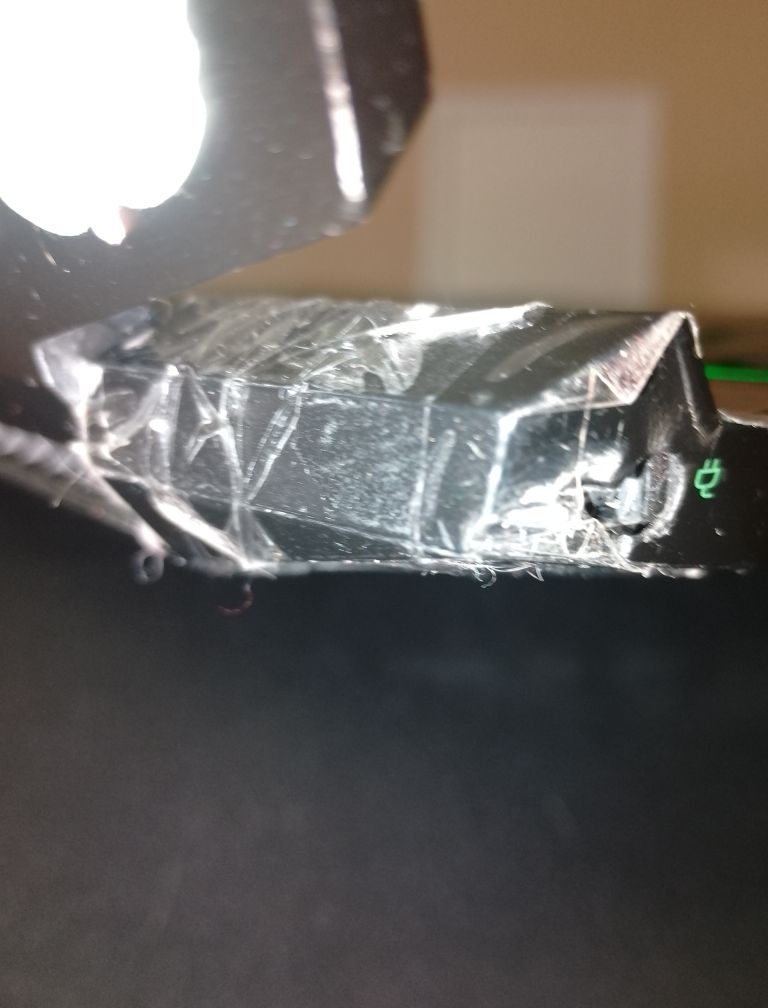
TLDR: Broken Chassis on HP Pavillion 15.6 Gaming Laptop, Originally Plastic Case, Wanting to Know if I Can Replace with Metal Case

Hello, I have an HP Pavilion 15.6 ec Gaming Laptop. There is an issue with the back case and front case, specifically the plastic near the hinges cracking and deteriorating. I took it to a laptop shop and they confirmed this issue, they are charging me more than what they repair should be. I am planning to do the repair at home on my own, but I would like to know if the replacement could be done with metal cases, and if so, where would I be able to make such a purchase. For now if there are no options for this, I will go with a plastic one The cracks in question:

Laptop specifications: Laptop Specifications

18
6
submitted 11 months ago by earmuff@lemmy.dbzer0.com to c/diy@lemmy.ml

I‘m trying to repair my Polar Vantage V2, as it has some electrical issues (display errors and unwanted button behavior). The watch is waterproof, which means the parts are most likely glued together. The watch doesn’t have to stay waterproof after repairs.

So far I only saw one screw on the side. Removing it did nothing. I also baked the watch at 80°C and 105°C for about 10 mins each in hopes it would soften the glue enough. I tried to use a suction cup to pull on the display, but nothing moved. I tried to put something between the case and display glass, but the gap is just too narrow.

I think increasing the oven temperature might end up in a damaged battery or display.

Any other recommendations on how I could open up the watch?

19
10
submitted 1 year ago by Hellstormy@lemmy.world to c/diy@lemmy.ml

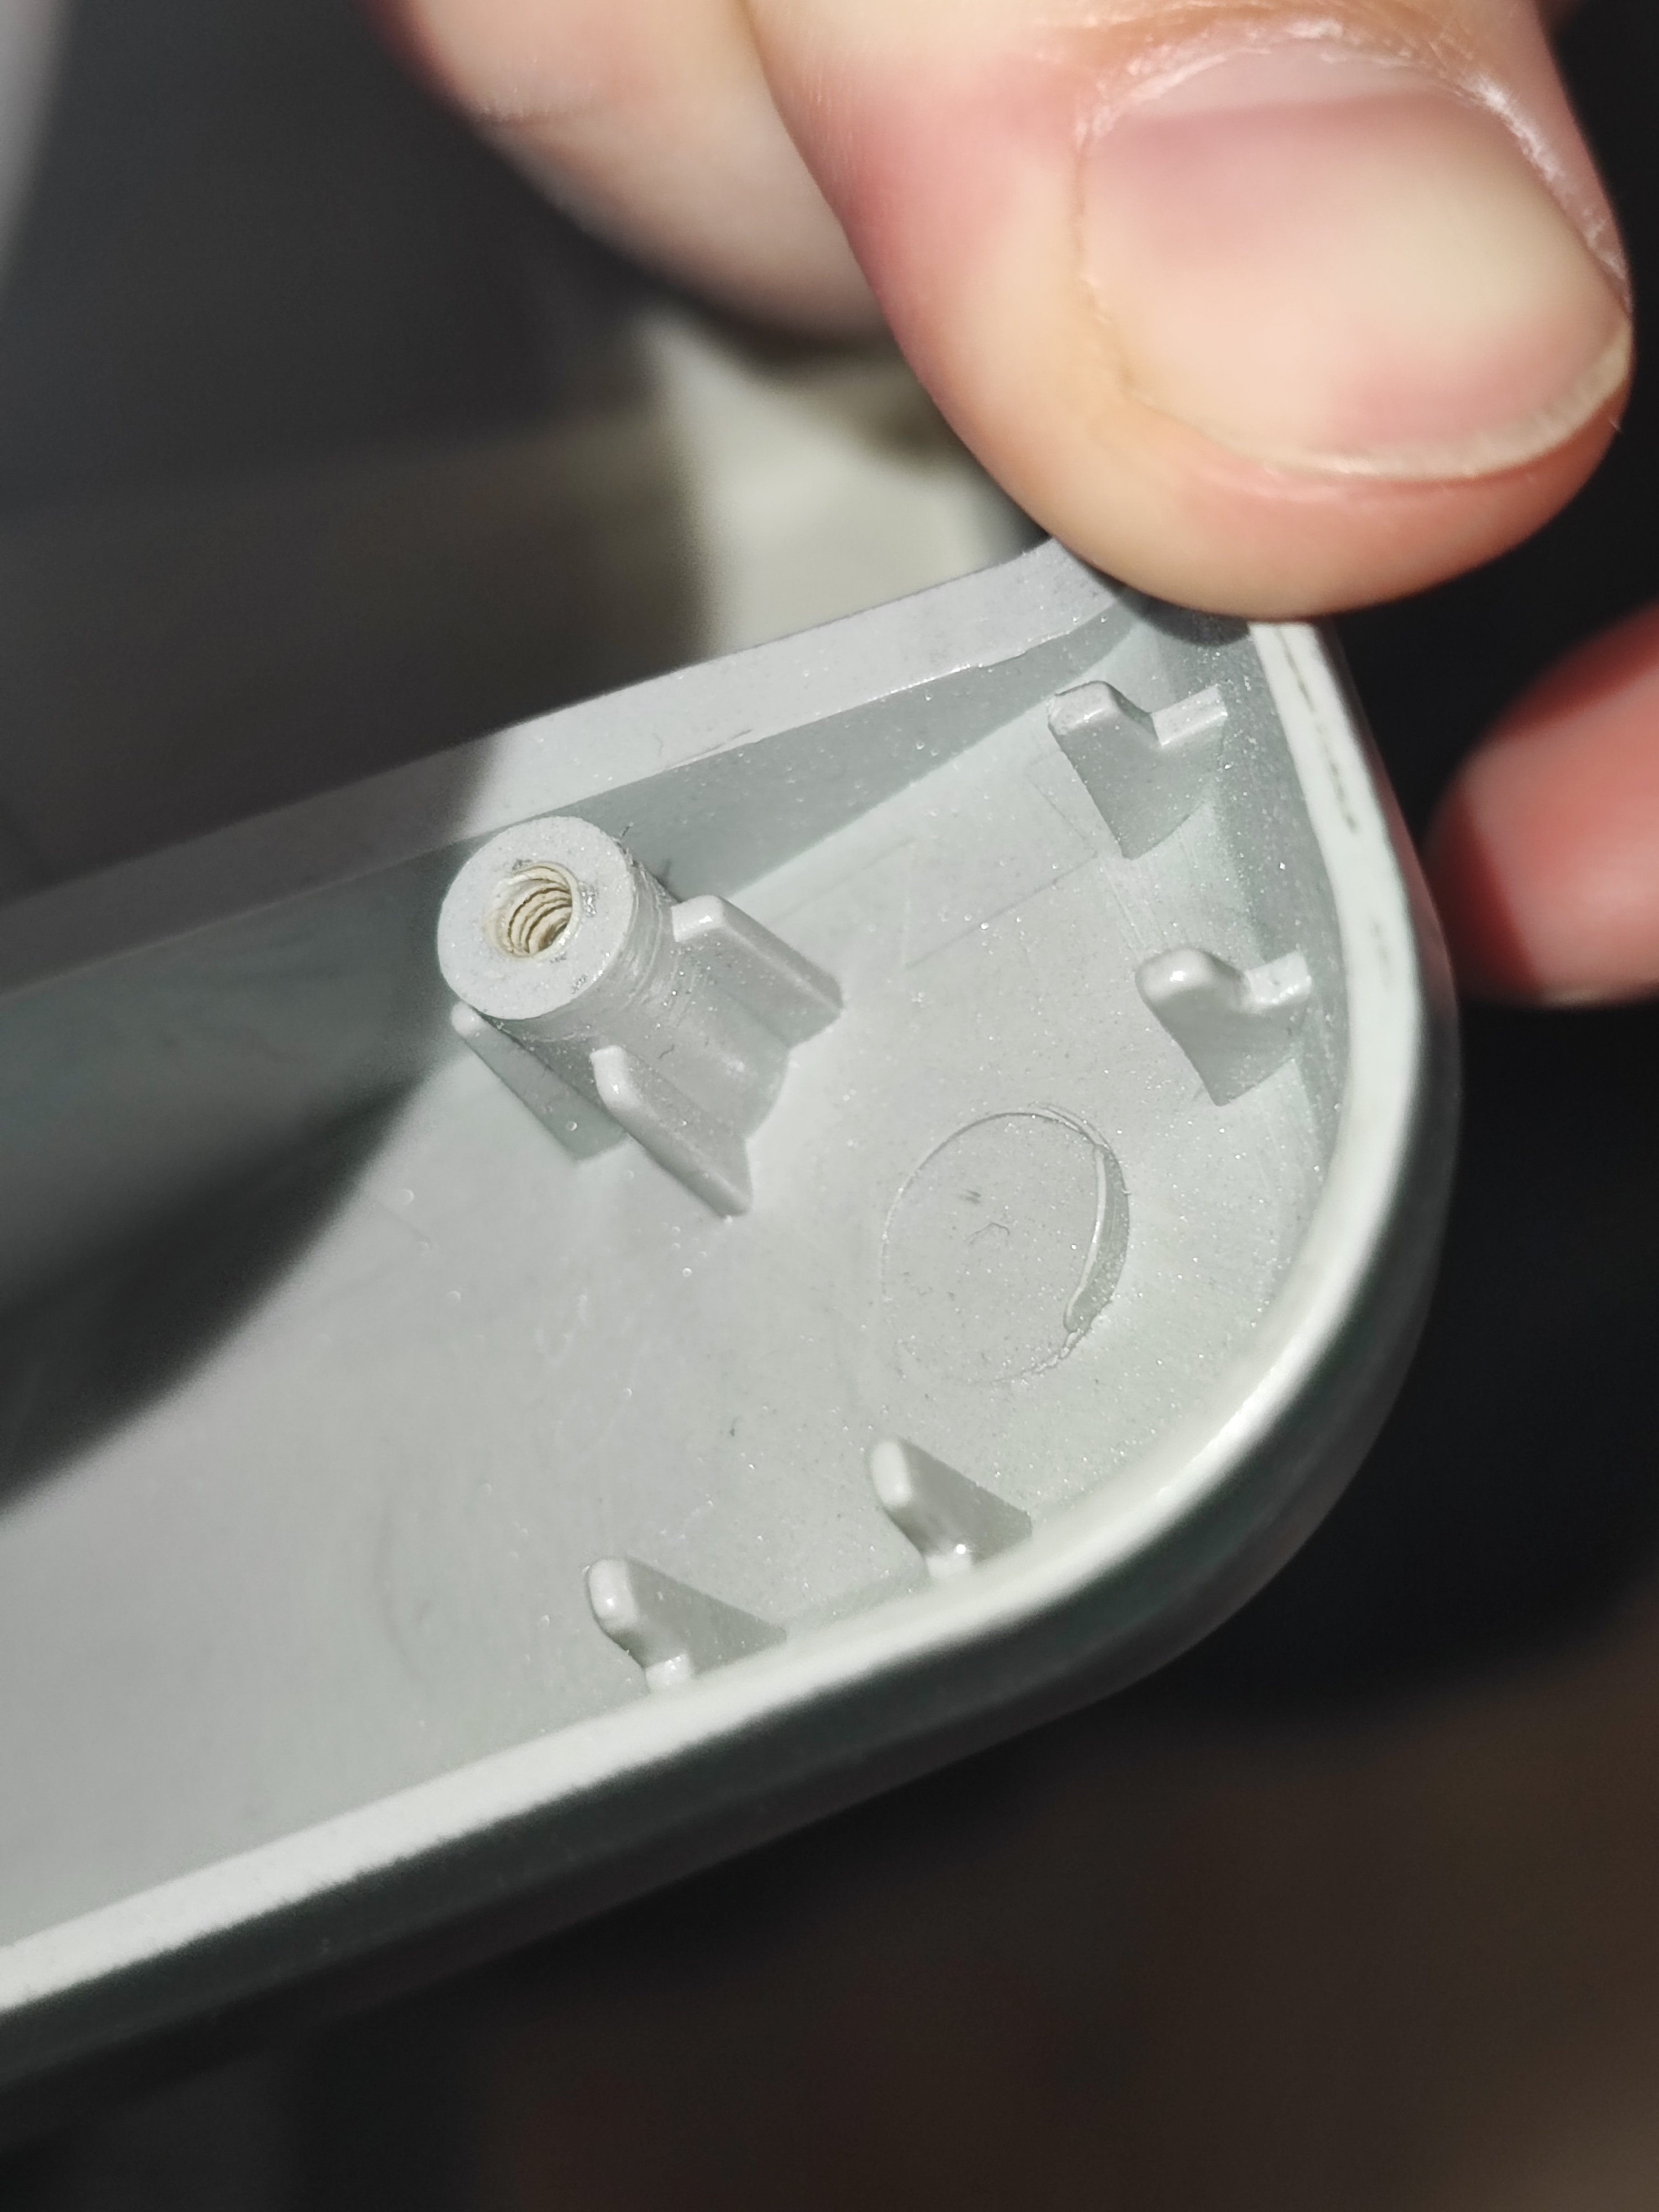
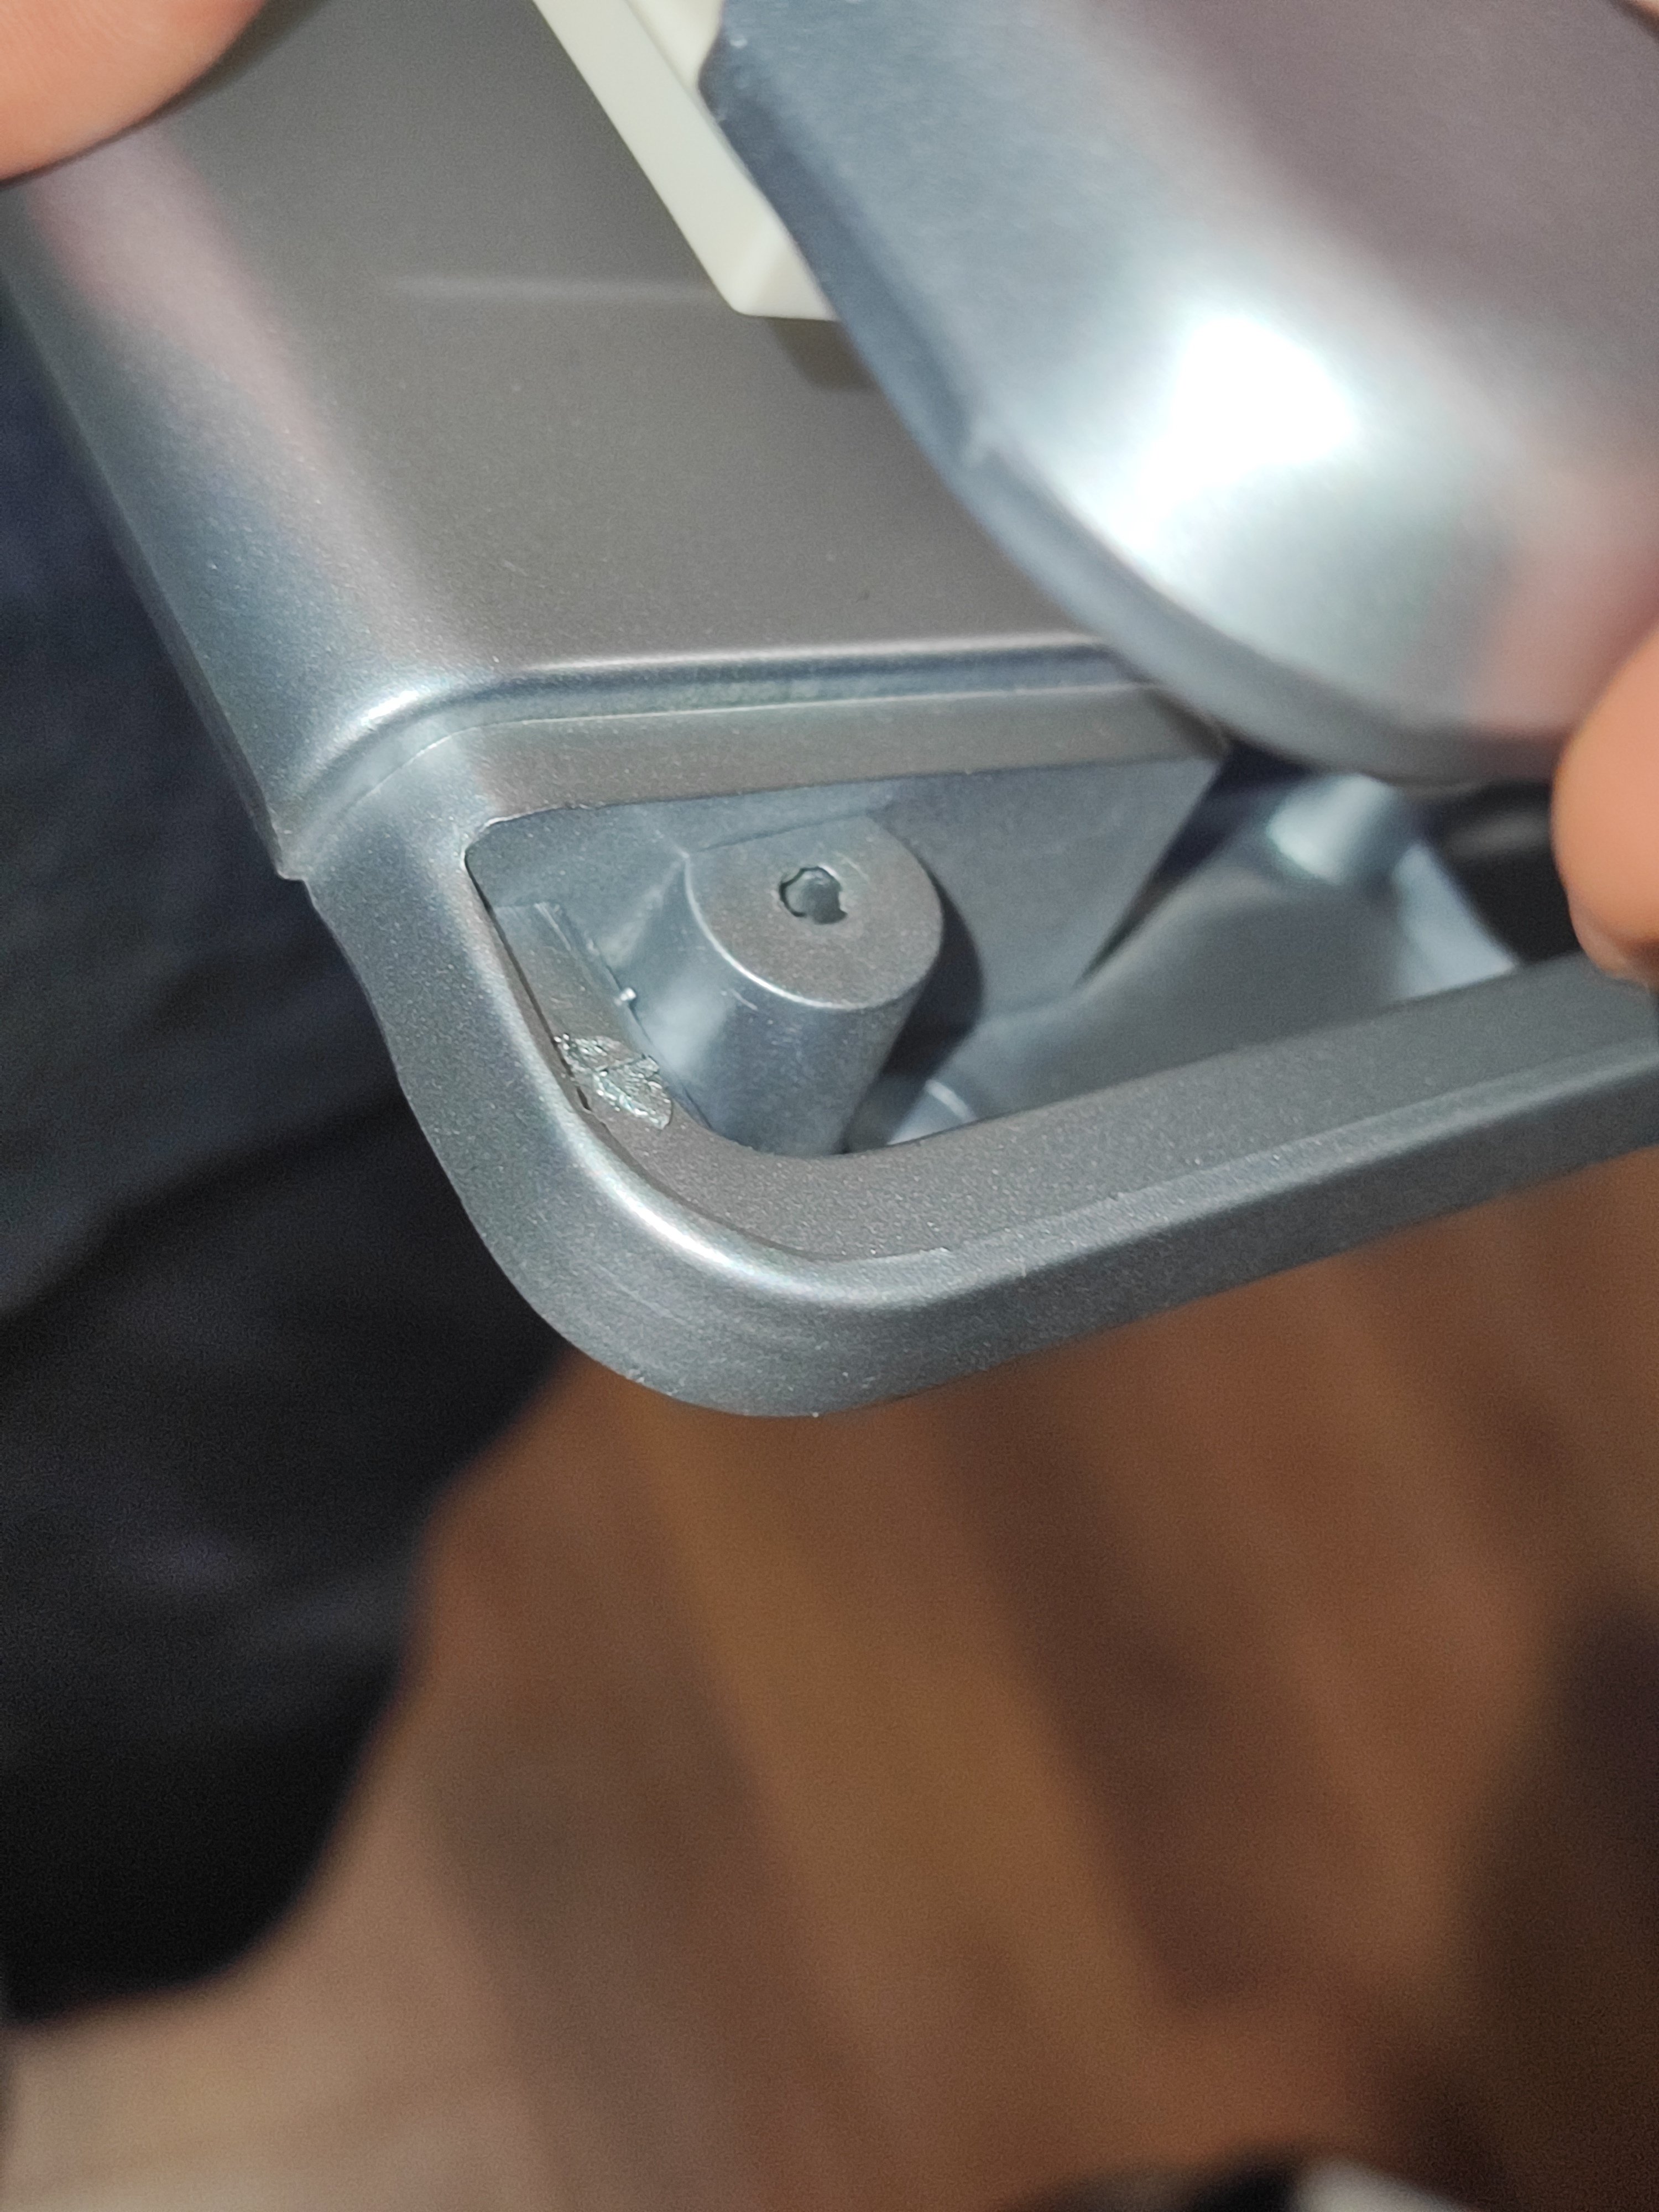
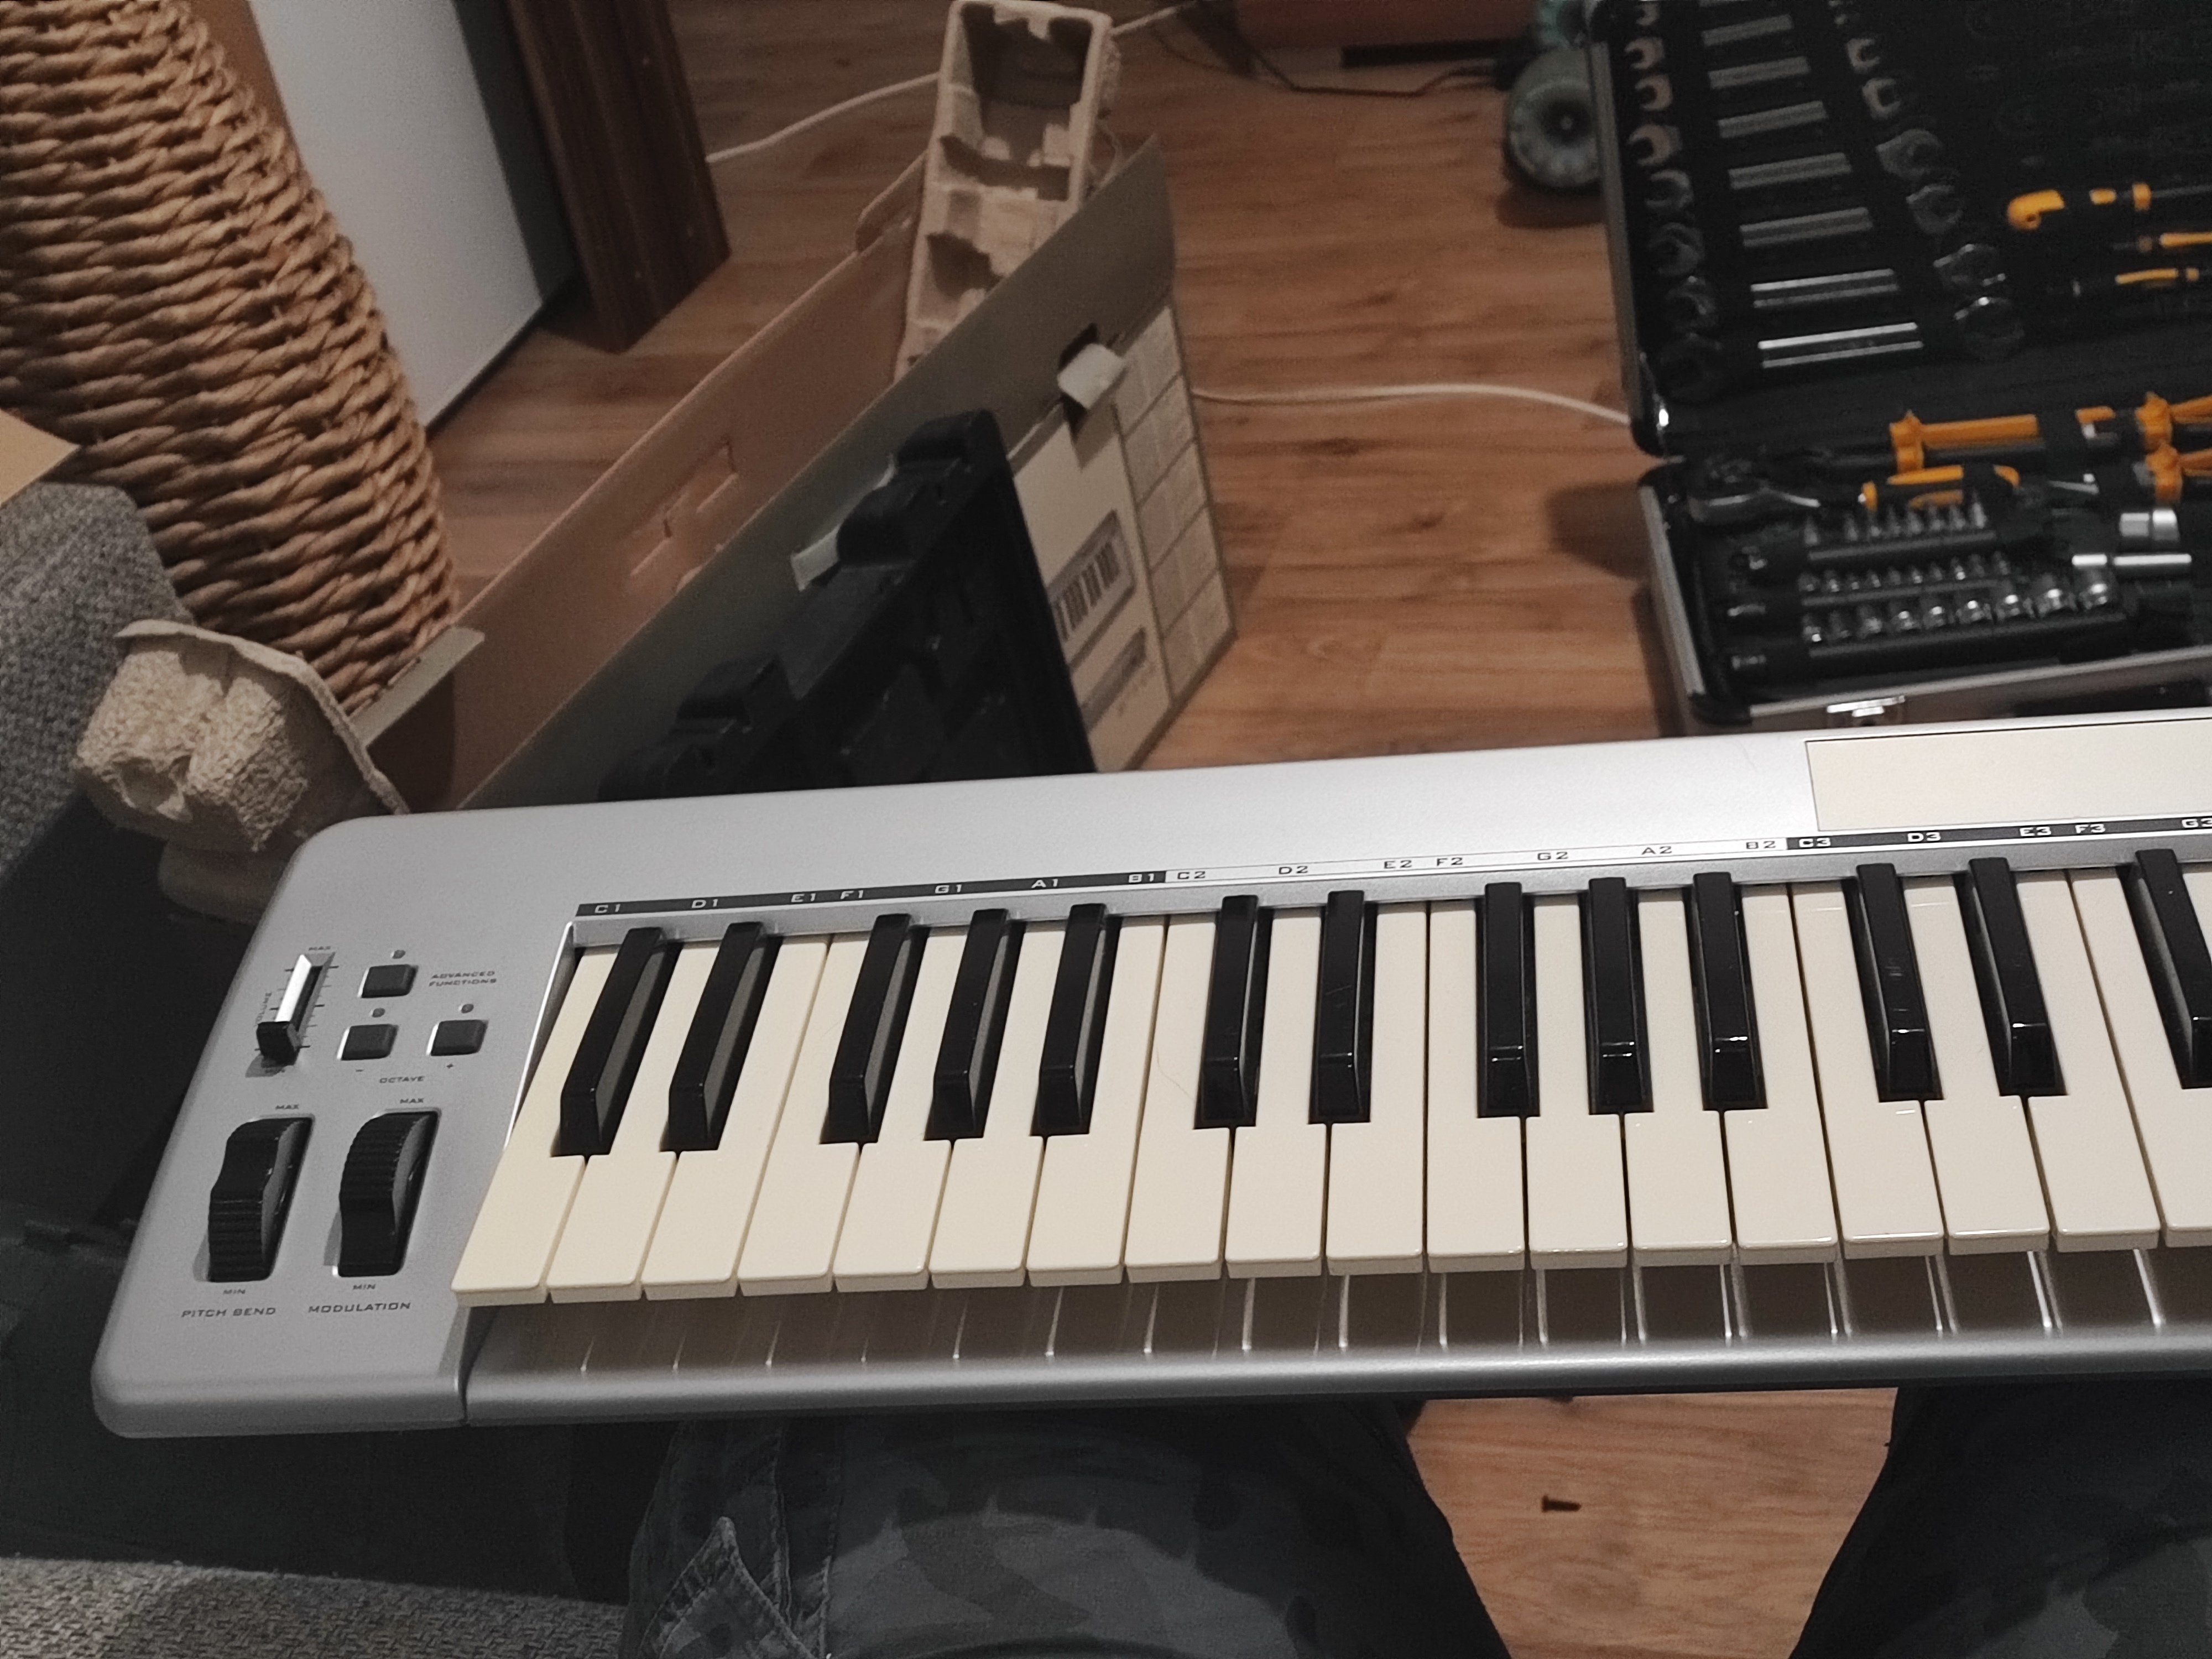
I just got this keyboard for free because a few parts on the PCB need to be replaced.

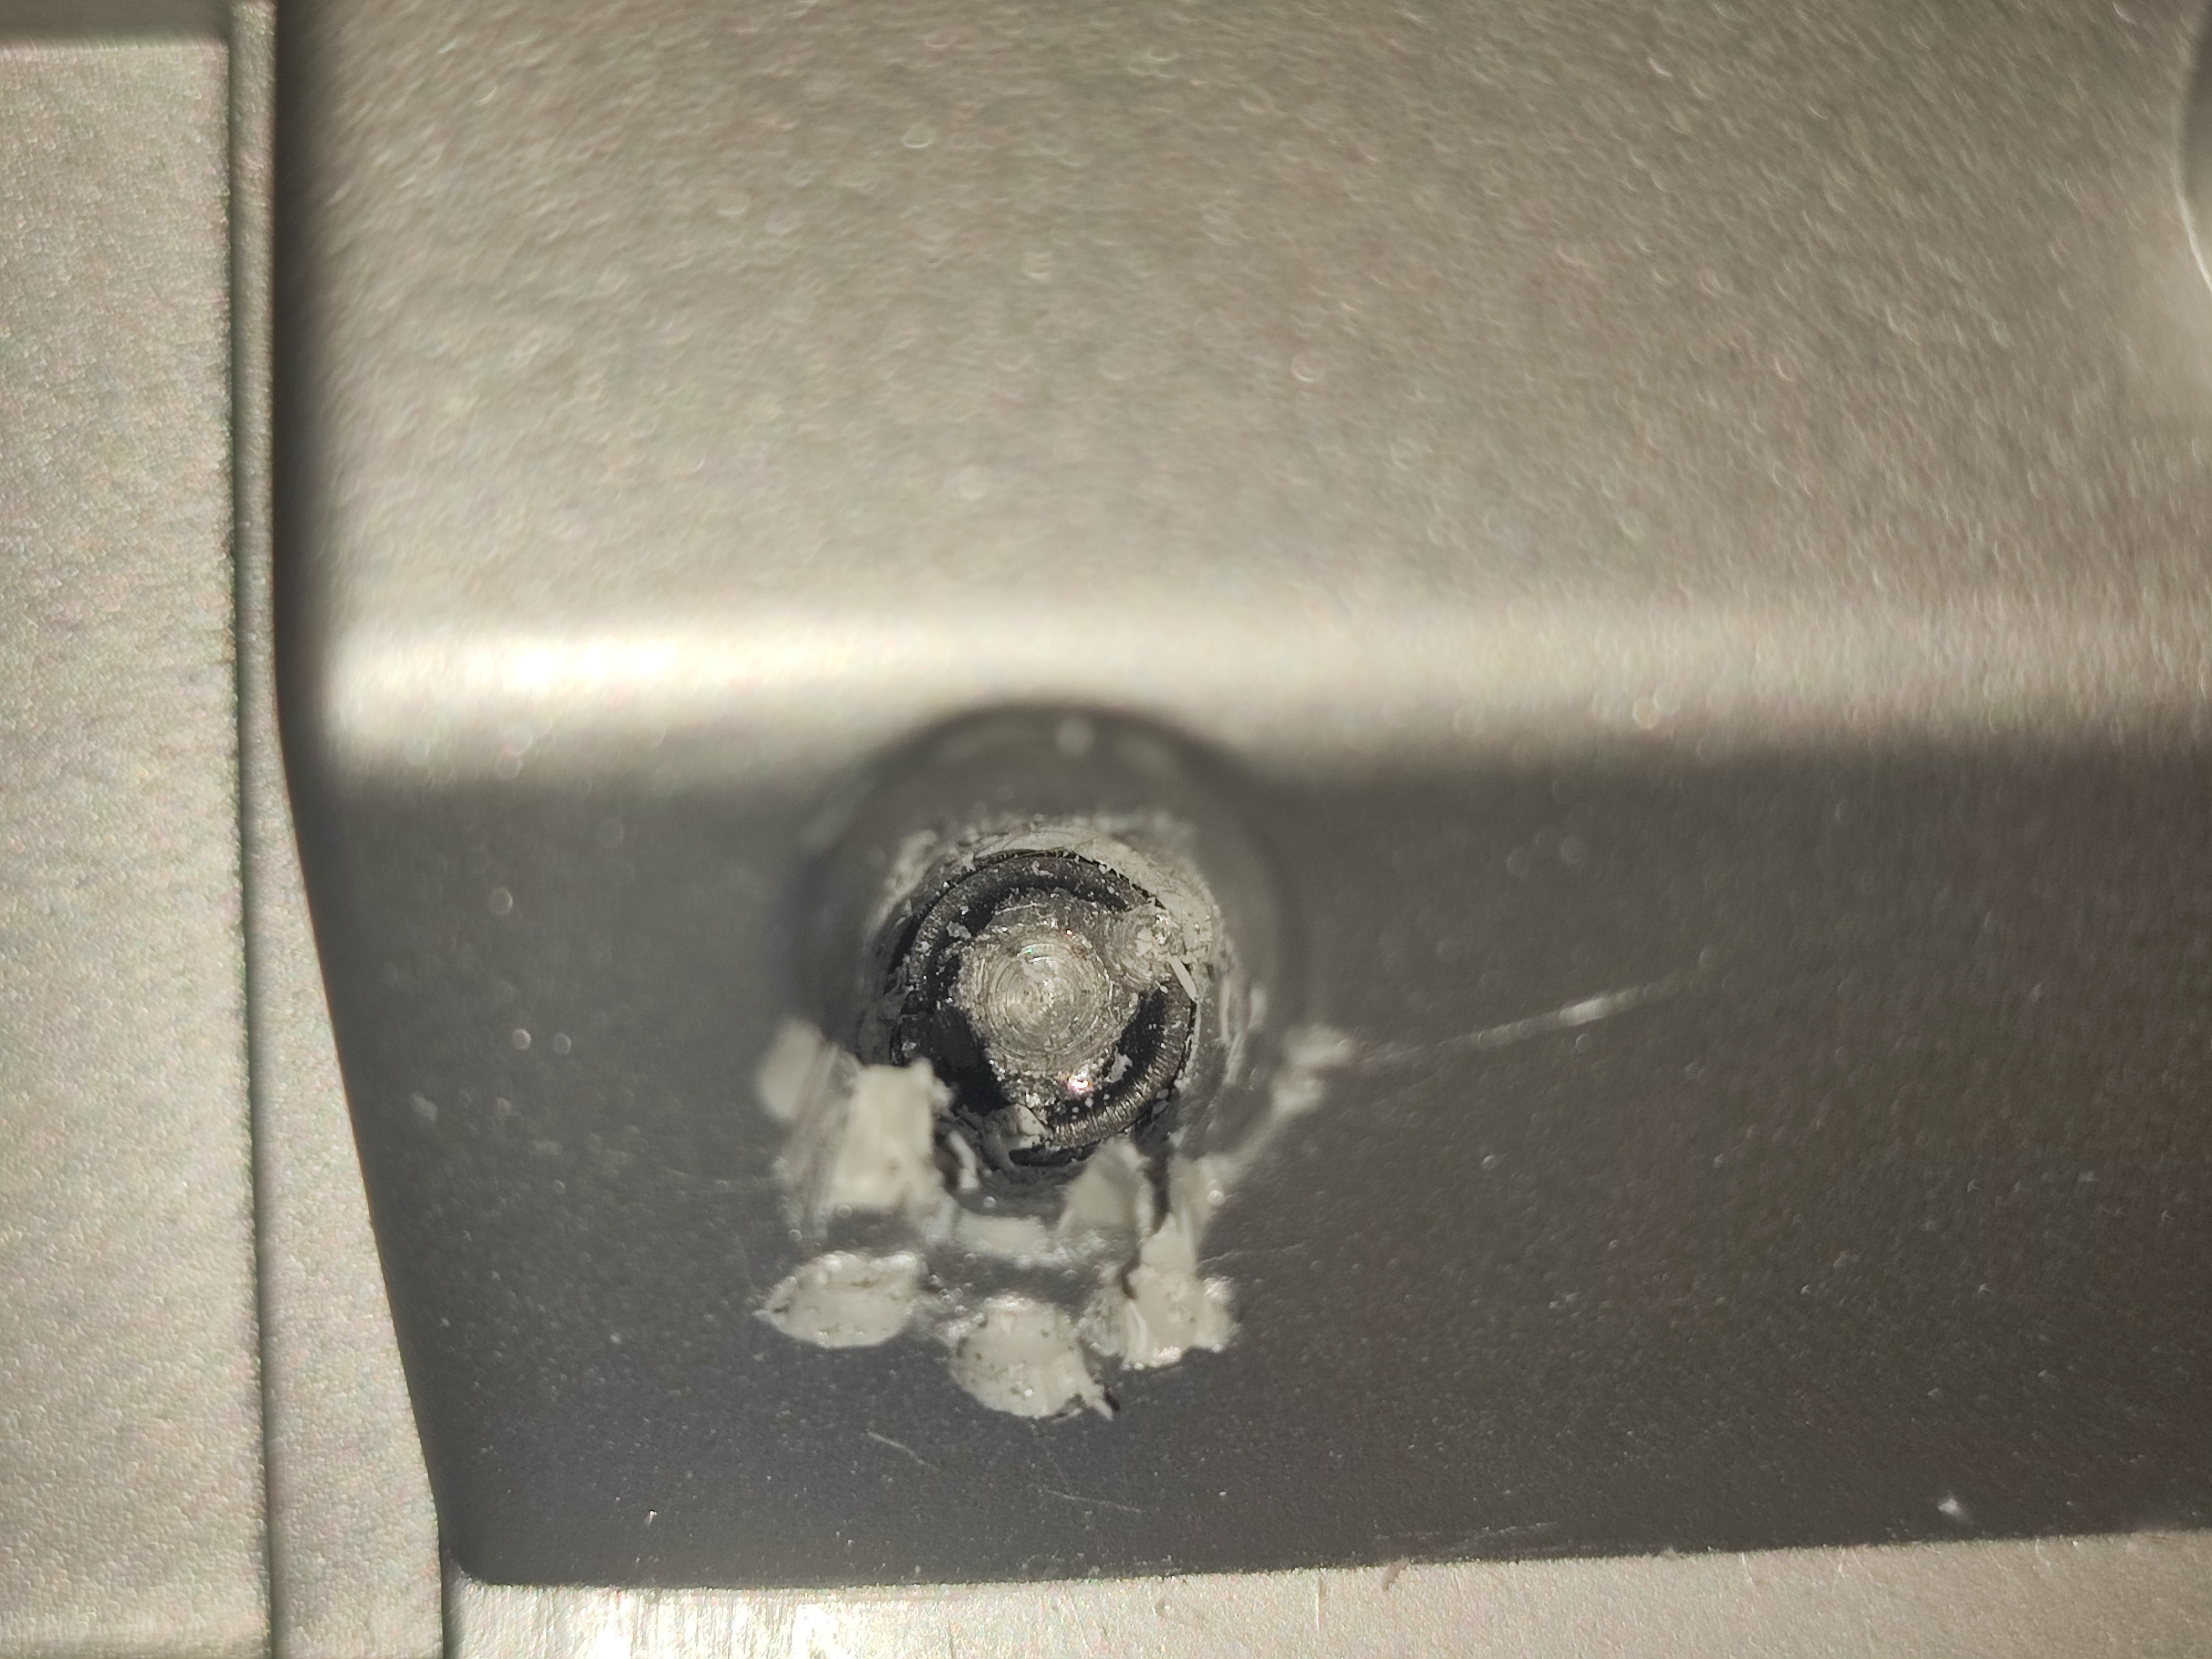
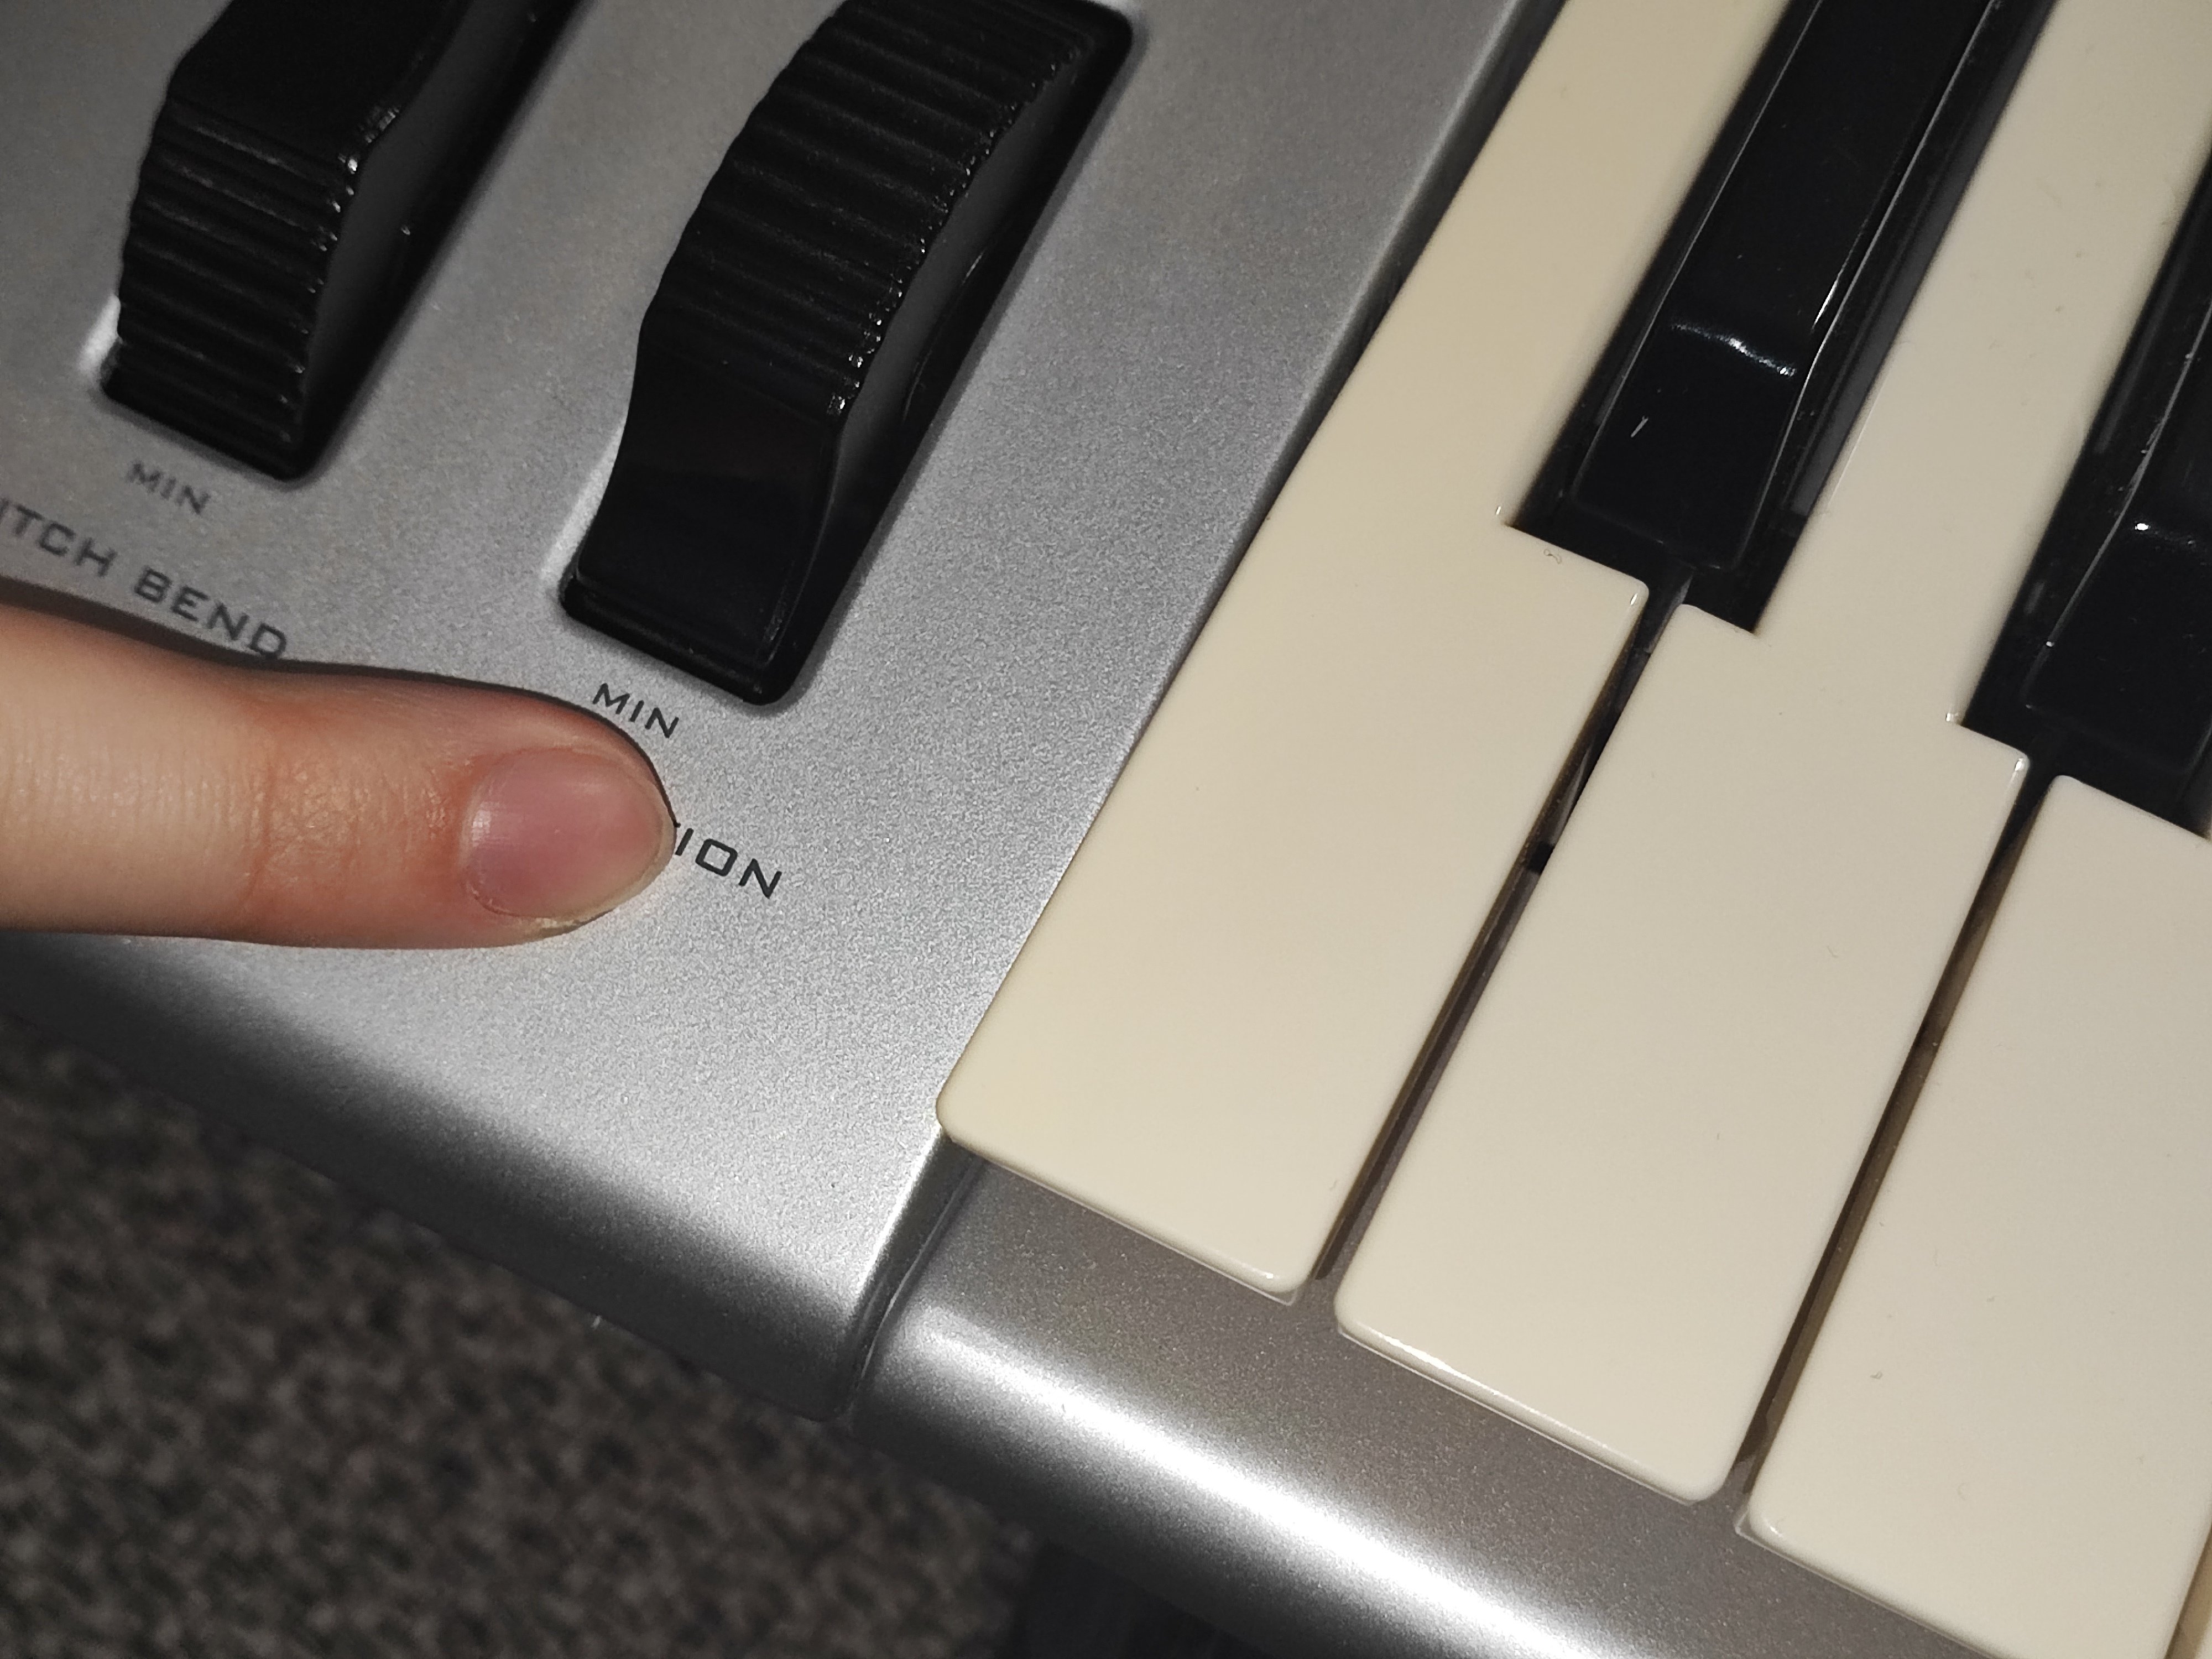
But I have trouble getting it open because one of the screws has been completely mangled:

The screw sits directly under this spot:

But that's also exactly where there is a PCB inside that I don't want to ruin by not being careful.

The things where the screw is in looks like this: Bottom: Top:

I hope maybe someone has an idea how to get it open without destroying the PCB which is very close to it.

20
23
submitted 1 year ago by favrion@lemmy.ml to c/diy@lemmy.ml

My Binkols 25-quart air fryer TO-A24 model is only toasting now. The other functions, such as air fry, broil, warm, and bake, all stopped working.

21
31
submitted 1 year ago by webghost0101@sopuli.xyz to c/diy@lemmy.ml

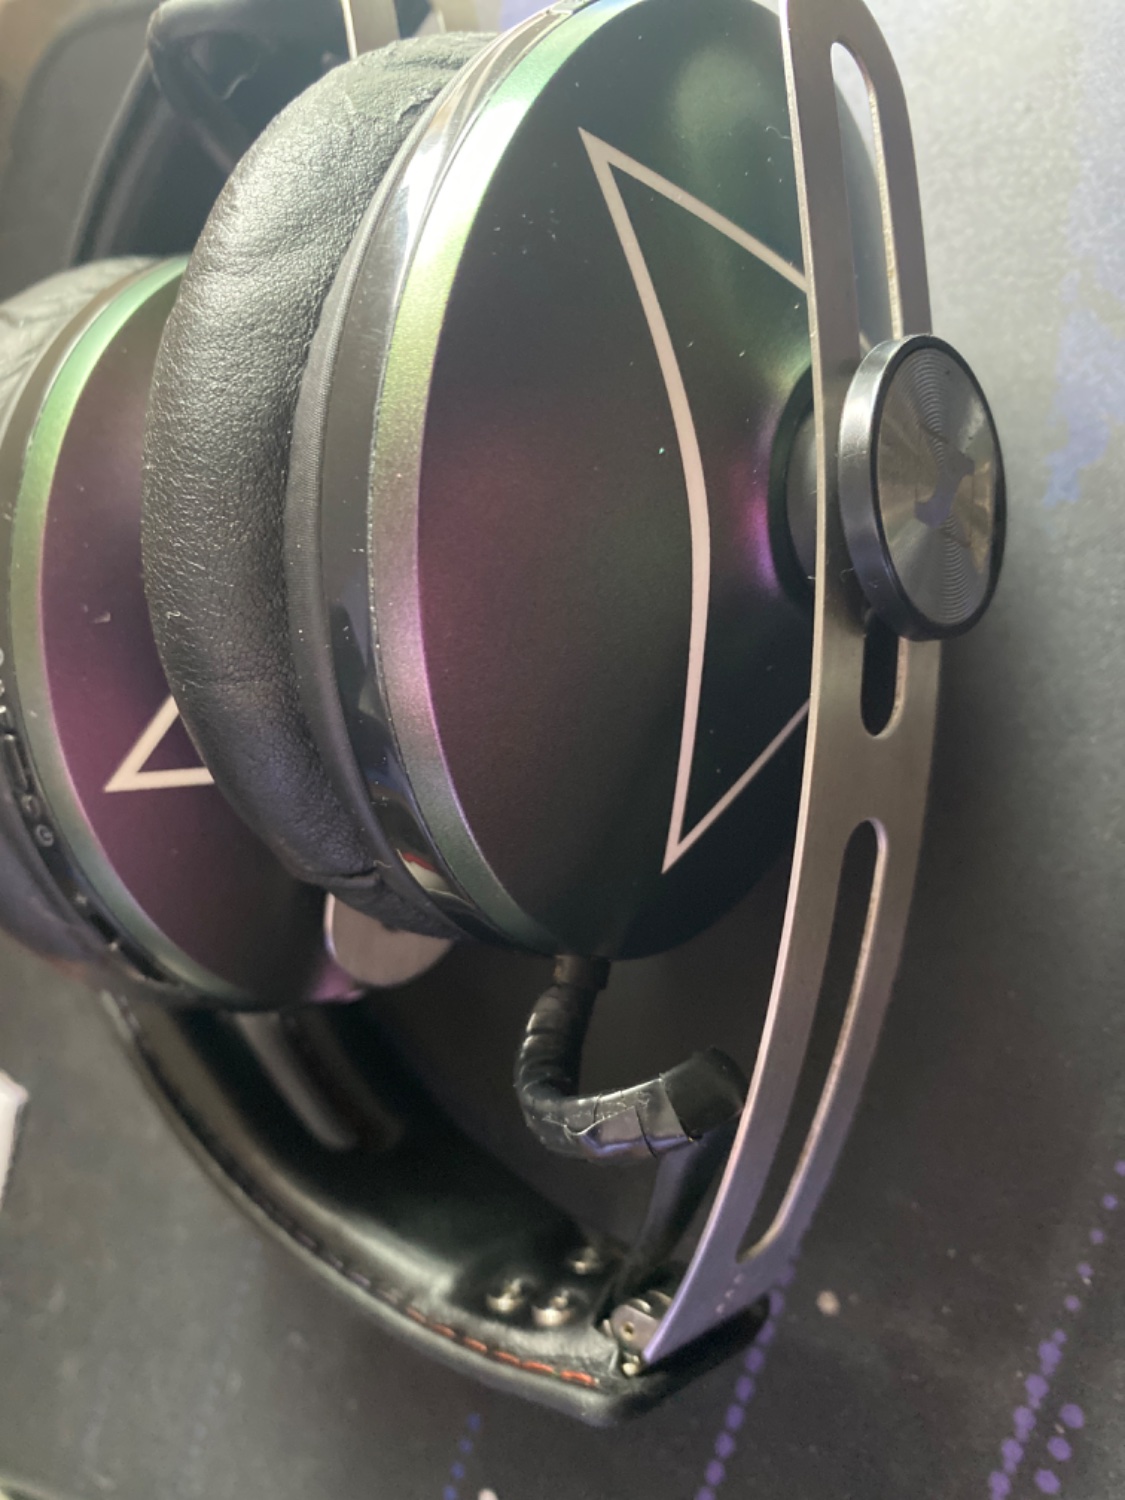
Model is Senheiser Momentum2 HD1 Bluetooth (over ear) PF edition.

I have wrapped electrical tape over it but cables on both sides have started to disintegrate/decompose.

I know next to nothing about audio cables. I care more about functional quality then original looks so i would be willing to swap the entire cable for a more permanent one, but i wouldn't want them to look ugly either and need to find a good way to fit them to the earshell.

22
9

May have accidentally sent my earbuds through a wash cycle, pretty gnarly corrosion on the right bud and the main charge controller. My first water damage! Is this worth doing anything with or shall I move to another used pair of buds? For reference I picked these up secondhand for $50 :)

23
5
submitted 1 year ago by Mhinkle79@lemmy.world to c/diy@lemmy.ml

Got a new tv that works with my existing mount but it’s just not working like we need for this bigger tv. Could I put a new mount using the same holes. My concern is the bolts won’t have the same resistance to being pulled out. Google foo was no help on this and the Reddit link of course has been deleted. Thanks in advance!

24
13
submitted 1 year ago* (last edited 1 year ago) by tomkatt@lemmy.world to c/diy@lemmy.ml

New house, was built/finished just under two years ago. I live in a dry climate, have been in my house for two years and only now discovered this. After some recent storms led to water in my window track I found my rear sliding windows have weep holes in the bottom, but they weren't draining.

After a lot of testing (filling the track with water, shop vac'ing it out, blower testing with air gun, suction with vacuum, etc.) I realized the weep holes in the interior of the window track and the weep holes on the exterior have no connection whatsoever. No water goes from inside to outside, and air blowing through exterior hole is felt through other exterior, and likewise with the interior, but nothing is going from interior to exterior. Water in the inside track will drain until the portion underneath fills and then pools up, and likewise, if I spray water in the exterior weep holes, nothing gets to the inside track, but it eventually comes out the exterior weep hole on the other side.

After some research, I found it's not uncommon for this to happen, it's a common defect with these sort of windows and I just drilled into the exterior weep hole with a 1/8 bit until it met the interior channel and sure enough, the water drains out as expected now. Put the window track back in, window back on, and tested pouring water in the track, it's draining perfectly now.


My only questions are, do I have anything to be concerned about with this DIY fix? Since the climate here is normally very dry (high desert, Colorado) and moisture evaporates quickly, I'm not worried about mold, but is there anything to keep bugs from getting in through the weep holes? They're not covered in any way. Also, will there be any winter concerns with the cold in sub-zero temperatures or snow/ice build up?

Apologies if these are dumb questions, but I'd literally never heard of weep holes until this week, with discovering the issue. So not sure what potential issues they might have, and honestly no way to know if I fixed this as intended.

25
24
submitted 1 year ago* (last edited 1 year ago) by aurelian@lemmy.ml to c/diy@lemmy.ml

I recently stumbled upon a fantastic swivelling recliner chair on trash day in Amsterdam, but there's one small catch – it's missing its base! The chair itself is in great condition, and I couldn't resist the opportunity to bring it back to life. However, I'm facing a bit of a dilemma when it comes to finding the right chair base to restore this gem to its former glory.

What I want to achieve:

  1. The chair is a swivelling recliner, so I need a base that allows it to swivel.
  2. I don't have any information about the chair's brand or model.
  3. I'm open to both purchasing a replacement base if I can find the right one, or attempting a DIY solution if that's feasible.
  4. I am located in the Netherlands, so I would prefer to get something local but am happy to order online.

I've tried searching online, but without knowing the specific chair's make and model, it's been challenging to identify the exact base I need. So, I'm turning to this wonderful DIY community for your expertise. Here are a few questions I have:

  1. What strategies or resources can I use to identify the chair's make and model based on any existing markings or features?
  2. If I can't find a matching base, how challenging would it be to fabricate a custom base that accommodates both swiveling and reclining functions?
  3. Are there any common standards or measurements for chair bases that I should be aware of when searching for a replacement?
  4. Any other tips, tricks, or advice on how to go about this project would be greatly appreciated!

Please let me know if I should add any pictures to the album HERE.

Thanks, everyone who takes the time to read this and respond ^ _ ^

view more: next ›

Do-It-Yourself, Repairs and Fixes

2 readers
1 users here now

Share tips and tricks to keep people from throwing out that broken item. Repair before replace!

founded 5 years ago
MODERATORS