Home Improvement

12304 readers
1 users here now

Home Improvement

founded 2 years ago
MODERATORS
1


Hello home improvement folks!

I hope it's ok to ask for help about my condo since it's not a house. It's my first property so I'm learning a lot.

This weekend I opened the showe drain to remove the accumulated after the shower became slow to drain. While cleaning the drain I noticed it was cracked. I thinking about putting some jb weld, flex seal or caulking as a temporary fix to stop the leak. I'm worried about leaking into my downstairs neighbors. I would like to replace this part of the drain, however I'm having a hard time finding information on the different types of shower drains. It seems like most drains are screwed-in, but the green stuff is making be think that mine might be glued. If anyone has some advice or resources I could look at I would be super grateful.

2


I have a friend who has a Rohn self-supporting antenna tower (like the one pictured) with a directional cellular antenna at the top. The tower is probably 40 feet high and was erected by a previous homeowner. They would like to make it useable again but the antenna needs to be turned to point at a specific cell tower.

The manufacturers documentation indicates that the tower is climbable but I've never dealt with these towers and thats outside my expertise. Who would I even call for that type of job?

3


I believe this is the vent to my plumbing but I’ve never seen a cap like this. Any ideas?

4


I picked up a couple steel-coated fireboard heat shields for my wood stove(s) and need to install them against the wall, with a minimum air gap behind of 21mm / 7/8".

I'm looking for suggestions on what to use for standoffs/mounts. I considered some galvanized steel u-channel sign posts, but not sure if they are ok at high temps, and the shop selling them couldn't verify it either. It would be convenient since I could use the existing holes to bolt them to the wall. Would these be ok? Do you have any better suggestions? I'm not sure if my 18V Ryobi drill can make it through steel pipes or whatever else so please consider that in your suggestion, or tell me how I could pull it off.

5


Hello smart people!

I have bought a kiln. And a kiln vent kit:

https://skutt.com/ceramic-kilns/kiln-accessories/envirovent-2/

We are two hobbyists and the kiln will live in the basement. We are in a block foundation bungalow with vinyl siding, and the basement extends above grade such that it has a variety of 24" (I think??) windows. The basement is unfinished and we are not looking to finish it. That works well for the kiln which likes a nice concrete floor lol.

I would like to install the duct on the kiln to vent out of one of the windows. I could make a new hole in the wall and install it as per the illustrations on the website, but every time I am reminded of how thin my walls are, I want to throw up. It would also be under my nice bay window in the living room and I'm not super into having it vent there.

My thoughts are to hang the duct along the ceiling to the window and to create an insert that I can place into the window frame with clips or something that would connect to the hose.

I guess these types of windows are commercially available: https://www.bestlouver.com/product_info.php?products_id=176&srsltid=AfmBOopOt16bNT3fGDBNVBRfXd4rXaRLBy_OH-xcBIZ6HRgnpYQ3xRyG but I'm not looking to replace the window and it would be ideal to be able to remove the insert if needed. Or even just disconnect the hose, if removing the insert isn't ideal.

The hose would have to snake around the well pump room, and I'm not totally sure I want to put the hose in the rafters (or whatever they are called) because the electrical wiring is there and the hose will be hot. I was going to have hangers to suspend the hose but ideally we would disassemble the assembly when the kiln was not in use. I can't imagine we would be firing more than twice a month, at least until my husband convinces me to offer kiln space to others.

Pests are an issue so we would need to seal it well. The vent outlet would end up being maybe a foot or two off the ground max, which is another reason I want to disassemble and possibly remove the insert. I would potentially make something that sticks out on the outside a bit more so we could still use the sliding glass pane to close it off when not in use.

I guess what I wanted to ask is if the community has any sage advice? Anything we should look out for or keep in mind?

6


Hi all. I've mounted a couple of things to studs before without an issue.

But I have a little bit more of an elaborate setup. I have a bunch of shelves for my cat that I want to put on the wall. I have a stud/wire detector, but one of the walls I wish to use has voltage detected across a very large area for some reason. And when I put my hand on the wall, it stops ever detecting any wires at all!!

Could there really be that much electrical wiring within this one wall??? There is a singular outlet in this area, but the detector goes off all over the wall, not just above the outlet.

My studs are very far apart at around 24 inches. So only small portions of the shelves will be drilled into the wall and the rest will be seated in the drywall with drywall anchors unfortunately.

How can I work on this project...drilling into both studs and drywall while avoiding the 10,000 wires that are evidently inside of my wall??? And also why do the "wires" all disappear when I touch the wall??

Thanks all lol.

7


I’ve recently become the owner of a home that was constructed in the mid 1950s (in the US). As such, not all the outlets are grounded, three-prong receptacles, since that wasn’t code-required at the time. It looks like a few have been added or upgraded over the years, but there are still many that are ungrounded. What is the best way to go about converting those receptacles to be grounded? Will that require a professional? It seems like probably the kind of electrical work that I am capable of doing myself, but I am also very much not an electrician.

8
24
Asbestos Paint? (drive.google.com)
submitted 3 weeks ago* (last edited 3 weeks ago) by paul0207@lemmy.sdf.org to c/homeimprovement@lemmy.world


Is there any indication that this old peeling paint contains asbestos? (Sorry for the picture link but my lemmy server is not currently working with attachments). Thanks.

9
109
Sump Pump - Part 2 (sh.itjust.works)
submitted 3 weeks ago* (last edited 3 weeks ago) by jubilationtcornpone@sh.itjust.works to c/homeimprovement@lemmy.world


Finally got the sump pump installed. Hardest part was digging the hole which was 22" of mostly rock with a little clay mixed in. No more leaky basement!

Original post:

https://sh.itjust.works/post/45678650

10
53
submitted 3 weeks ago* (last edited 3 weeks ago) by HeyJoe@lemmy.world to c/homeimprovement@lemmy.world


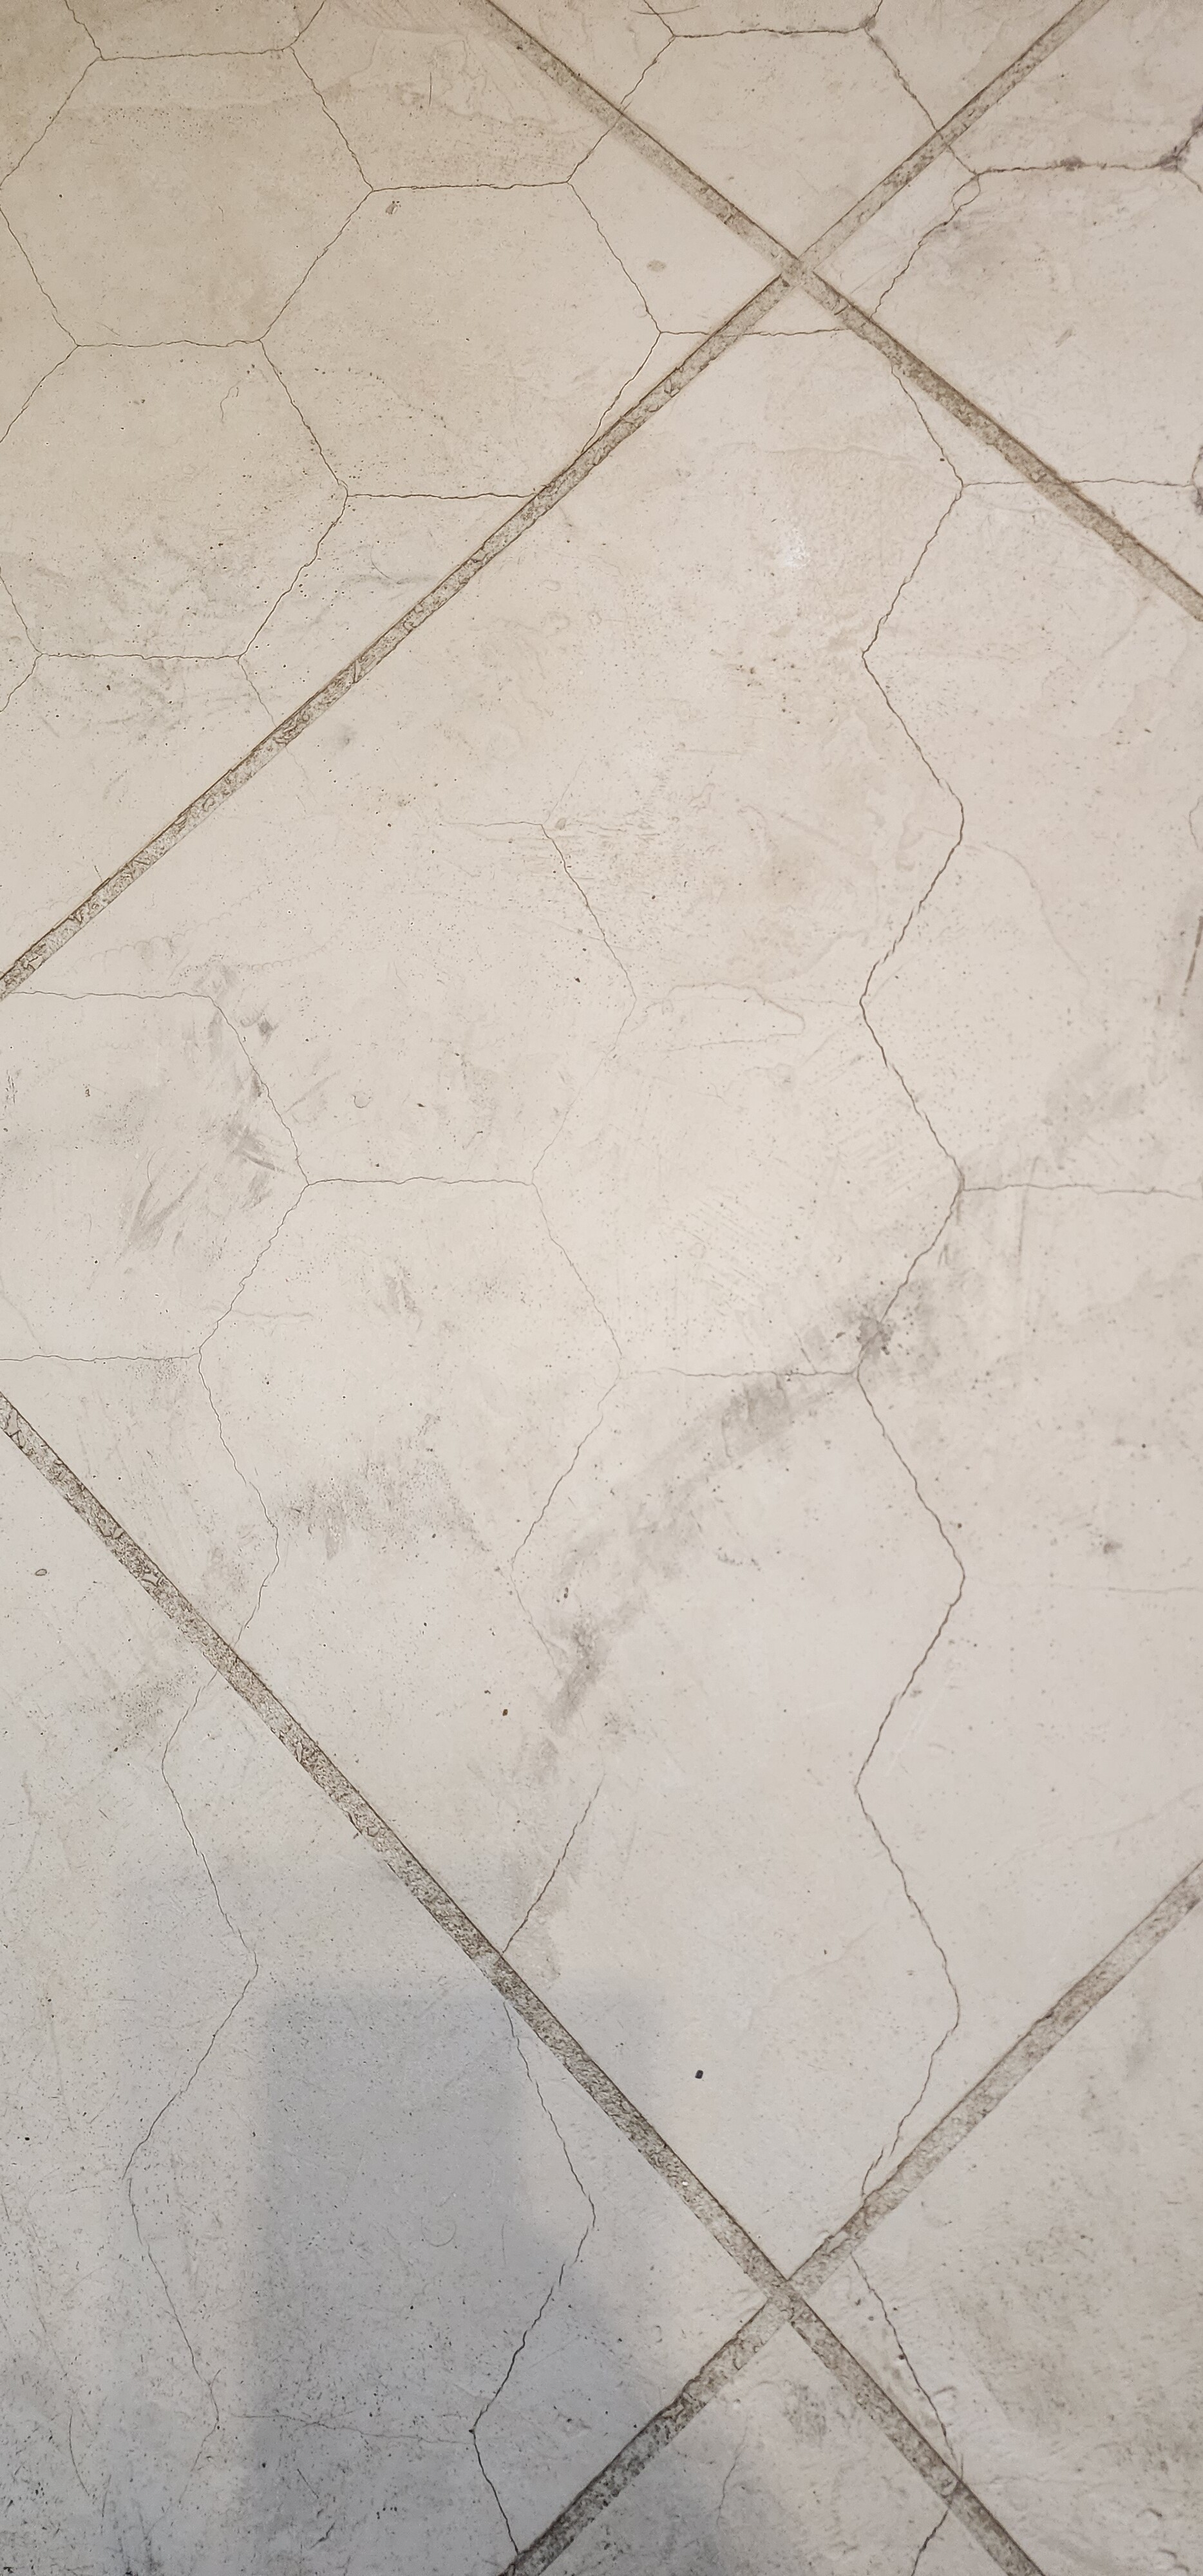
This is the same tile that existed when we moved in 10 years ago. Over the years, our kids have splashed water out while playing in bathtub and some toilet accidents... it has caused some areas to start showing hairline cracks revealing the big tile is really just a bunch of small ones placed together. Is there any easy fix to cover this somehow, or will my only real option to redo the entire floor? Thanks!

Thanks for the comments, and the answers are lining up with my thoughts. You are all correct, there have been countless lazy attempts in the house where they cut corners, so it would not be surprising if they did that here as well. Guess redoing this at some point is the #1 option.

11


I have a mold issue in the basement which I believe is caused by water seeping in through number of cracks on the exterior:

cracked

Is this DIY repairable? Does it require a mason or could it be sealed with silicone?

12


Looking for input. I’ve got a 4” to 1.5” flared flex cap for the base but trying to adjust the pipe ever so slightly seems to be troublesome. Any thoughts?

13
115
Flooring Pop (lemmy.world)
submitted 1 month ago* (last edited 1 month ago) by yedfixy@lemmy.world to c/homeimprovement@lemmy.world


Flooring is by no means beneath me, but I haven’t really done anything below a shoe molding. So question for the tile high club: What would you do in the pictured situation? These are floor sections that have always felt a bit “squishy”. Today they finally popped up into the tent formation you see here.

Wait for it to settle and then add glue to keep it down? Cut it to fit?

Additional context:

I did not do this install myself, so the history is a bit of a mystery. This is installed in a full bathroom and is made of what feels like a smoothed slate material. I believe it is a composite tile.

More photos for context:

14
105
Broken stair step (lemmy.world)
submitted 1 month ago* (last edited 1 month ago) by callcc@lemmy.world to c/homeimprovement@lemmy.world


Hello community, I noticed that this stair step in my european 60ies house was a bit cracked so I broke it off completely. How would you fix this? Some mortar or tile glue? Does it need some kind of rebar?

15


My living room has no permanent light fixture. This wasn't a problem when it was just me but now my wife and I spending more there so it's time for a change. I'm looking a simple, "no installation required" solution since we plan to move in the future. Any suggestions? Thanks in advance.

16
17


We bought our house about 2.5 years ago. Originally built in 1974, it was the first house in this subdivision by at least a decade. There were a few issues we knew about, and a few that we didn't.

Most projects involve a lot of cursing the people who built this place because despite the structure being very solid -- they went way overboard on materials -- they were also idiots who didn't seem to know how gravity works or how to use a level.

A big issue we learned about after the sale was the storm water drainage issues, including a complete lack of storm water drains, no drainage around the foundation, and a bad leak at the lowest corner that would routinely flood the basement after a moderate rain.

Oddly enough, the foundation is in pretty good shape and has no major cracks or settling. Probably because the ground underneath it is a very compact mixture of clay and rock.

Stormwater Mitigation Steps Taken Prior to Now:

  • Installed a central drain line to divert downspout runoff on one side of the house. (Took a day with a mini-excavator).
  • Dug up an existing and fully blocked drain line on the other side. Replaced most of it (took two weeks of evenings by hand).
  • Replaced all the gutter and valley guards (as part of roof replacement).
  • Sealed cracks in front sidewalk.

This upgrades resolved most of the flooding. I learned last spring that if the gutter guards aren't kept reasonably clean, the gutters will overflow and dump water next to the foundation, resulting in basement flooding. I figured it would be best to install a sump pump with the best place being at the lowest point. Unfortunately, the lowest point is in a weird little crawlspace that's big enough to stand up in but only has a 2'x2' access door.

The other day, I started to dig the hole for the sump pit and immediately found a concrete slab extending 2 feet out from the interior wall I didn't know was there because it was covered with dirt.

I cursed the people who built this house -- for the hundredth time -- for not just digging a basement for the entire length of the house which probably would have been one hell of a lot cheaper than the excessive number of blocks walls they built to accommodate a small basement and four (4) separate crawlspaces.

...anyway...

I jackhammered through the slab and started digging out the sump pit. It's slow going due to the ground being very hard and rocky but I'll get it done eventually.

18
40
submitted 1 month ago* (last edited 1 month ago) by Seefoo@lemmy.world to c/homeimprovement@lemmy.world


I am installing smart switches in my home. I have this 2-gang box at the top of our stairs, where I am doing a virtual 3-way setup for both switches. One powers the light on the stairs, the other the hallway at the top of the stairs. A few things:

  • This box has no live wires since its the other side of the two 3-ways (I have tested this by disconnecting all wires from all switches and checking for lives).
  • Each of the boxes is on a separate breaker. It has TWO sets of neutral pigtails in the back. This is the correct setup, but its possible the neutrals where mixed up during the original wiring of the house.
  • Each set of romex wires is connected to another set of romex. None of them criss-cross (except the grounds).

Now, here is my odd behavior and my need for assistance:

After wiring the two virtual 3-way setups (Option 2 from this page) everything was working fine. I was also planning to switch out the fixtures, so I went back and turned off the breaker for the hallway, but the smart switch for the hallway was still active (LED is on, I can see it on homeassistant). Now, I am thinking the original wiring mixed up the loads in the box with the incoming wires and the two neutrals for those breakers have been connected...anyone have thoughts on whats going on? is the solution here to basically swap the incoming 3-wire load romex?

**Solution: ** I am not 100% certain the cause of the issue. It is possible I mixed the wiring up when doing the virtual 3-way, but I basically followed the advice here and started from scratch. I traced the travelers from each of the main boxes and connected them to the appropriate load and completed disconnected the 3-way part. once I had the right load on the right travelers, I then setup the virtual switches wiring off the black wire coming with the traveler. Lastly, I ensured the neutrals from the two romexs that had a traveler+load where pigtailed with the virtual switch. took a bit of time, but felt this was the easiest way to not spin my wheels too much. Appreciate the advice, if anyone really does want, I can put together a diagram (on paper 😉 )

19


First, pictures:

Interior wall

Ceiling & rafters

Exterior wall

Under the carpet

My 1962-built house in Ohio has this three-season sunroom in back that was converted from a covered rear patio. For the first few years I lived here, I tried to use it as year-round office space, but it stays too humid back there during the spring/summer/fall to not have A/C or a dehumidifier going at all times, and I can't effectively heat it during the winter, so for the last couple years it has just been used as non-climate-controlled storage. I want to change that this year and make it habitable year-round.

From what I can tell so far, looks like the existing walls are solid enough, so I think maybe I could just add insulation and drywall? I don't think those ceiling rafters are functional, looks like they're just hanging there, so was thinking maybe I could remove them and raise the floor off that concrete patio slab some too.

All advice is appreciated - I'm not an expert on any of this, though I do have some experience performing the actual labor that would be required once I know what I need to do.

20


Technically this isn’t home improvement since it’s a summer cottage I’m fixing up for a customer. I’ve got to say though, what a fucking privilege it is to be self-employed and land jobs like this. An elderly customer with deep pockets handed me the keys to their remote cabin and basically told me to fix whatever needs fixing. No deadlines, nobody watching over my shoulder, and I’m free to come and go as I please. I wouldn’t go as far as to say I’d do it without pay, but I honestly can’t think of anything I’d rather be getting paid for.

EDIT: All time top 1 post on this community - yay!

21
22
23


Looking to put gutters here.

This is how others next door are done, as well as how the ones I'm replacing were done previously. Basically a downspout connected between two gutter's via a hole cut in them.

Is this actually the correct way to do this, or is there a better way that doesn't seem so janky and leak prone.

24


cross-posted from: https://lemmy.world/post/34021020

I recently installed an Emporia Vue with monitoring for the individual circuit my water heater is on. It captured the very significant difference in energy usage from replacing resistive heat with heat pump.

25


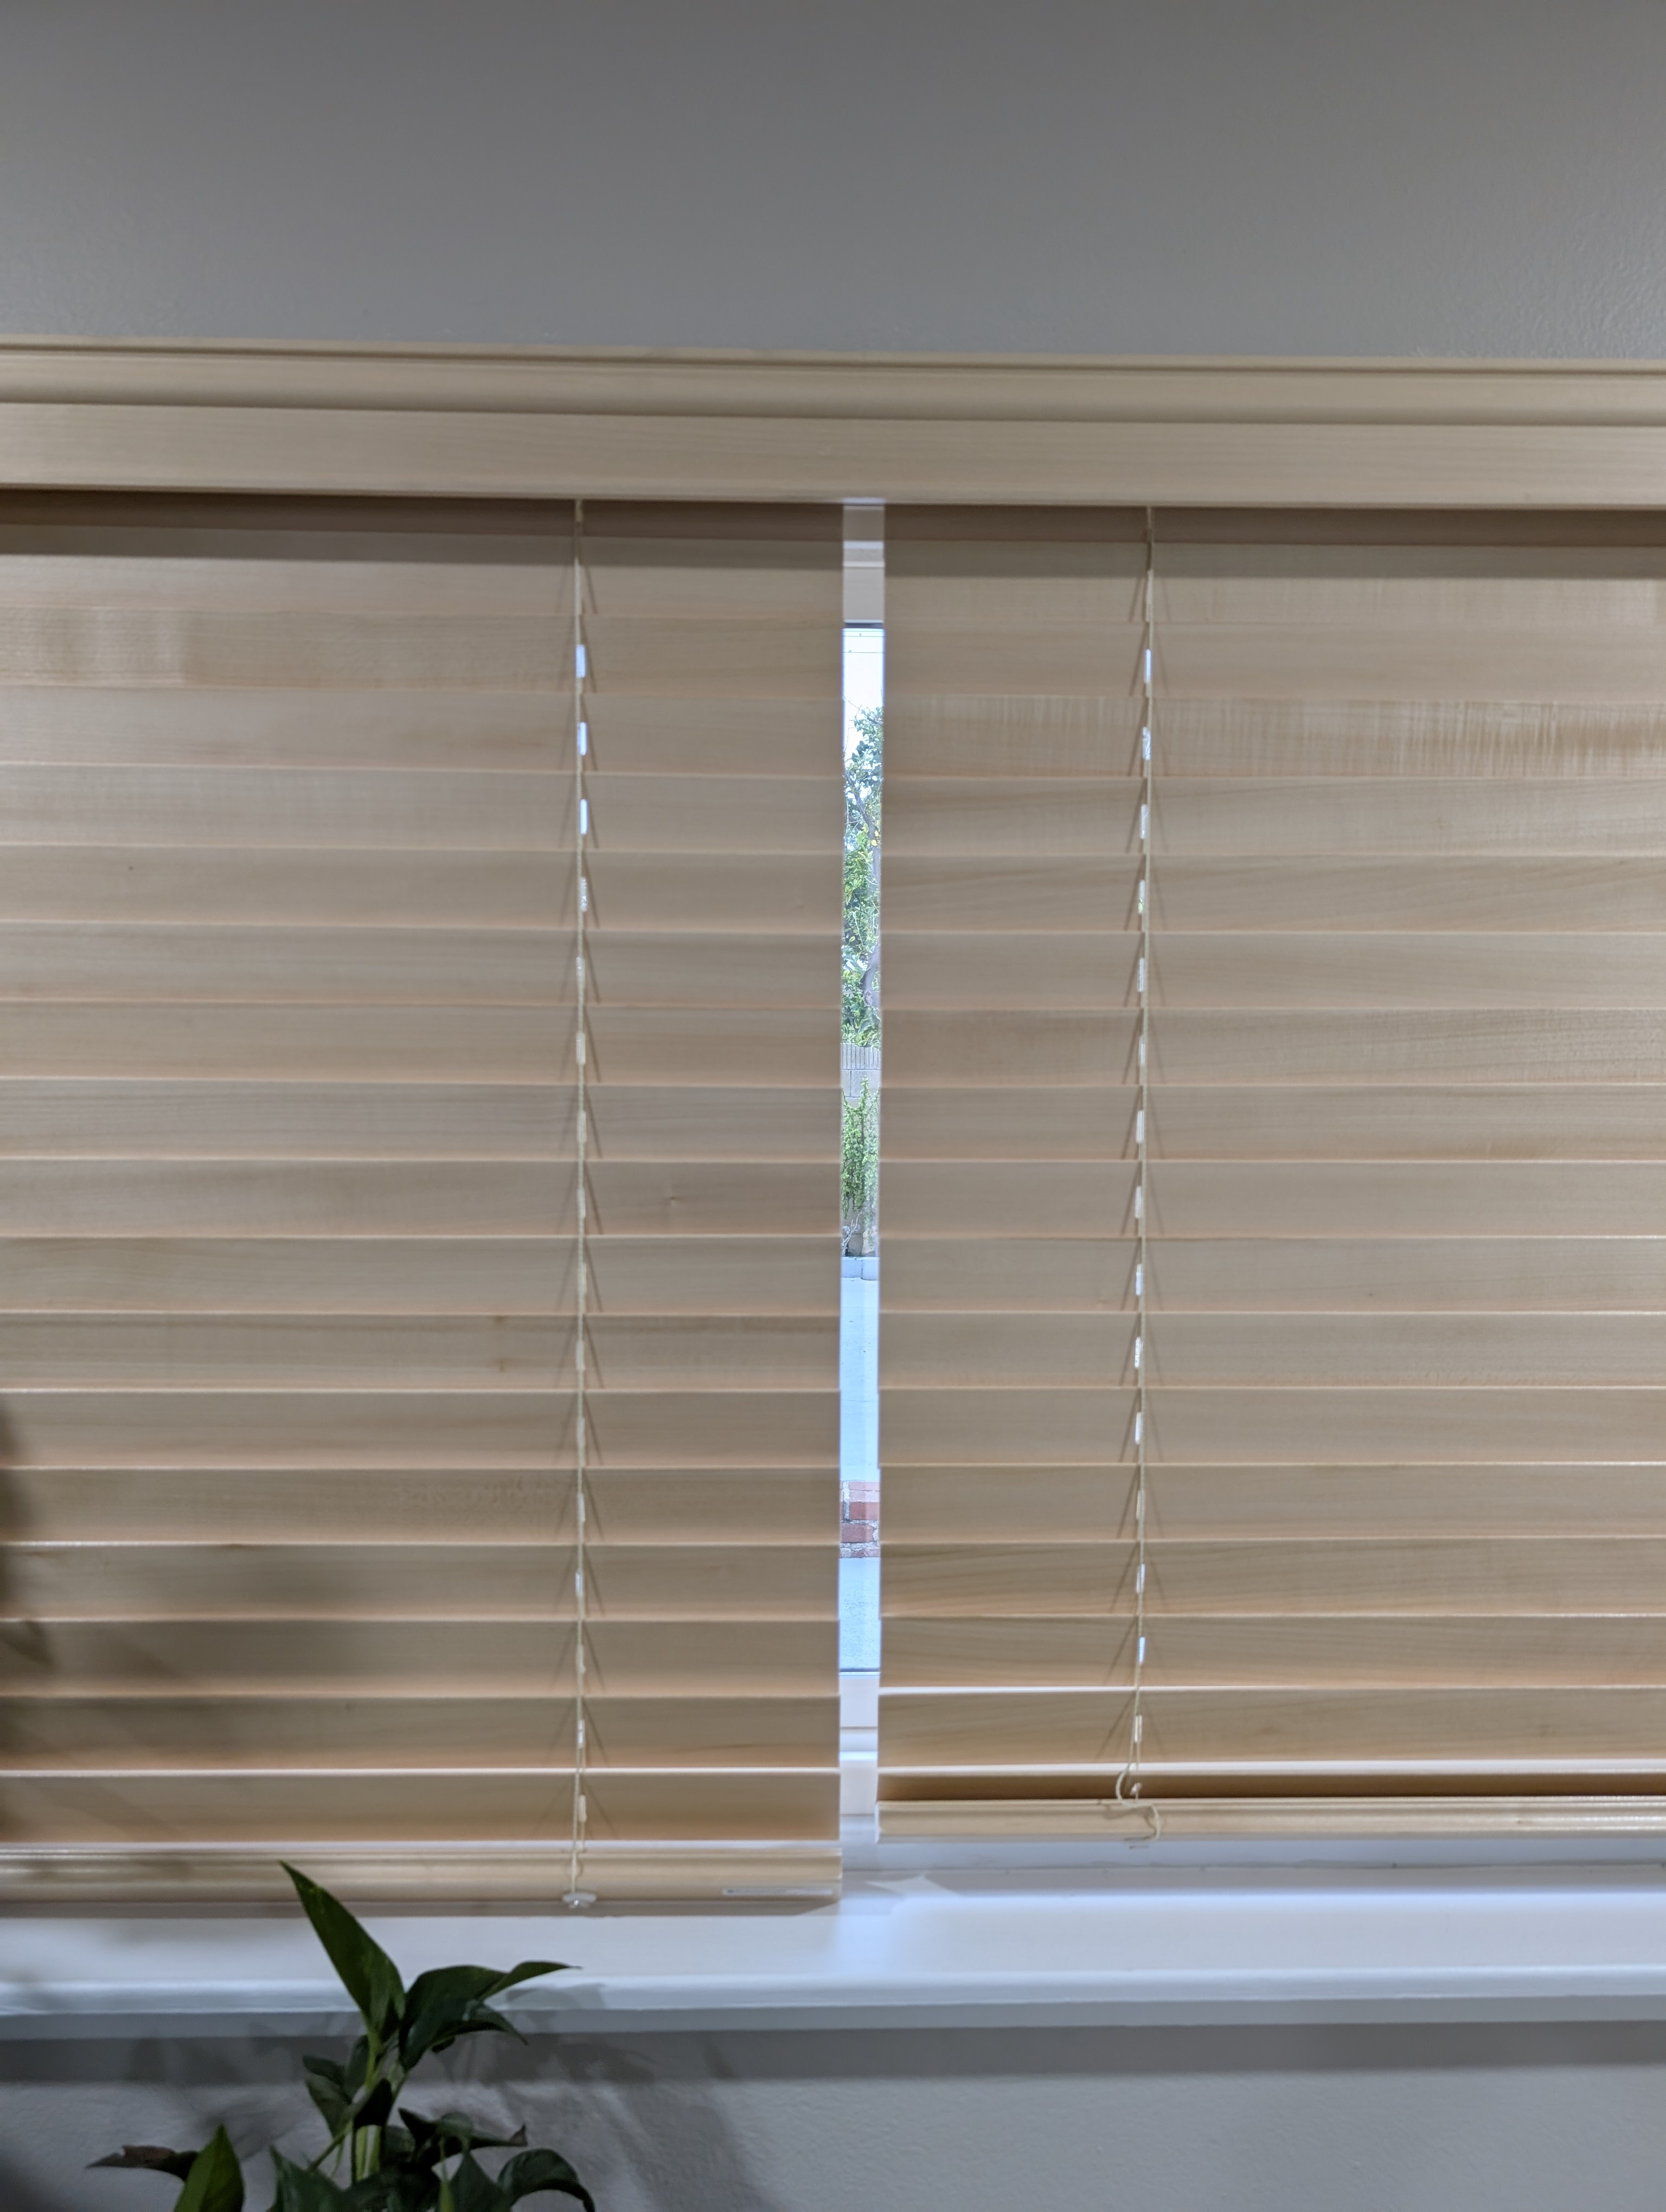
I'd like to know if there is something I can do to close the gap or hide the gap in the blinds. Obviously, I can measure properly and purchase new ones but really trying to avoid that.

I've also thought about curtains, but it's also something I'd like to avoid. Are there any solutions to this?

Here is another photo zoomed out.

view more: next ›