1
27
Cargo Bike Movement (www.cargobikemovement.com)
2
90
3
40
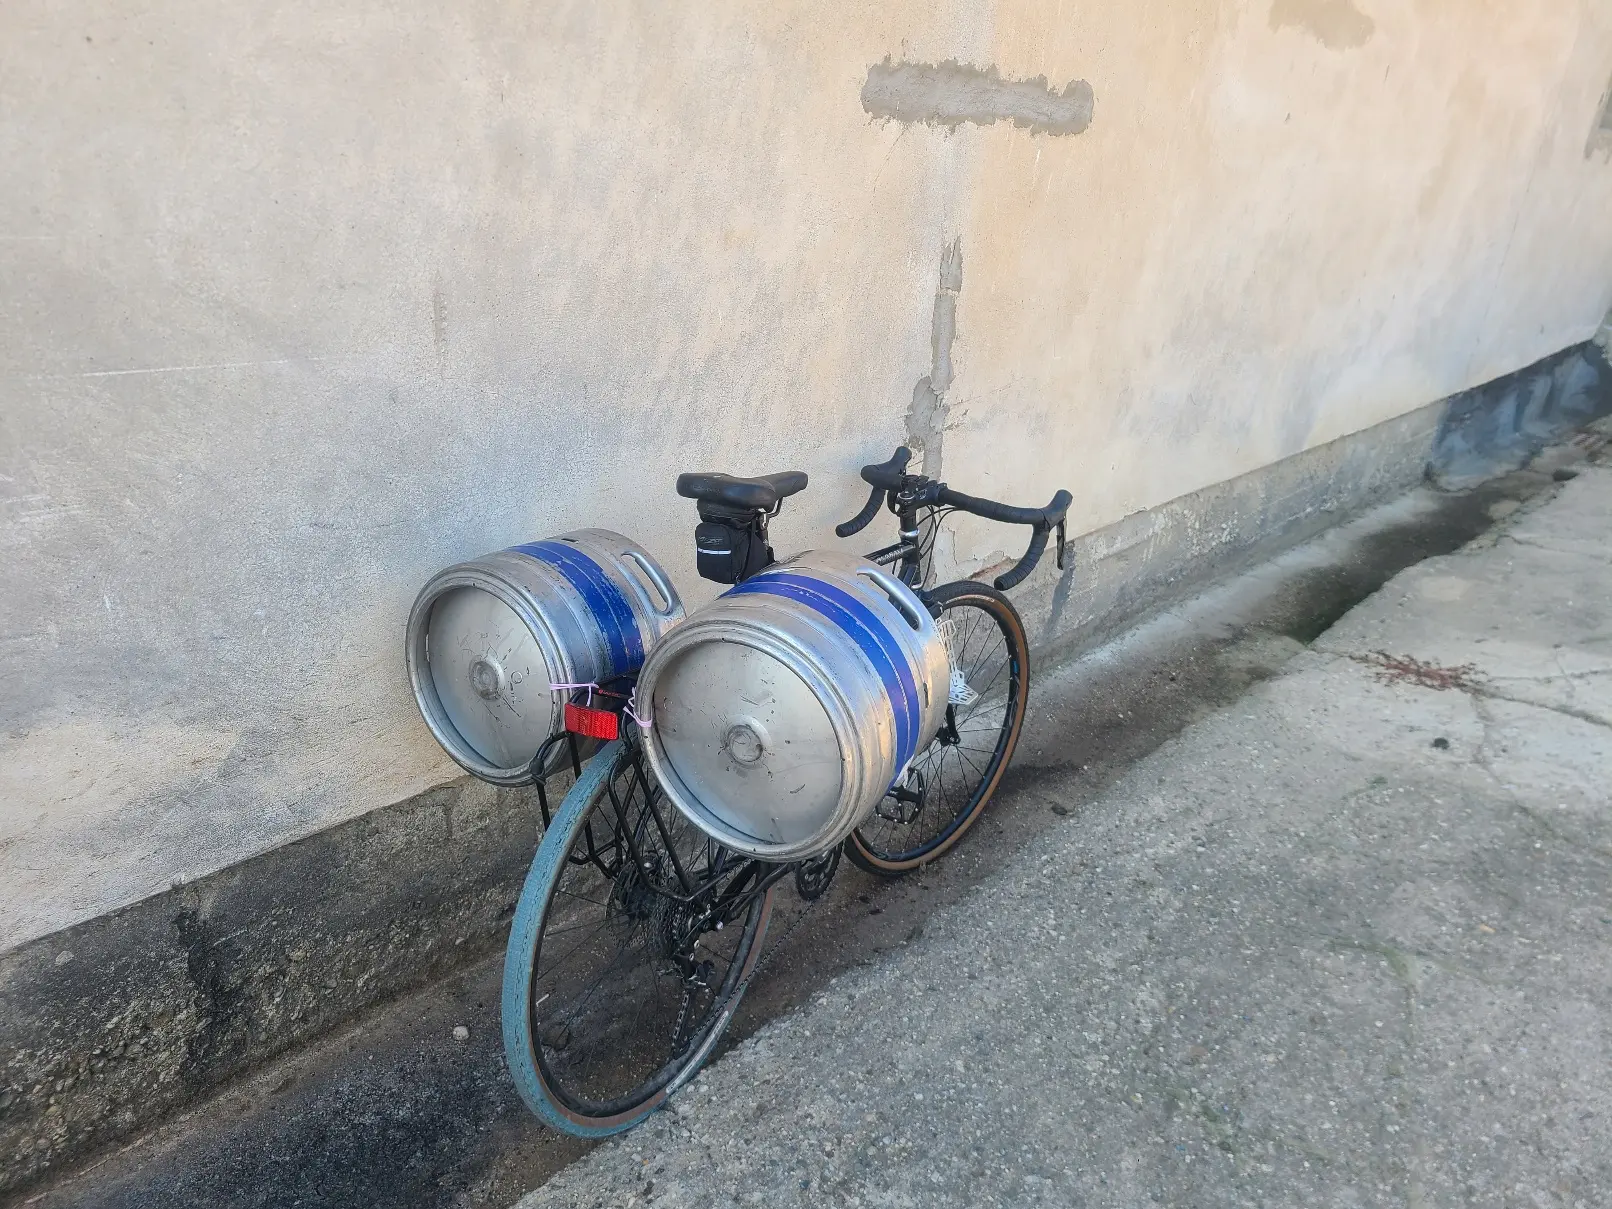
USS Kegterprise (sopuli.xyz)

cross-posted from: https://sopuli.xyz/post/16474902

Side view:

4
42

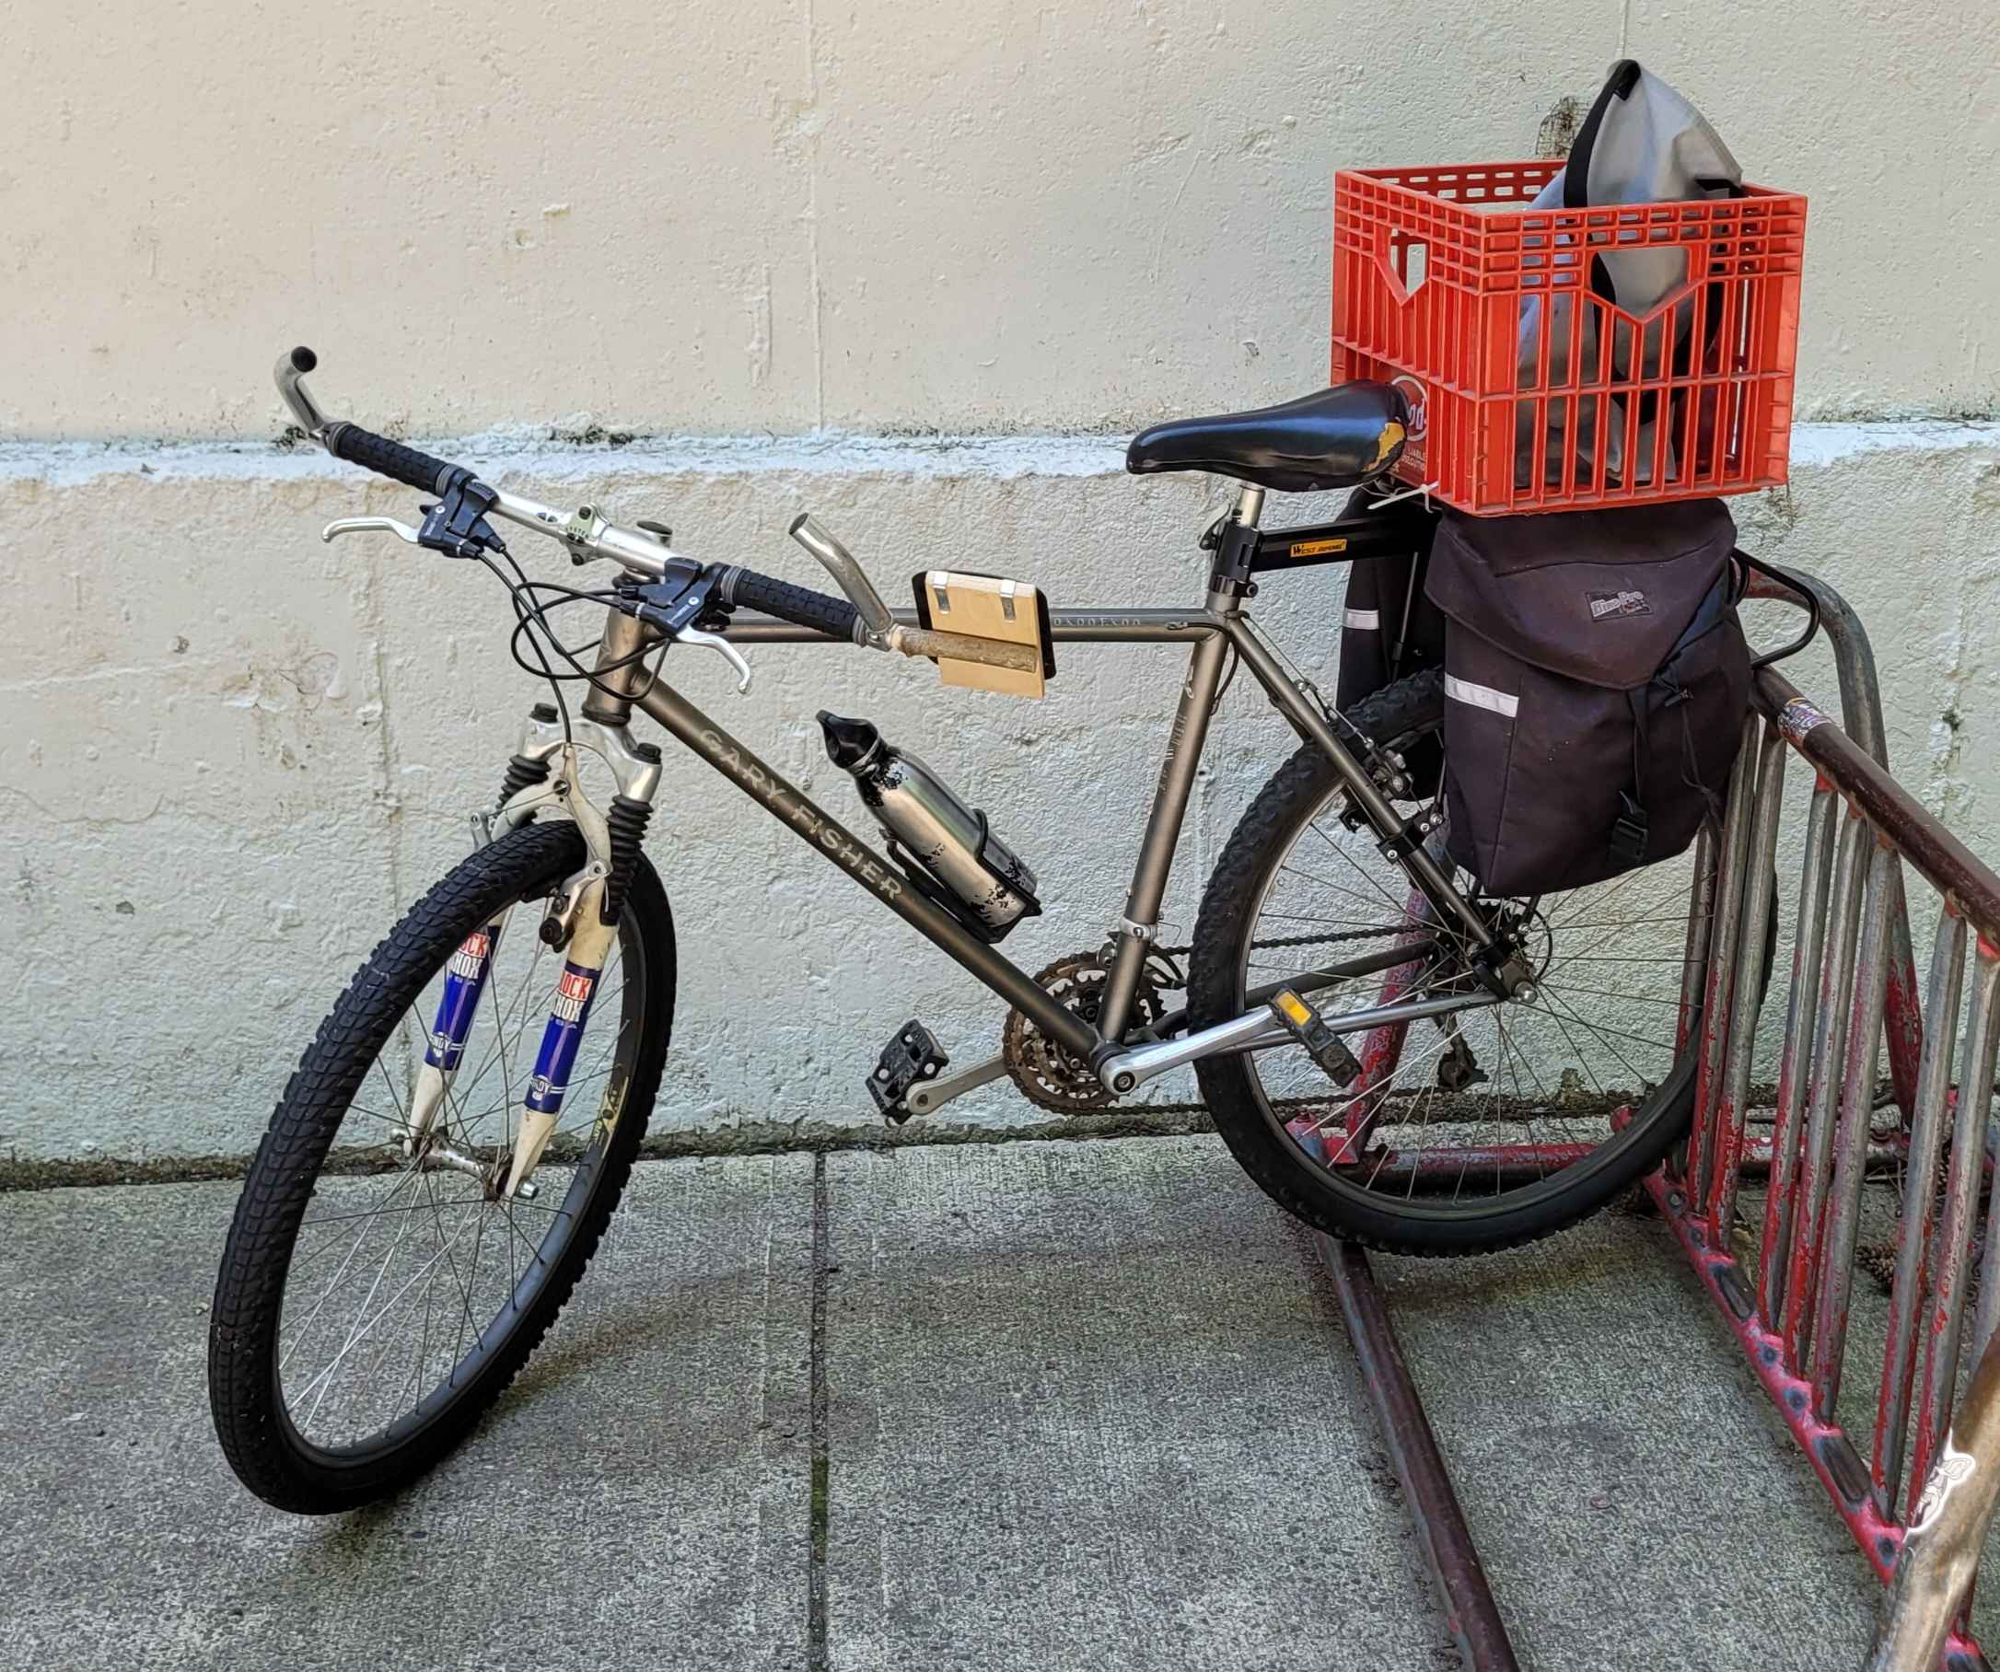
I've made a few trips to the hardware store and other errands over the years, using a backpack on my bike (years ago, when it was my only transportation, I hauled a small amount of groceries in a backpack and just made multiple trips) but this is the first trip I've made since I started trying to turn this mountain bike into a cargo bike. I've got the rear rack I talked about in that post, some basic secondhand fabric panniers secured with straps and zip-ties, and a milk crate from a consignment shop. I went for a pretty light grocery run for the first trip, just two totes of frozen stuff, and it rode just fine on the way home.

Thanks for all your advice! I think I'm going to upgrade to bucket panniers at some point soon, but I'm glad I can at least start using it like I'd planned.

5
18
6
5
7
74
DIY Camping Bike Trailer (campingwithsteve.com)
submitted 4 months ago by poVoq@slrpnk.net to c/utilitycycling@slrpnk.net
8
34
submitted 4 months ago* (last edited 4 months ago) by JacobCoffinWrites@slrpnk.net to c/utilitycycling@slrpnk.net

I previously posted looking for advice on turning my old steel-framed mountain bike into something I could use to haul groceries and maybe some bits of furniture I find on trash day.

I got a ton of helpful suggestions, and started out on what I think will be a gradual project as I make incremental improvements to this bicycle.

Step 1 was adding a rear rack, so I could add cargo panniers, or a basket behind the seat.

I settled on this one because I liked the extra support legs, and because it claimed to be able to support more weight than most other designs (something I remain skeptical about, but I'm pleased with the overall construction so far).

I did find that the right side seat stay was too crowded for two of the wraparound attachments to fit, so I'd need to use the built-in attachment point just above the rear gear.

Unfortunately, the lower support rod segment was too short to reach the attachment bolt. But that was fixable - the rod was just a length of 3/8 steel round stock with a flattened section where it bolted to the wraparound attachment bracket. It would be pretty easy to make one of my own.

I started by buying some 3/8” steel rod and a fresh can of propane for my offbrand bernzomatic torch (on two trips, one by train, one by bike because I didn’t realize the old one was empty till I tried to use it).

(Test fitting the 3/8 rod into the upper section of the telescoping rear post)

Then I got some of my old forging tools together. Without a proper forge or anvil, I knew it’d be pretty sloppy blacksmithing, but I didn’t need this to be particularly fancy.
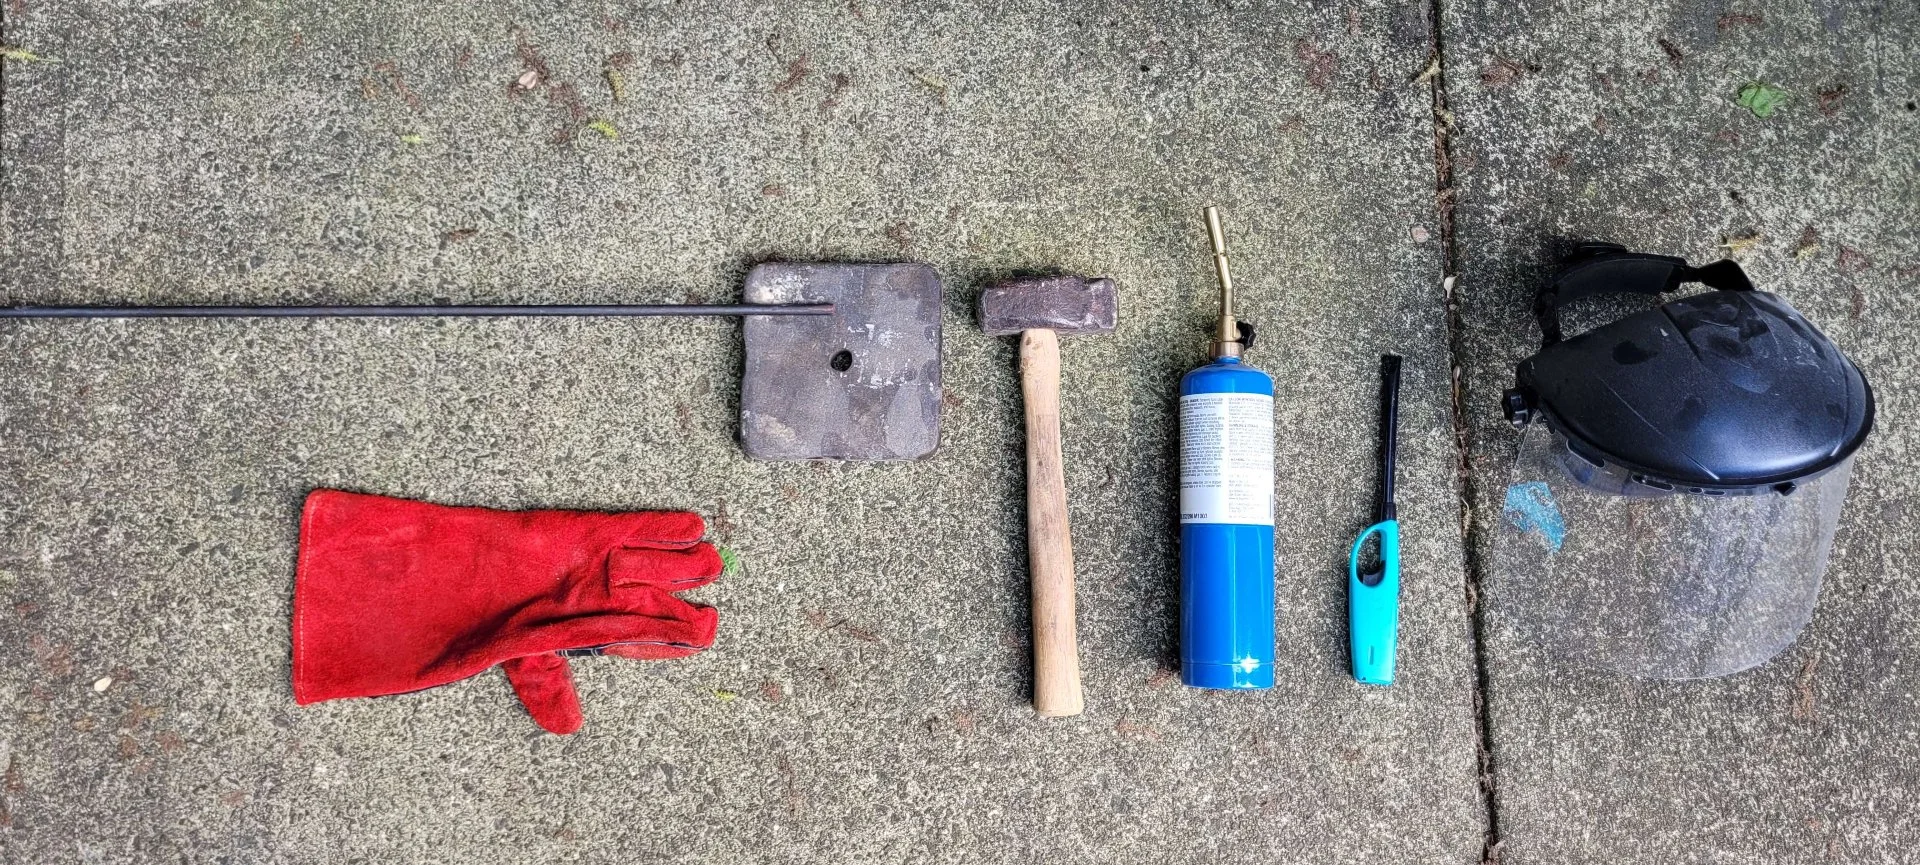
From left to right: 3/8ths steel round stock, fireplace glove, a steel block I found on the side of the road (my anvil, at the moment), my favorite forging hammer (combination round peen and straight peen), offbrand bernzomatic torch, lighter because I couldn't find my striker, and a face shield because you should wear safety goggles while forging (and this was easier to find)

I didn’t take any pictures while working because I didn’t want to waste additional fuel. Basically I just heated the end up as much as I could without a way to contain the heat, and hammered the daylights out of it whenever it seemed to be as hot as it’d get. It was halfway closer to cold forging than proper blacksmithing but I managed to spread the end of the rod flat enough to drill a hole through safely.

I used the drill press, a metal-drilling bit, and a bunch of tap oil, and went through the center of the piece without any real difficulty.

Once the hole was positioned, I used the grinder to clean up the overall shape of the forged part a little. Like the old wisdom says: a grinder and paint makes me the welder (or blacksmith) I ain’t.

(Top: the new one. Bottom: the original/stock part)

I decided to go much longer than necessary, which I suppose adds a little weight, but also some strength as we’re not relying on as much of the hollow tube it attaches to for structural support.

Once it was cleaned up and the oil removed, I spraypainted it. It would have been easy to go with Gloss Black to match the rest of the bike rack (I had a can of it handy) but I decided to paint it blue. I’d just put some work into making this part custom, and I’m working on rethinking if my goal needs to be to make something look like a product in the first place. For now I don’t mind calling a little attention to it.

Plus, the bike never looked great, which works great for me. One of my relatives found it rusting in a sandpit, gave it to me my first job away from home, and I’ve replaced piece after piece back when it was my sole means of transportation. For quite awhile it was held together with zip ties and various kinds of tape (and featured a fender made from cut-up gatorade bottles and duct tape) and the overall look meant it wasn’t exactly a high priority target for theft.

I gave the paint the full 24 hours to dry, then assembled the last bit of the rack.

Looking decent!

I have some panniers a relative gave me to hang over the rack if I can ever figure out how these straps work, but I wanted to see if it would work with a big steel basket I got out of a dumpster awhile back.

Turns out it’s ridable, though heavier than I'm used to. Cargo would likely make it even more tippy, though maybe not more so than those child seats I've seen around? Just the same, I suspect if “bicycle pickup truck” was a good idea, more people would be doing it so I'll swap on the panniers soon.

Next steps will be to add panniers, better brakes (per the previous post), and I think a frame bag and a handlebar basket.

Edit: I've removed the basket and I think I understand the paniers. I just don't trust the attachment system to stay attached and not get tangled up in the rear wheel and chain. Each side has an adjustable strap with a hook, and a loop of strap sewn on. It just seems like with the flex and stretch of the cloth bags as the bike moves and bounces along, it'd be too easy for the hook to come unhooked, at which point it'd be awesome at snagging a spoke or something. So I've got it hooked together I think the way it's intended, and a few zip ties should make sure it stays that way. When I go to buy bigger panniers someday (these are fairly small) I think I'll want ones with buckles or something more secure but still removable.
9
31
submitted 5 months ago* (last edited 5 months ago) by silence7@slrpnk.net to c/utilitycycling@slrpnk.net
10
34
11
35
Found it! (self.utilitycycling)
submitted 5 months ago by foothillbilly to c/utilitycycling@slrpnk.net

I've been cycling for utilitarian purposes for several decades, but I never had a community for that before.

12
3
13
2
submitted 5 months ago* (last edited 5 months ago) by JacobCoffinWrites@slrpnk.net to c/utilitycycling@slrpnk.net

I've been riding the same Gary Fisher Hoo Koo E Koo Mountain Bike since my uncle found it in a sandpit and gave it to me to ride while away on my first internship. It was in somewhat rough shape back then, and it's kind of the bicycle of Thesius at this point as parts failed and I found ways to replace them.

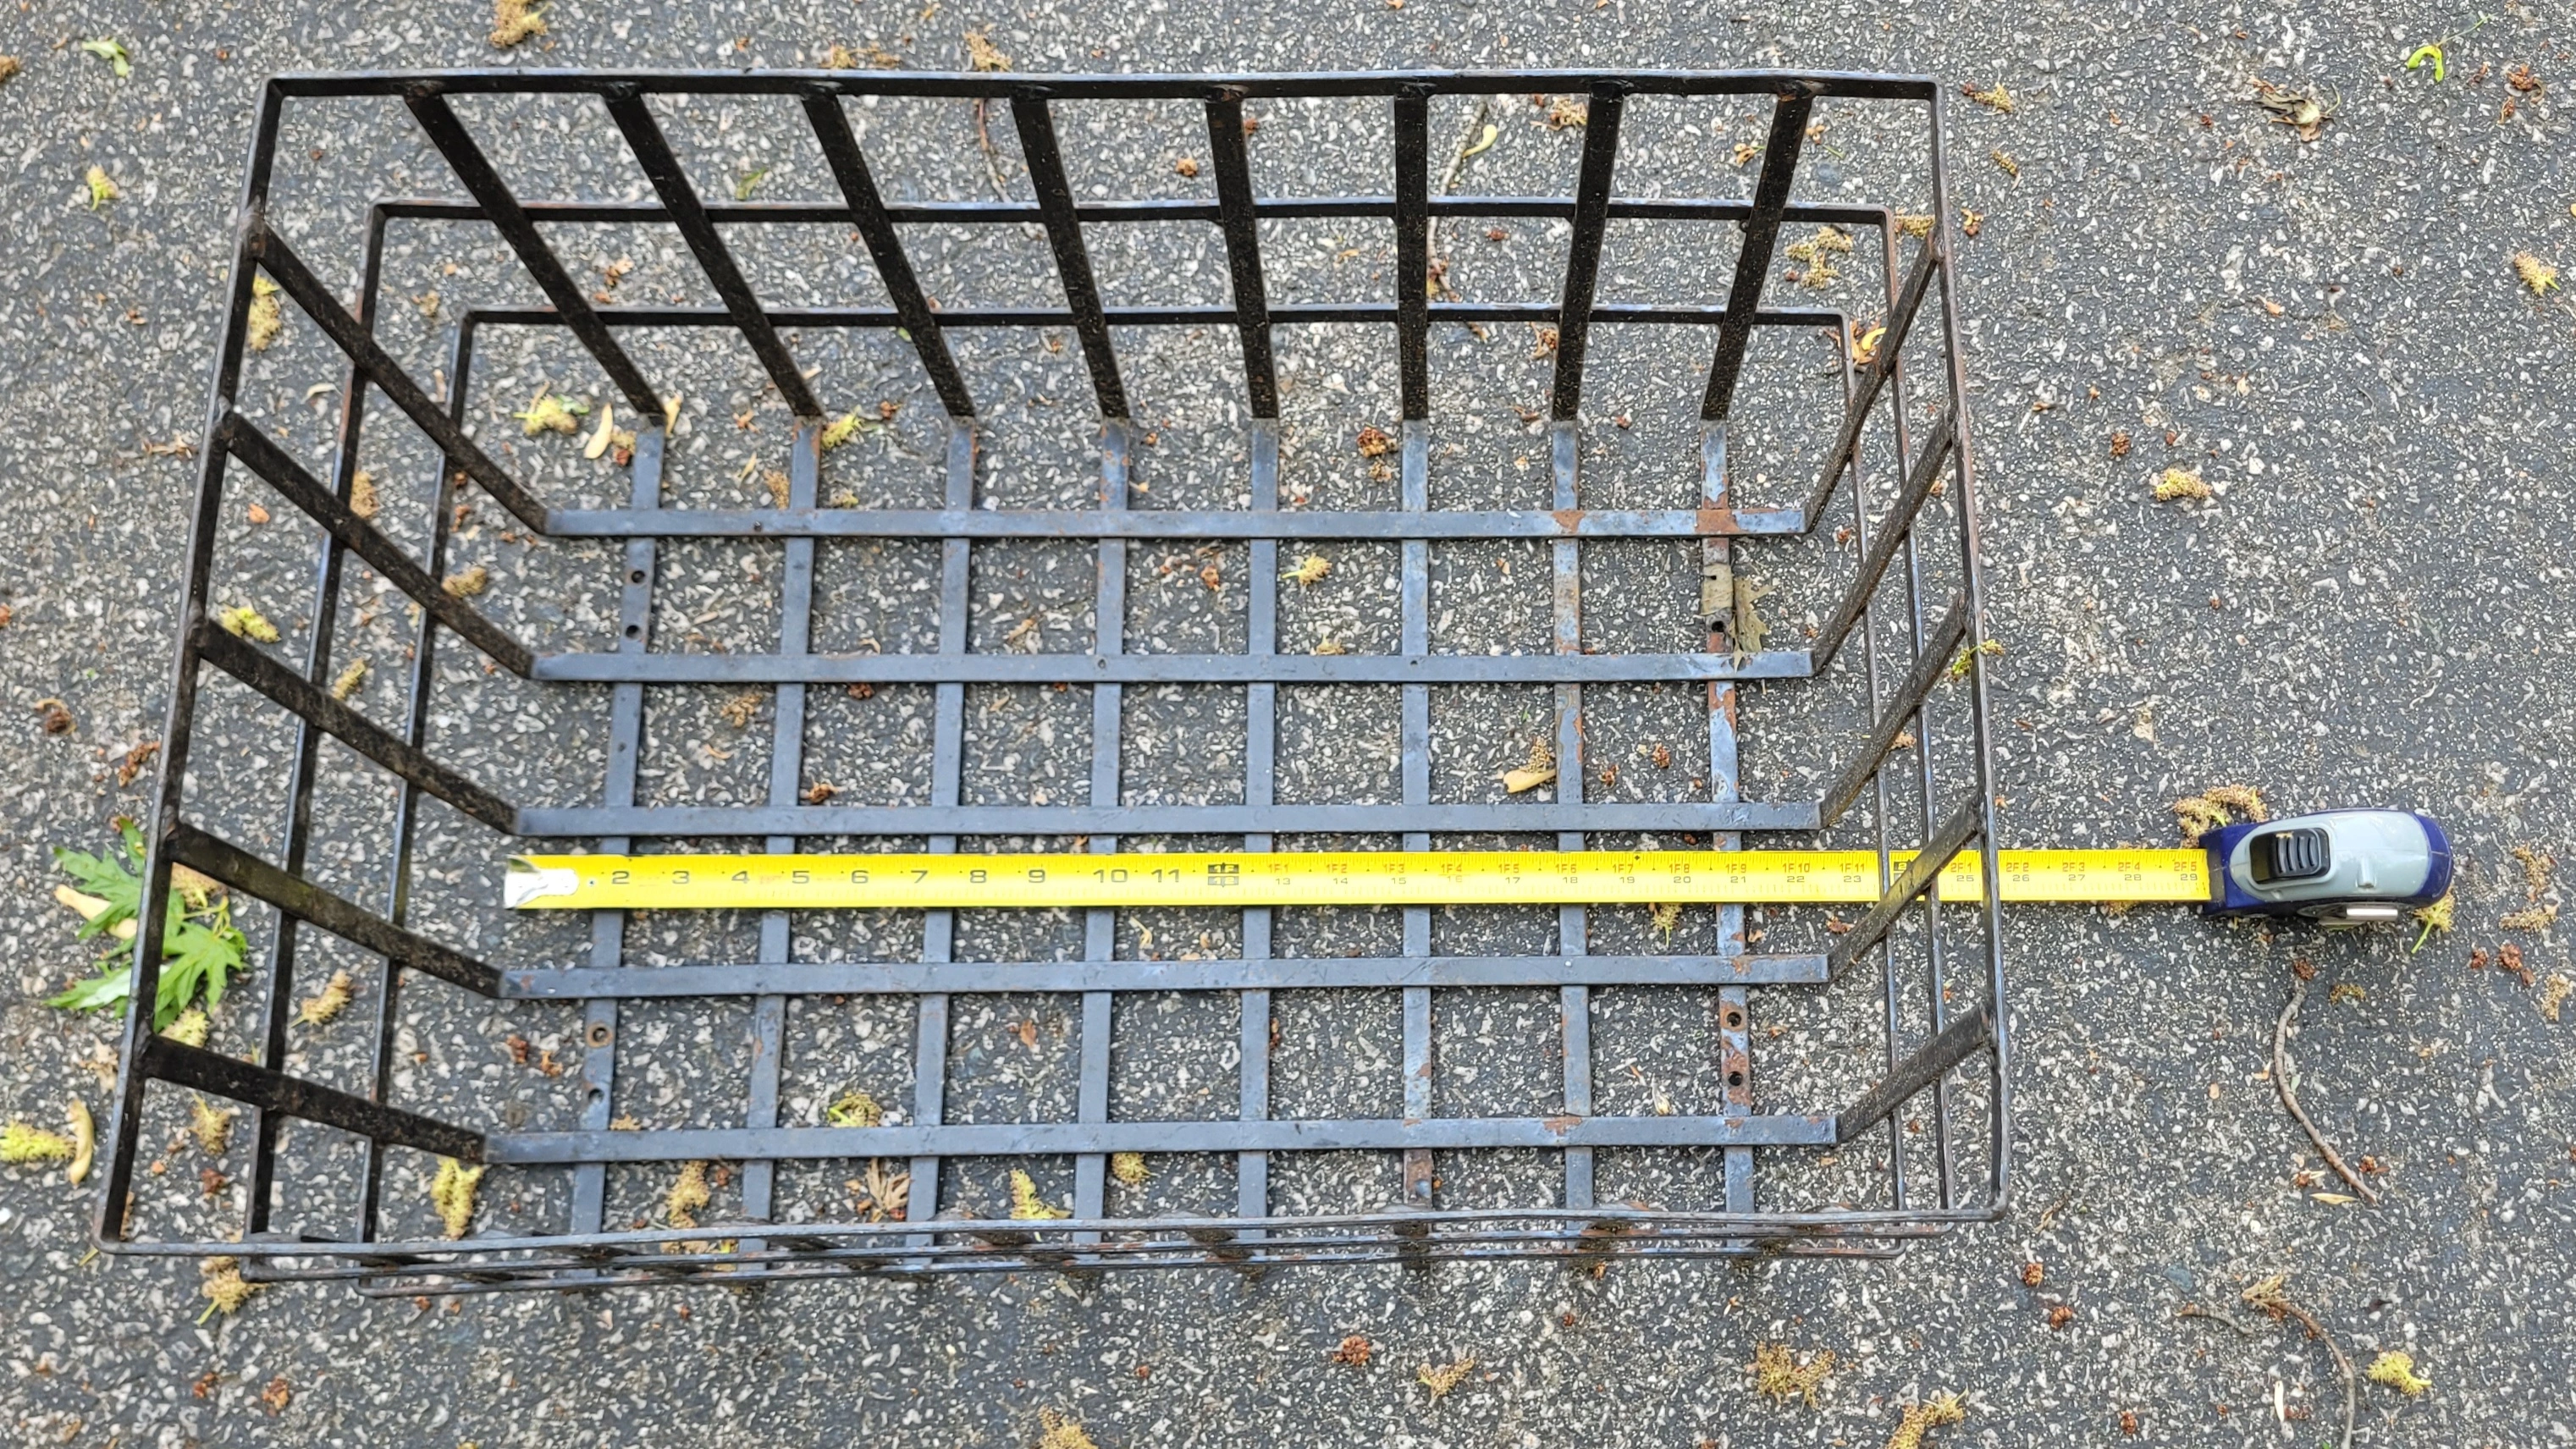
I was replacing the front tire and realized I'd like to make this thing into a cargo bike (I currently use it to scout for furniture to restore on trash days, but usually have to ride home and return on foot to grab anything I find, plus I could get groceries). I'm not sure what level of standardization this bike follows and I have no familiarity with cargo bike parts, but I was thinking I'd like to add a Rear Pannier Carrier Cargo Rack and perhaps a large basket on top of that - in fact, I happen to have this homemade welded steel basket I pulled out of a dumpster a couple years ago:

It's 23" long, 12" tall, and 16" wide. I could weld on whatever mounting hardware it needs.

So basically I'm looking for advice on layout and things to add, specific parts if you have any recommendations, is that basket a horrible idea, etc. What traits make for a useful cargo bike, what would work well with this old mountain bike? And thank you for any ideas!!

14
6
15
2

I love seeing this. I'm not quite ready to by this particular bike, but I'm definitely going to share the info with my husband and see what he thinks. This could suit our needs in the next year or two.

16
1
17
1

This week on Electrek’s Wheel-E podcast, we discuss the most popular news stories from the world of electric bikes and other nontraditional...

18
2
submitted 8 months ago* (last edited 8 months ago) by Jake_Farm@sopuli.xyz to c/utilitycycling@slrpnk.net

I am sure this would work for messenger bags, camera bags, or really any bag. And hard board backing could be added to them from rubbing on the wheels.

19
1
20
1

cross-posted from: https://sopuli.xyz/post/9204474

I had been looking for a bike to get around my local city and managed to snag a Huffy cruiser for $50. It is in decent shape with only some superficial rust on the pedals. This will be a big learning experience for me as I haven't ridden a bike for nine years. I'll both learn how to use a bike to run errands and how to do some of my own maintenance. Maybe even customize it a bit by adding a frame lock and a 3 speed gear hub. I guess we shall see how far I get in this learning and fitness quest.

21
3
22
1
submitted 9 months ago* (last edited 9 months ago) by hamtron5000@slrpnk.net to c/utilitycycling@slrpnk.net

https://imgur.com/a/ivFq4VE

Hi all,

A coworker gifted me a free Trek 4500 from the early 2000s, largely unused in the last many years. It sat in my back yard for a few months while I thought about what to do with it; I've finally made the first movement towards having a badass utility bicycle.

Step one involved knowing that I like a more upright riding position and am not the most comfortable or agile person on a bike (that's nice-speak for "I'm a pretty fat guy" and "I never really rode bikes as a kid so I learned how in my mid-20s and am still not 100% comfortable with it"). So I bought a pair of swept-back handlebars which I then kept in a closet for a month, lol.

Finally I decided to just move forward, so I took the bike to the local bike shop and had them do their inspection, basic needed maintenance, and installation of the handlebars. Now I have something fairly comfortable which also looks kind of neat.

Four more things I have planned to do:

  • Add a back rack that I have on an old trashed frame also in the backyard.
  • Acquire and add fenders. While it rarely rains here, when it does I'd like to be prepared.
  • Acquire and add a front rack, since this is going to be largely for groceries and errands.
  • Add a bike trailer, again for groceries and errands.

Other possibilities include a different seat, a handlebar bag in lieu of a front rack, essentially anything else to make it cool and functional.

Do y'all have any recommendations for stuff that might be worth adding or doing to this bike to make it comfortable for someone overweight to commute with and do basic errands and groceries with?

23
1
submitted 10 months ago by Five@slrpnk.net to c/utilitycycling@slrpnk.net
24
1

Context: I've got panniers, including those specific to shopping, and a traditional bike trailer. For large grocery hauls (100lbs+), this combo works well, but it's a bit of a PITA.

But the Travoy is so unique and useful that it probably should have been my first purchase for groceries by bike.

For those who don't know, the Travoy is basically a two-wheeled grocery cart that can attach to your bike as a trailer (by the seat post). That means, you can cart it around off the bike, then attach it to your bike and ride off.

I'm finding it easier than panniers (and no need to get a grocery cart, then return it, etc.), and way easier to store compared to my other trailer.

My only real problem is that Burley sells really expensive bags that attach to the Travoy, and while the bags are good quality and add to the utility of this trailer, they are way too expensive.

I'm currently using their "Upper market bag" and an Arkel Shopper bag on the lower half with straps that attach to the Travoy and keeps everything nice and secure.

Anyway, I've had so many positive comments while using it in stores that I thought you guys might appreciate knowing about it :)

25
1
Winter eBiking (slrpnk.net)

well, my plan was to fix up a free entry-level mountain bike a coworker gave me - and, to be clear, i still intend to do it. however! i ran out of time, money, and know-how, all relatively quickly. and combined with that, i also decided somewhat last minute that i don't really want to drive to work any more in 2024 if i can possibly help it.

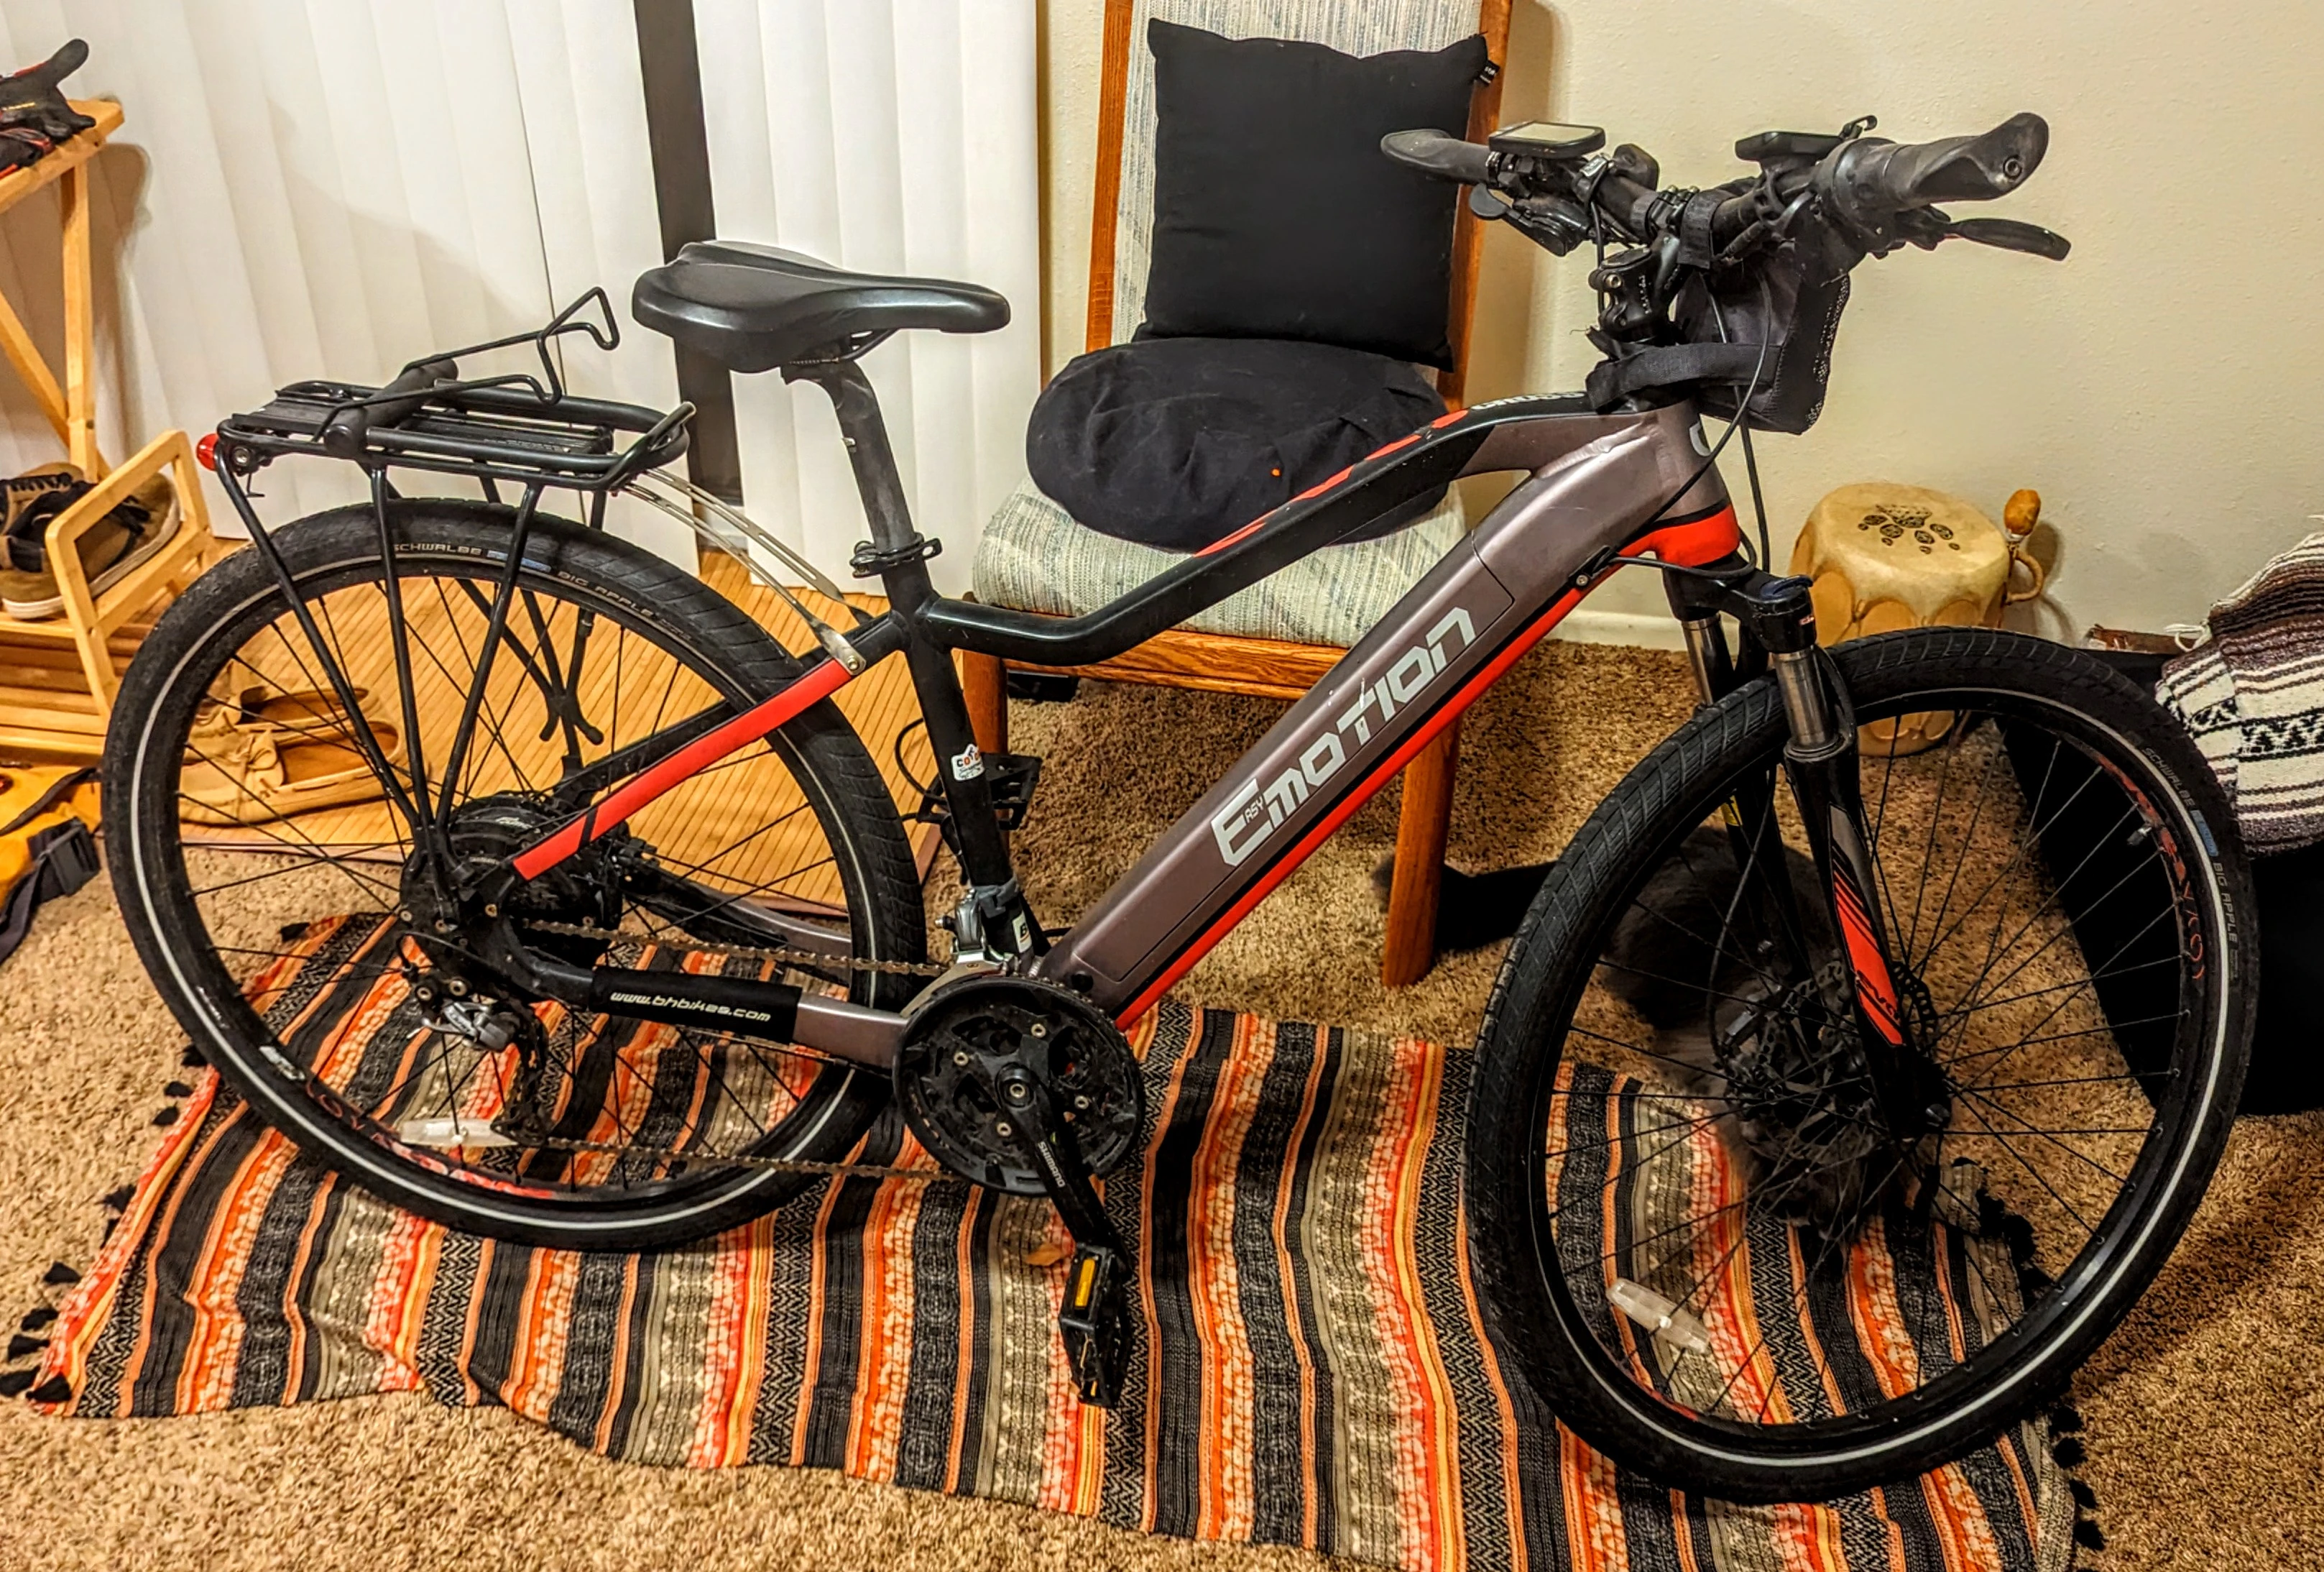
so instead i dusted off my electric chariot, my Shadowfax, my E-Motion ebike which i have named "Thora". she's my go-to ride in nice weather, but has been packed up for the winter. last night i got her out of her "garage" and charged her up, and this morning i did my quite short 1.5 mile commute in cold weather for the first time. 21 degrees F, -6 degrees C.

just wanted to say, i super appreciate all the advice shared in my other thread about winter biking. i wore my snowshoeing coat, gloves and glove liners, and a stocking cap. it worked! the only rough part was my face; it got so cold i got a headache. that said, i can just try a scarf tomorrow.

here's to functional transportation, even in the wintertime.

view more: next ›

utility cycling

642 readers
1 users here now

🚴🚲 Welcome to the Utility Cycling Community! 🚲🚴

Are you a passionate cyclist who believes that bicycles can transform the way we move around our cities and towns? Are you interested in exploring the world of utility biking, where bicycles are a tool for practicality, sustainability, and adventure? If so, you've come to the right place!

founded 1 year ago
MODERATORS